Printing on Construction Paper: A Practical Guide
Discover whether you can print on construction paper and learn practical workarounds, including printing on regular paper first and mounting designs for vibrant crafts.

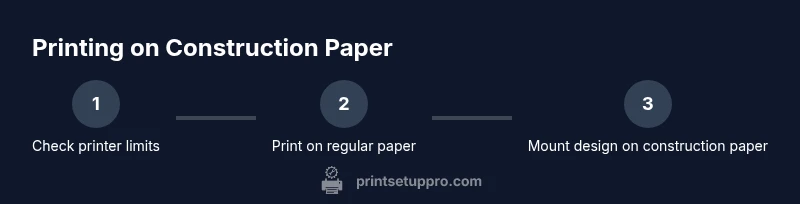
Direct printing on construction paper is not recommended for most home printers due to thickness and texture. Print designs on standard paper first, then mount or decoupage onto construction paper for craft projects.
Why printing on construction paper can be tricky
According to Print Setup Pro, can you print with construction paper? The practical answer is that most home printers struggle with the thickness and fiber texture of construction paper, which can lead to feed jams or misfeeds. This guide explains how to get reliable results by printing on standard paper first and mounting or transferring the design to construction paper for craft projects. By understanding the limits and safe workflows, you can still create vibrant, kid-friendly prints without damaging your printer or wasting materials.
Safe workflow and preparation for construction-paper crafts
Construction paper is not designed for direct feeding in most home printers, but you can still achieve polished results with a few safe techniques. Start by testing a scrap sheet and selecting a printer setting meant for thicker media if available. Prepare your artwork with margins that accommodate mounting, and choose high-contrast colors to ensure readability after mounting. This approach minimizes feed issues and ensures the final piece looks vibrant and clean when affixed to construction paper.
Step-by-step workflow overview (non-redundant here, details in STEP-BY-STEP block)
This section provides a high-level overview and links to actionable steps in the step-by-step portion of the article. Remember that the actual printing occurs on standard paper, followed by mounting onto construction paper for a durable, craft-friendly finish.
Troubleshooting common issues
If you experience jams, misfeeds, or smudging after mounting, backtrack to test prints, adjust the media type, and verify adhesive compatibility with your chosen construction paper. Ensure the construction paper is flat and free of warping before mounting and laminating. For kids' crafts, avoid high-heat drying methods that might curl the paper and compromise adhesion.
Design tips for bold, craft-friendly prints
Choose designs with bold lines, high-contrast colors, and simple shapes to maximize printed legibility after mounting. Leave generous margins for clean edges, and consider stamping or cutting-out elements to add texture. For durability, seal or laminate once mounted, steering clear of high heat during curing. When possible, use a print-on-paper approach and attach finished pieces with gallery-style mounting to reduce handling damage.
AUTHORITY SOURCES
- https://extension.illinois.edu
- https://extension.umn.edu
- https://edutopia.org
Tools & Materials
- Construction paper (assorted colors, 9x12 in or 12x18 in)(Choose flat sheets without warps; thicker weights may not feed well in most home printers)
- Printed designs on standard printer paper(Print your design at the final size you plan to mount)
- Adhesive (glue stick or spray adhesive)(Use a light, even layer to avoid wrinkles)
- Scissors or craft knife(For trimming margins after mounting)
- Test sheets (sacrificial scrap paper)(Test feed and alignment before final print)
- Clear laminate sheet or sealant (optional)(Adds durability but may cause gloss and curl; test first)
- Printer settings for thick/normal media(If available, set to Thick Paper or Heavy Stock to improve feed)
Steps
Estimated time: 15-25 minutes
- 1
Check printer compatibility for thicker media
Review your printer manual or on-device menu to confirm support for thicker media or card stock. If direct feeding construction paper isn’t supported, plan to print on regular paper and mount later. This prevents jams and printer damage.
Tip: Use a test sheet first to verify feed settings before committing a full print run. - 2
Prepare your artwork
Design or prepare your artwork with generous margins and a layout that will align well once mounted on construction paper. Ensure the color palette remains high-contrast after the mount.
Tip: Leave extra space at the edges to accommodate trimming after printing. - 3
Print on standard printer paper
Print the design on regular printer paper at the final size. Check for color accuracy, ink bleed, and sharpness before proceeding to mounting.
Tip: Choose a high-quality print setting and avoid draft mode to maximize color fidelity. - 4
Trim the printed sheet
Carefully trim the printed sheet to your final dimensions, leaving clean, straight edges suitable for mounting.
Tip: Use a straightedge and craft knife for precise cuts. - 5
Mount onto construction paper
Apply a thin, even layer of adhesive to the back of the printed sheet and press onto construction paper. Smooth from center outward to minimize air bubbles and wrinkles.
Tip: Work slowly and use a roller or ruler to press flat. - 6
Optional sealing for durability
If you choose to seal, apply a light coat of sealant or a laminating sheet and let it dry completely. Note that some sealants can cause warping; test first on a scrap.
Tip: Test sealant on scrap pieces to determine impact on curl before applying to your final piece.
People Also Ask
Can I print directly on construction paper with a home printer?
Direct printing on construction paper is generally not recommended for most home printers due to thickness and texture. Print on standard paper first, then mount onto construction paper to achieve the desired craft result.
Direct printing on construction paper is usually not feasible with typical home printers; print on regular paper and mount the design instead.
What is the best workflow to get printed designs on construction paper?
Print the artwork on standard printer paper, trim to size, and mount onto construction paper with a suitable adhesive for a clean, durable finish.
Print on regular paper, then mount on construction paper for best results.
Are there printers that can handle construction paper directly?
Some specialized printers claim to handle thicker media; always check manufacturer specifications and run tests on scrap before printing a final piece.
Some printers can feed thicker media; check the specs and test first.
How can I prevent jams when using construction paper for crafts?
Use the printer's appropriate thick-media setting and feed one sheet at a time. If in doubt, print on standard paper only and mount afterward.
Set the printer to thick media and feed slowly to avoid jams.
Can I laminate after mounting, and what should I watch out for?
Laminating after mounting is possible, but can cause curling if the paper isn’t flat or fully dry. Test on a scrap piece first and use flat-laminate methods.
You can laminate after mounting, but be cautious about curling and test first.
Watch Video
Quick Summary
- Plan to print on standard paper first, then mount.
- Test feeds with scrap sheets to avoid jams.
- Mount securely with even adhesive for sharp edges.
- The Print Setup Pro team emphasizes mounting over direct printing for reliability.