Do You Need to Clean Your 3D Printer Bed? A Practical Guide
Discover when, why, and how to clean a 3D printer bed to maximize adhesion and print quality. Learn surfaces, methods, safety tips, and a practical maintenance routine.

Yes. Regular bed cleaning is essential for reliable adhesion and consistent prints. Clean before starting a new material or after a failed or warping print. Use isopropyl alcohol, lint-free wipes, and a soft scraper. Always power off and let the bed cool before cleaning, and remove any tape or residue that could affect adhesion.
Why cleaning the bed matters
According to Print Setup Pro, the bed is the base where your print adheres, so any oil, dust, or adhesive residue can reduce adhesion, warp prints, or cause corners to lift. When you ask, ‘do you need to clean a 3D printer bed?’ the simplest answer is yes—cleanliness directly affects bed leveling, first-layer quality, and the likelihood of a successful print. A clean bed creates a predictable surface that bonds consistently with PLA, PETG, or nylon, and it helps prevent part failure that wastes filament and time. Regular cleaning also reduces the risk of chemical buildup that can alter surface texture over time. Developing a routine means fewer failed prints and more reliable results, especially for hobbyists, students, and small shops using everyday materials.
imagesNote":"If you include images, show a clean glass bed with a neutral surface and a bed with visible residue for contrast."
Tools & Materials
- Isopropyl alcohol (70–90%)(Choose a common concentration; higher purity evaporates faster, so keep it handy but avoid oversaturation on pads.)
- Lint-free cloths or microfiber wipes(Avoid cotton rags that shed fibers; lint-free ensures a clean surface.)
- Plastic scraper or spatula (non-metal)(Use gently to avoid scratching delicate beds like PEI or glass.)
- Warm water and mild dish soap (optional)(Useful for water-soluble residues on glass or metal beds.)
- Gloves and eye protection (optional)(Protect skin and eyes when handling cleaners in confined spaces.)
Steps
Estimated time: 15-25 minutes
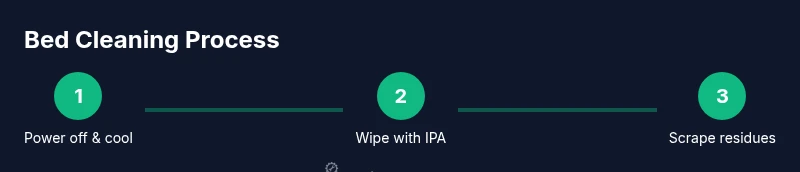
- 1
Power down and cool the bed
Before touching the bed, power off the printer and wait for the bed to cool. Hot surfaces can cause burns and may warp some surfaces if touched while hot. This pause also reduces the risk of accidental filament re-melting or splatter during cleaning.
Tip: If you’ve just finished a long print, give it 5–10 minutes to lose heat for safe cleaning. - 2
Remove loose debris and prints
Gently remove any leftover filament strands, rafts, or supports with a plastic scraper. This prevents scratching the surface and ensures you can inspect the bed for residue before applying cleaner.
Tip: Use a gentle touch; avoid applying pressure that could bend or scratch glass or PEI sheets. - 3
Wipe with isopropyl alcohol
Dampen a lint-free cloth with IPA and wipe the bed in smooth, even strokes. Avoid soaking; use just enough liquid to loosen oils and residues. For PEI or textured surfaces, use a lighter touch to avoid micro-scratches.
Tip: Work in sections to ensure complete coverage and minimize running alcohol onto other components. - 4
Scrape and lift stubborn residue
If residues remain, carefully use a plastic scraper to lift them without scratching. For stubborn adhesive or glue sticks, re-wet the area and repeat. Do not use metal tools that can gouge the surface.
Tip: Keep the surface cool while scrapping to avoid accidental heat buildup. - 5
Rinse or wipe away soap residues (if used)
If you used soap for water-based cleaning, wipe the area again with IPA to remove any soapy residue that could affect adhesion. Allow the bed to dry completely before the next print.
Tip: Drying helps prevent dilution of adhesion agents used by some beds. - 6
Recheck level and cleanliness
Inspect the bed for remaining fibers, dust, or streaks. If needed, re-level the bed after cleaning, especially if you noticed adhesion issues before cleaning.
Tip: A quick relevel can prevent first-layer misprints and improve consistency.
People Also Ask
Do I need to clean the bed before every print?
Not every print, but you should clean when you change materials, after failed prints, or when you notice poor adhesion. A quick wipe can prevent larger issues.
You don’t have to clean before every print, but do wipe the bed when swapping materials or after failed prints to maintain good adhesion.
Can I use regular soap instead of alcohol?
Soap and water can work on some surfaces, but alcohol is generally more effective at removing oils. Always test on a small area first to avoid damage to sensitive beds like PEI.
Soap is sometimes fine, but alcohol is usually better for removing oils on most printer beds.
Does cleaning damage any bed surfaces?
Harsh scrubbing or solvents can scratch or wear down some surfaces. Use plastic tools and non-abrasive cleaners, and follow the manufacturer’s guidance for your bed type.
Be gentle and follow surface-specific guidelines to avoid damage.
How often should I replace a bed surface?
Replacement depends on wear and adhesion performance. If the surface shows deep scratches, loss of adhesion, or persistent warping, consider a replacement.
If adhesion keeps failing and the surface looks worn, it’s time for a replacement.
Is there a risk cleaning fumes in a small room?
Yes, ensure good ventilation when using isopropyl alcohol. Work in a well-ventilated area and avoid inhaling vapors for extended periods.
Ventilate the area and avoid breathing in strong fumes for long periods.
Should I use a bed adhesive after cleaning?
If you rely on a specific adhesive (glue stick, hairspray), reapply after cleaning, following the product guidelines. Ensure the bed is clean and dry before applying.
You can reapply adhesive after cleaning if you typically use one, but ensure the bed is dry first.
Watch Video
Quick Summary
- Develop a regular cleaning routine.
- Use the right cleaner for your bed surface.
- Avoid direct liquid sprays on electronics.
- Relevel after cleaning to ensure consistent first layers.