What to Do When Paper Is Stuck in Your HP Printer
Step-by-step guide to clear a paper jam in HP printers safely. Learn quick fixes, diagnostic flow, and prevention tips from Print Setup Pro to keep your printer running smoothly.

Most likely, a misfed sheet or misaligned tray is causing the jam. Start by powering off, unplugging, and carefully removing visible paper, then reseat the stack and reinsert the tray with even folds. If the jam persists, consult your HP manual or Print Setup Pro's step-by-step guide for model-specific steps.
What to do when paper is stuck in printer hp
If you’re searching for how to handle a paper jam, you’re not alone. What to do when paper is stuck in printer hp is a common question for home offices and small businesses relying on HP devices. In this guide, we’ll walk you through practical, safe steps to clear the jam quickly while protecting delicate printer components. According to Print Setup Pro Team, having a calm, methodical jam-clearing routine reduces downtime and protects your printer. The most important thing is to stay patient and avoid forcing paper through the path, which can tear fibers and worsen the jam. Always refer to your model’s user manual first, but use these core steps as a reliable framework for most HP printers. Print Setup Pro analyses from 2026 emphasize safety and a process-driven approach to jams.
Quick fixes to try first
Before you tear into the printer, try the simplest checks that solve most jams. Verify that the printer is powered off and unplugged. Open all accessible panels and gently inspect the paper path for any wedged sheets. Remove any stuck paper with both hands and avoid pulling at sharp edges. Tap the paper stack in the tray to loosen curled sheets and ensure the guides are snug against the paper without binding. If the jam is near the output tray, gently support the paper as you remove it to prevent tearing. These quick fixes often resolve the issue without requiring tools or disassembly.
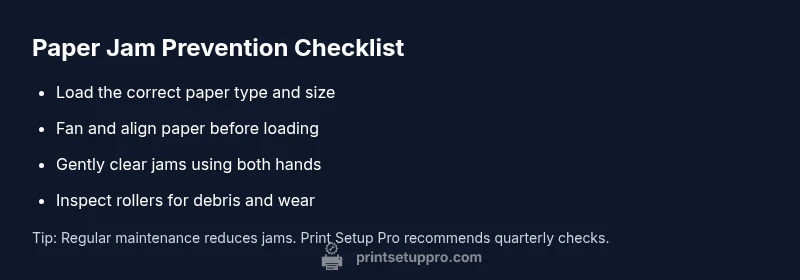
Check paper type, size, and tray alignment
Using the wrong paper type or size, or loading paper incorrectly, is a frequent jam trigger. Check that you’re using the paper type and weight recommended in your printer’s manual, and confirm the paper size matches the tray setting. Fan the stack to prevent sticking, then align the stack and adjust the side and rear guides to snugly cradle the paper. Misalignment can cause the sheet to feed crookedly, leading to jams further down the path. After adjusting, reinsert the tray and print a test page.
How to safely remove a jam without damage
Never use sharp tools or yank aggressively. Gently grip the paper, supporting it from both sides to avoid tearing. If the sheet tears, remove every fragment to prevent a second jam. When removing from the rear feed, move slowly and avoid forcing the page through a tight spot. If you encounter resistance, pause to reassess; sometimes a slight rotation of the roller helps release the sheet. Recheck for small torn pieces in the rollers or path before closing panels.
Diagnostic flow: Symptom → Diagnosis → Solutions
A jam can present as a blinking light, a jam message on the display, or a sheet stuck mid-feed. Start with simple causes: misfed or curled paper, incorrect tray settings, or dirty rollers. If none apply, inspect for torn fragments or foreign objects in the path. Solutions vary from reloading paper correctly to cleaning the rollers and resetting the printer’s internal sensors. When in doubt, consult the HP manual or Print Setup Pro’s model-specific guide for the right sequence for your device.
Step-by-Step: Common jam clearance procedure
- Power off and unplug the printer. 2. Open all access panels and locate the jam. 3. Carefully remove the jammed sheet, holding it with both hands. 4. Inspect for torn pieces and clean the paper path if needed. 5. Reload paper correctly, aligning guides. 6. Reconnect power and print a test page. 7. If the jam recurs, try a different paper type or weight and consult the manual.
Safety tips and common mistakes to avoid
Always unplug before touching internals and never use metal tools. Avoid yanking paper or forcing sheets through when resistance is high. Keep the work area clean and free of dust that can contaminate rollers. Rely on model-specific guidelines for rear vs. front loading jams and seek professional help if you notice unusual noises, hot components, or repeated jams after repeated attempts.
Steps
Estimated time: 30-45 minutes
- 1
Power down and unplug
Shut off the printer and unplug the power cord to prevent any electrical hazards. This also helps avoid the printer starting mid-clear, which can cause injury or further jams.
Tip: Wait a few minutes for internal components to settle before opening panels. - 2
Open jam access panels
Gently open the front or rear access panels as described in your HP model manual. Do not force panels if they resist. Locate the jammed sheet in the feed path.
Tip: Look for curled edges or small scraps indicating a partial jam. - 3
Remove jammed paper
Grip the paper with both hands and pull it straight out. If the paper tears, remove all fragments carefully to prevent refeeding obstacles.
Tip: Support the sheet to avoid tearing and tearing pieces must be removed entirely. - 4
Check rollers and path
Peek into the path for any tiny bits and wipe rollers with a lint-free cloth if recommended by HP. Ensure there are no pinch points or debris blocking movement.
Tip: Do not use liquids on rollers unless HP instructions allow it. - 5
Reload paper and reseat panels
Fan the paper stack, load into the tray, and slide guides to fit snugly. Close all panels securely to prevent misfeeds.
Tip: Use the printer’s tray settings to match the paper size. - 6
Power on and test
Plug the device back in, power on, and run a small test page. If the jam recurs, try a different paper type or weight and repeat the checks.
Tip: If repeated jams occur, consult the HP support site for model-specific guidance.
Diagnosis: Printer reports a jam or stops with paper stuck in feed path
Possible Causes
- highMisfed or curled paper
- mediumWrong paper size or weight
- mediumDirty or worn rollers
- lowTorn fragments or foreign object in path
Fixes
- easyGently remove jammed paper with both hands, without tearing
- easyReload paper correctly, fan the stack, and align guides
- mediumClean rollers per HP/recommended method and inspect path for debris
- mediumIf jam persists, reset printer and consult model-specific guide
People Also Ask
What causes paper jams in HP printers?
Jams are commonly caused by misfed or curled paper, incorrect paper size, or dirty rollers. Verify paper type and tray settings first, then inspect for debris.
Jams are usually caused by misfed paper, wrong size, or dirty rollers. Check paper type and tray settings first, then inspect for debris.
Is it safe to force paper out of the feed?
No. Forcing paper can tear it and spread fragments inside the printer. Gently remove the jammed sheet and check for torn pieces before reinsertion.
No, avoid forcing it. Gently remove the jammed sheet and check for torn pieces before reinserting.
How can I prevent jams in the future?
Use the recommended paper type and weight, fan the stack, and load it correctly with guides snug to prevent misfeeds. Regularly clean rollers as advised by HP.
Choose the right paper, fan the stack, and load correctly. Clean the rollers regularly to prevent jams.
When should I contact HP or a technician?
If jams persist after following proper steps, or you hear unusual noises, see error codes that you cannot resolve, or the printer won’t reset after power cycling.
If jams keep happening after following steps or you hear unusual noises, call HP support.
Do HP printers have automatic jam-clearing features?
Some HP models offer guided jam-clearing routines in the control panel; refer to the model manual for exact capabilities and steps.
Many HP models include guided jam-clearing in the control panel; check your manual for details.
Watch Video
Quick Summary
- Power off before clearing jams
- Load and align paper correctly
- Inspect for torn fragments
- Follow model-specific jam procedures