When to Replace Printer Drum Brother: A Practical Guide
Discover how to tell when your Brother printer drum needs replacement, signs to watch for, and a step-by-step process to swap it safely. This Print Setup Pro guide helps home offices and small businesses maintain sharp prints and extend device life.

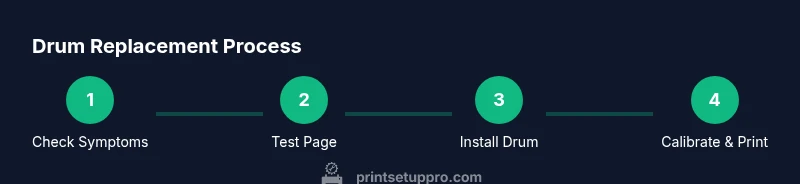
Your quick answer: This guide helps answer when to replace printer drum brother to keep output crisp. Replace the drum when you notice streaks, ghosting, or overall faint output in your Brother prints, not just after cartridge changes. According to Print Setup Pro, running a diagnostic test page and inspecting the drum surface will confirm timing before purchasing a new drum.
How a Brother Drum Works
The drum, or imaging drum, is the component that transfers toner from the cartridge to the paper. In many Brother printers, the drum is a separate unit that collects toner, rotates with the paper path, and can wear over time from heat, friction, and high page coverage. When the drum ages, the toner deposition becomes less uniform, leading to streaks, ghosting, or faint prints. Understanding this helps you decide when to replace printer drum brother rather than chasing cartridge issues. Regular maintenance, such as cleaning the printer and avoiding excessive heat exposure, can extend drum life. Print Setup Pro notes that the drum’s life depends on usage patterns, media type, and print density. For office tasks with heavy color pages, expect quicker wear than for light text-only documents.
Signs You Might Need a Drum Replacement
Common indicators include horizontal lines across pages, ghosted images, or a general drop in print density. If you see color misalignment, patchy areas, or the same defect appearing on multiple pages, the drum is a prime suspect. These symptoms are not typically caused by a singular cartridge fault, so chasing toner replacement may be wasted effort. To confirm, print a simple test page with solid blocks of color and black, then inspect for consistent density across the page. If defects persist, plan a drum replacement rather than continuing to swap cartridges.
How to Diagnose Drum Wear Without Replacing
Before purchasing a new drum, run a small diagnostic exercise. Print a plain text page to establish a baseline density, then print pages with large solid blocks and a few gradient shades to check consistency. Look for faint halos, edge specks, or banding that repeats in each page. Clean the printer interior with a lint-free cloth, gently wiping the drum area and contacts to remove loose toner. If after cleaning the same defects appear, the drum is likely worn and should be replaced.
When to Replace Printer Drum Brother: A Practical Threshold
There's no universal expiration date for drums because wear depends on page coverage, media type, and duty cycle. A good rule of thumb is to consider replacement when page quality degrades noticeably on multiple pages, or after a defined page-count in your model's user guide. In practice, many users replace the drum after printing between 10,000 and 20,000 pages for typical office workloads, but this can vary widely. Always refer to your model's drum life estimate in the manual and use it as a guide rather than a hard rule. Print Setup Pro emphasizes contextual timing: heavier workloads require earlier replacement to prevent print defects.
Safety and Compatibility Considerations for Brother Models
Safety first: always power off the device and unplug before opening any cover. Use clean, dry hands, and avoid touching laser optics directly. Some Brother models use sealed drum cartridges or modular drums; verify you have the correct drum substitute for your exact model number. Mixing drums or using incompatible units can cause misfeeds or damage. Keep a copy of your printer’s service manual handy to confirm the part numbers and compatibility.
Cost, Value, and Alternatives to Drum Replacement
Drum units represent a larger upfront cost than cartridges, but they offer longer life and lower overall cost per page for high-volume printing. Consider your typical monthly page count and color usage when deciding whether to replace the drum or continue with cartridge-only supplies. If your model supports a "drum and cartridge" combination, you may optimize by buying a kit that includes both. Also compare refurbished drums from reputable suppliers and check warranty terms. Print Setup Pro suggests evaluating total cost of ownership rather than just the sticker price.
Maintenance Tips to Extend Drum Life
Preventive care can extend the drum’s useful life. Use high-quality paper with low dust content, avoid exposing the printer to extreme temperatures, and keep the interior free from toner dust. Run routine cleaning cycles and calibrations according to the manual. Store spare drums in a cool, dry place in their packaging until needed. Clearing jams promptly can prevent drum damage from rough paper handling.
What to Do with an Old Drum Unit
Recycle through local electronics recycling programs or manufacturer take-back schemes where available. Do not throw drum units into regular trash; they contain toner and chemicals that require proper disposal. If the drum still holds some useful life, consider handing it to a local repair shop as a spare or for parts. Always consult local regulations for e-waste.
Quick Readout: Before Replacing, Run This Checklist
Create a small pre-purchase checklist to avoid wasted replacements: confirm the exact Brother model number, verify drum part number, check for available compatible drums, review the drum life estimate in the manual, and collect the current print samples to compare after replacement. This ensures you aren’t paying for a full drum unit prematurely and helps you justify the purchase to stakeholders.
Tools & Materials
- New Brother drum unit (drum replacement)(Ensure model compatibility by checking the exact Brother printer model.)
- Lint-free cleaning cloth(For toner dust and surfaces around the drum area.)
- Isopropyl alcohol 70% or higher(Use sparingly for stubborn residues on non-coated parts.)
- Screwdriver set (Phillips and/or flathead)(Only needed if your model uses visible screws to access the drum.)
- Gloves(Protect hands and prevent oils on the drum surface.)
- Anti-static brush (optional)(Helps remove dust without scratching surfaces.)
- Printer manual or model guide(Reference for compatibility and steps specific to your model.)
- Plain paper for test pages(Used to calibrate and verify print quality after replacement.)
- Waste container or bag(Dispose of old drum and any toner responsibly.)
Steps
Estimated time: 30-60 minutes
- 1
Power down and unplug
Turn off the printer and unplug the power cable to prevent any electrical risk. Wait 60 seconds to allow internal capacitors to discharge before opening the covers.
Tip: Keep the printer unplugged and place it on a clean, stable surface to avoid accidental drops. - 2
Open the printer cover and locate the drum
Carefully open the front or top cover to expose the drum unit and any connected toner cartridges. Identify the drum’s location relative to the cartridge so you know what to remove first.
Tip: Refer to your model’s diagram if you’re unsure which component is the drum. - 3
Remove the toner cartridge if required
Some Brother models hold the toner cartridge in the drum assembly. Remove the cartridge gently and set it aside on a clean surface. Do not touch the toner surface.
Tip: Keep the cartridge upright to avoid toner spills. - 4
Release and remove the old drum
Unclip or unscrew the drum unit from its mounting. Gently slide the drum out of the printer, taking care not to tilt it excessively to prevent toner leakage.
Tip: Have a waste bag ready for the old drum and any residual toner. - 5
Inspect the old drum for wear
Check the imaging surface for scratches, scuffs, or missing segments. If you see obvious wear or inconsistent color deposition, replacement is warranted.
Tip: Take note of any repeating defects that appear across multiple test prints. - 6
Prepare the new drum for installation
Remove protective packaging and tape from the new drum per the manual. Do not touch the imaging surface and keep it clean during handling.
Tip: Avoid exposing the drum surface to fingerprints or dust. - 7
Install the new drum unit
Align the new drum with the printer guides and firmly slide it into place until it clicks. Re-secure any mounting clips or screws as required.
Tip: Double-check that the drum is fully seated before reassembling. - 8
Reinstall the toner cartridge and close covers
Reinsert the toner cartridge, ensuring it sits properly in the drum assembly. Close all covers and reseal the printer to prevent dust entry.
Tip: Listen for a soft click indicating secure placement. - 9
Run alignment and print a test page
Power the printer back on and print an alignment or calibration page. Review the results for even tone and absence of streaks.
Tip: If the alignment page shows misalignment, repeat the calibration or consult the manual. - 10
Evaluate results and dispose of old parts
Compare the test page to a baseline and confirm improved quality. Properly dispose of the old drum and any used toner.
Tip: Keep the new drum’s packaging until you’re confident in print quality.
People Also Ask
What are the first signs that indicate I need to replace a Brother drum?
Look for streaks, ghosting, or faint prints across multiple pages. If these persist after cleaning and cartridge checks, the drum is likely worn and should be replaced.
Common early signs are streaks, ghosting, and overall faint prints. If cleaning and cartridge checks don’t fix it, replace the drum.
Can I continue printing with a worn drum, or should I replace it immediately?
Continuing to print with a worn drum can worsen print quality and may damage the printer over time. Replace the drum when wear signs are evident and after confirming with a test page.
It's best to replace when you notice wear signs; continuing to print can worsen quality and might cause more damage.
Are third-party drums safe for Brother printers?
Third-party drums can be compatible, but verify model compatibility and warranty terms. Some manufacturers may limit warranty coverage if non-original drums are used.
Third-party drums can work, but check compatibility and warranty terms before use.
How do I recycle an old Brother drum?
Check local electronics recycling programs or Brother's take-back options. Do not dispose of drums with regular trash due to toner content.
Recycle through local programs or Brother's take-back options; never trash a drum with toner.
Is the drum replacement the same across all Brother models?
Drum replacement steps and parts vary by model. Always consult the specific user manual for your Brother printer to ensure proper procedure.
Model-specific manuals guide you because steps differ between Brother printers.
Should I replace the drum before it runs out of life to avoid issues?
Preemptive replacement can prevent quality dips on critical prints, but base the decision on model guidance and observed wear rather than a fixed page count.
Replace when wear signs appear, not strictly by page count, unless your model advises otherwise.
Watch Video
Quick Summary
- Identify drum wear signs early to prevent print defects.
- Always verify model compatibility before purchasing a drum.
- Use calibration pages to confirm successful installation.
- Consider total cost of ownership when choosing drum vs. cartridge-only options.
- The Print Setup Pro team recommends following model-specific guidance for best results.