3D Printer Wall Art: How to Design, Print, and Mount Decor
Learn how to design, print, finish, and mount stunning 3D printer wall art for home offices and studios. Practical tips, safe mounting, and durability included.

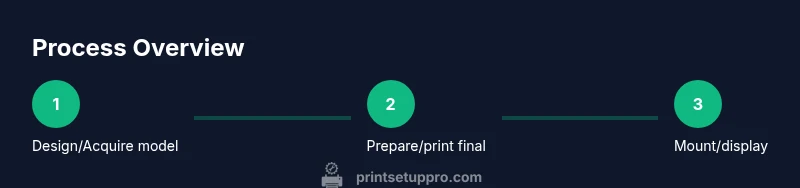
You're going to create custom wall art with a 3D printer. This quick guide outlines the materials, design considerations, and essential steps to print and mount durable, safe wall art. You'll need a model, filament, a printer with a stable bed, and mounting hardware. Safety and finish tips help you avoid warping or damage.
What is 3d printer wall art?
3D printer wall art refers to sculptural or relief-style pieces printed with an FDM or resin 3D printer that are designed to hang on a wall. It combines artistry with additive manufacturing, allowing you to create depth, texture, and unique silhouettes that cast shadows and change with light. For home offices and DIY studios, 3D printer wall art offers a personalized, conversation-starting focal point that goes beyond flat posters or canvas prints. Print quality, material choice, and mounting strategy all influence the final look and durability. Whether you build single statement pieces or layered compositions, the result should feel integrated with the space. As Print Setup Pro notes, planning ahead minimizes waste and yields more repeatable results.
Design planning and scaling
Successful wall art begins with thoughtful planning. Start by measuring the wall space where the piece will hang and sketching an approximate silhouette. If you’re combining multiple pieces, create a rough layout grid to ensure balance and rhythm. Consider thickness and profile so that the sculpture sits comfortably away from the wall without crowding electrical outlets or switchplates. Remember to account for mounting hardware and backing to keep the piece level. Print Setup Pro emphasizes that scalable models save time and prevent oversized prints from dominating the space.
Materials, filaments, and finishes
PLA is the most forgiving filament for beginners, offering crisp details and easy post-processing. PETG adds strength and impact resistance, making it a good middle ground for wall art expected to endure sunlight or humidity. For outdoor or UV-prone spaces, consider ASA or specialty filaments designed for weather resistance. Finishes matter: sanding between layers, priming, and painting can transform a matte, industrial print into a gallery-worthy piece. Post-processing also helps reduce visible layer lines and enhances adhesion to mount hardware. Always work in a well-ventilated area when sanding or painting.
Printer settings and quality factors
A stable bed, consistent extrusion, and proper cooling are essential for clean wall art. Use a layer height that balances detail with print time—smaller layers capture fine textures but take longer. Ensure walls are thick enough to hold weight and prevent sagging on larger prints. Bed adhesion strategies (paint-on glue sticks, blue tape, or specialized surfaces) help prevent warping. Calibrating the Z-offset and nozzle temperature for your filament reduces defects like blobs or stringing that ruin surface quality. Lightly post-process after printing to preserve detail while smoothing rough surfaces.
Printing process and troubleshooting
Printing wall art can reveal issues like warping, delamination, or surface imperfections. If warping occurs, improve bed adhesion, reduce print speed, or raise ambient temperature with an enclosure. Stringing can be minimized by tuning retraction settings and ensuring stable environmental conditions. Layer shifts often indicate belt tension issues or loose couplers—pause the print and recheck hardware before resuming. For resin prints, ensure resin tanks are clean and the model is properly supported. Printing multiple pieces with consistent settings improves overall color and tone consistency across a series.
Mounting, display, and durability
Mounting methods depend on size and weight. For lighter pieces, strong 3D-printed mounting brackets or adhesive-backed spacers can suffice, but larger works should use wall anchors or a French cleat system. Ensure the mounting hardware is rated for the weight and that the print’s center of gravity aligns with support points. If you plan to illuminate the piece, consider backlighting or indirect LED strips for dramatic effect. Protective backing or acrylic sheets can shield delicate surfaces from dust and accidental knocks. Print Setup Pro recommends testing mounting with a mock weight before committing.
Aesthetic considerations and customization ideas
3D wall art shines when you experiment with color, texture, and composition. Try multi-layered designs with different color filaments or painting after printing to create high-contrast shadows. Combine geometric shapes with organic forms for a modern look, or print modular pieces that can be rearranged over time. For a cohesive gallery wall, repeat a common motif and vary scale or depth. Lighting choices—daylight, warm bulbs, or RGB accents—dramatically alter how texture reads on screen and in person.
Tools & Materials
- 3D printer with stable bed(At least 200x200 mm build area; enclosure recommended for PETG/ABS)
- Filament spool (PLA recommended)(Choose color and finish; keep filament dry)
- Build surface or adhesion aids(Painter's tape, glue stick, or hairspray for bed adhesion)
- Calipers or ruler(For precise scaling and alignment)
- Post-processing tools(Sandpaper (120–400 grit), primer, acrylic paints)
- Mounting hardware(Picture hooks, screws, wall anchors sized for weight)
- Safety gear(Gloves and eye protection for sanding/painting)
- Ventilated workspace(Ensure good air flow when sanding or finishing)
- Cutting tools(X-Acto knife or snips for trimming supports)
Steps
Estimated time: 2-6 hours
- 1
Design or Acquire a Scalable Model
Choose an existing model or design one from scratch with scalable dimensions. Check licensing to ensure you’re allowed to print and display publicly. Ensure the silhouette fits your wall space and aligns with your decor.
Tip: Verify scale against the intended wall area by printing a small 10–20% scale test piece first. - 2
Prepare Your File for Printing
Open the model in your slicer, orient it for optimal strength and minimal support. Decide on wall thickness and hollow vs. solid fills; export the G-code after confirming a clean, error-free model.
Tip: Print a tiny test piece to validate orientation and surface quality before committing to the full print. - 3
Set Up Printer Bed and Slicer Profiles
Calibrate bed level, set an appropriate Z-offset, and choose a layer height that balances detail with time. Select the correct temperature for your filament and enable cooling as needed. Apply bed adhesion aids for large flat sections.
Tip: Maintain a stable ambient temperature and consider an enclosure for PETG or ABS to reduce warping. - 4
Print a Test Piece
Run a small segment to verify tolerances and surface quality. Inspect for layer consistency, gaps, or warping, and adjust settings if needed before printing the full model.
Tip: If the first layer isn’t sticking well, pause and re-level the bed or increase bed adhesion temporarily. - 5
Print the Final Piece
Start the main print and monitor the initial layers closely. Plan for long print times and schedule accordingly. If multiple pieces are needed, print them sequentially with consistent settings.
Tip: Consider enabling a gentle fan on the layers that benefit from smoother surfaces to reduce warping. - 6
Post-Process and Mount
Carefully remove supports, sand rough edges, and apply primer and paint as desired. Mount using chosen hardware, ensuring weight and balance are supported. Allow finishing layers to cure fully before mounting.
Tip: Test mounting with a temporary setup to confirm hardware strength before final installation.
People Also Ask
What printer is best for 3D printer wall art?
A reliable hobby-level FDM printer with a stable bed is sufficient for most wall art. Start with PLA for easy results, then explore PETG or ABS/ASA if you need greater durability or UV resistance. A printer with a heated bed and enclosure helps with larger pieces and challenging materials.
A reliable hobby-level FDM printer with a stable bed is enough for most wall art; start with PLA and consider PETG for more durability.
What filament types work best for wall art?
PLA is the easiest and most forgiving, suitable for beginners and quick results. PETG offers better strength and impact resistance, while ABS/ASA require an enclosure and good ventilation due to fumes.
PLA is easiest; PETG is stronger; ABS needs ventilation.
How thick should wall art be?
Aim for a balanced thickness that provides structural integrity without adding unnecessary weight. Thicker sections tend to be stronger but increase print time and material use.
Choose a balanced thickness that supports the design without excess weight.
Will wall art warp in heat or humidity?
Any plastic can warp under heat or poor environmental conditions. Use appropriate settings, a heated bed if required, and consider enclosure or ventilation to minimize warping.
Yes, heat can cause warps; proper settings and a good bed help.
How do I mount 3D-printed art safely?
Use sturdy mounting hardware rated for the print’s weight, such as wall anchors or a French cleat system. Ensure studs or anchors are securely installed and verify the weight balance of the piece.
Use strong mounting hardware and test before final installation.
How long does printing take?
Printing time varies with model size, layer height, and filament. Small pieces may take a couple of hours, while larger, highly detailed pieces can extend significantly.
It depends on size and settings; expect several hours for large pieces.
Can I create modular wall art and rearrange it later?
Yes. Printing modular components that interlock or align allows for flexible layouts and easy updates to your display over time.
Absolutely—modular pieces let you rearrange as you grow your collection.
Watch Video
Quick Summary
- Plan scale and layout before printing
- Choose filament and settings to balance detail and durability
- Post-process for finish and protection
- Use proper mounting for stability and safety