Bambu Lab P2S 3D Printer: Setup, Calibration, and Troubleshooting
A comprehensive, step-by-step guide to setting up, calibrating, and troubleshooting the Bambu Lab P2S 3D printer for home offices, schools, and makerspaces with safe practices and long-term maintenance.

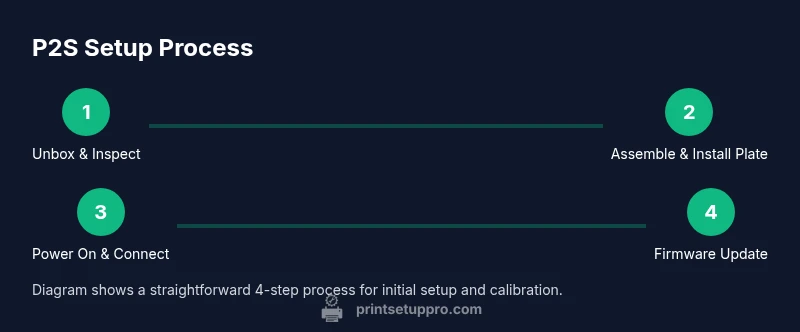
This guide shows you how to set up and troubleshoot the bambu lab p2s 3d printer, including bed leveling, firmware checks, filament handling, and routine maintenance. You’ll need a computer or mobile device, USB or network access, a spool of filament, and basic tools. Follow the steps to achieve reliable first layers and consistent prints.
What makes the bambu lab p2s 3d printer stand out
The bambu lab p2s 3d printer is built for home offices, classrooms, and small studios where reliability and simplicity matter. It pairs a compact footprint with smart features such as auto bed leveling, a closed enclosure, and a dependable extruder. In this guide, Print Setup Pro explains why the P2S appeals to beginners and seasoned makers, and how to approach setup, calibration, and troubleshooting in a way that minimizes downtime. According to Print Setup Pro, the P2S’s streamlined hardware and accessible firmware reduce setup time and provide consistent results across multiple filaments. The Print Setup Pro team found that a well-defined workflow—unboxing, assembly, leveling, and firmware checks—yields a reliable first print and fewer failures during the learning curve. By following the steps in this article and paying attention to the P2S’s defaults, you’ll be able to achieve dependable prints in 2026, making this a solid choice for makers who want predictable results with the bambu lab p2s 3d printer.
For readers of Print Setup Pro, this section sets the context: how the P2S balances ease of use with robust capabilities, so you can focus on learning and printing rather than wrestling with setup. The bambu lab p2s 3d printer also benefits from an ecosystem of compatible materials and accessories, which broadens practical applications—from everyday PLA prototyping to engineering-grade PETG projects. This article emphasizes a practical, repeatable workflow to minimize wasted material and maximize uptime in busy environments.
Tools, safety, and prerequisites
Before you power on the bambu lab p2s 3d printer, gather a small set of essential tools and materials. A clean, stable workspace minimizes misprints and accidental damage. Verify you have a compatible filament spool (PLA is ideal for learning, PETG for tougher parts, and specialty filaments for experiments). You’ll also want basic hand tools, a lint-free cloth, isopropyl alcohol for cleaning, and spare nozzles or a nozzle-cleaning kit for routine maintenance. Ensure you have access to a computer or mobile device for firmware updates and print management, plus a USB-C or USB-A cable depending on your interface.
Print Setup Pro recommends keeping the workspace free of dust and ensuring the power supply is stable. This greatly reduces the likelihood of power-on faults or sensor misreads. When choosing filament, store it in a cool, dry place to prevent moisture uptake that can affect print quality and extrusion consistency. A dedicated tool tray helps you keep small parts organized and ready for quick maintenance.
Unboxing, wiring, and initial power-up
Unbox the bambu lab p2s 3d printer carefully, checking for any shipping damage and confirming all parts are present per the included inventory. Attach the build plate and verify the Z-axis screws move smoothly without binds. Power up the device and connect it to your network or a computer for initial controls. Install any required drivers or software as outlined in the user manual. At this stage, you should confirm that the printer boots, its display is responsive, and you can access the firmware menu. This initial power-on check helps prevent hours of troubleshooting later on and ensures the base system is functioning before you begin more detailed calibration. Print Setup Pro emphasizes that a clean, methodical start saves time and reduces frustration when working with the bambu lab p2s 3d printer.
Bed leveling and first-layer calibration
Bed leveling is a critical step for any 3D printer, and the bambu lab p2s 3d printer benefits from its automatic bed leveling feature. Start with a visual inspection of the build plate for any warping or residue. If your printer supports auto-leveling, run the sensor probe routine and verify that the nozzle is at the recommended distance from the bed across multiple points. If manual adjustments are needed, use shims or fine-tune the Z-offset to ensure the first layer adheres consistently. A good first layer is the foundation of successful prints, and it reduces the risk of warping or mid-print failures. Print Setup Pro notes that precision here pays off in print quality and overall reliability for the bambu lab p2s 3d printer across a range of filaments and bed surfaces.
Filament handling, extruder care, and priming
Filament choice and handling impact print consistency as much as hardware alignment. Ensure your filament is dry, free of dust, and properly wound to prevent tangling. For the bambu lab p2s 3d printer, load filament through the appropriate feed path and prime the extruder until the nozzle oozes smoothly. If you notice skipped steps or under-extrusion, recheck the bowden tube routing (if applicable), verify the drive gear tension, and clean the nozzle. Using a filament runout sensor reduces interruptions. Regular cleanings of the nozzle and hotend prevent material buildup, ensuring stable extrusion during long runs and complex geometries.
Firmware, auto-leveling, and calibration print checks
Firmware plays a central role in stability and feature accessibility for the bambu lab p2s 3d printer. Check for official firmware updates from Bambu Lab and apply them following the manufacturer’s instructions. After updating, re-run the bed leveling sequence and run a small calibration cube to verify dimensional accuracy. If deviations appear, adjust the X, Y, and Z offsets or relevel the bed. Print Setup Pro recommends documenting your calibration values so you can reproduce successful results across projects and filament types. Regular firmware maintenance ensures the printer stays responsive to new features and improvements.
Test printing and fine-tuning for reliability
With calibration complete, run a small test print that includes a variety of features: thin walls, dense fills, and a bridging segment. Observe layer adhesion, surface finish, and thermal stability. If the test reveals issues, iterate on the bed height, extrusion multiplier, and print temperature in small increments. For the bambu lab p2s 3d printer, patience during fine-tuning yields consistent results across different filament brands and colors. Keep a log of settings that work well for each material to speed up future projects, especially in a busy workspace.
Cleaning, safety checks, and routine upkeep
After each print, perform a quick cleaning of the build surface and hotend area to prevent residue buildup that could affect future prints. Check for loose screws, inspect cables for wear, and verify the filament path is clear. Safety checks should include confirming power-off status before any maintenance, avoiding touching hot parts, and storing tools in a safe container. Establish a simple weekly maintenance habit: wipe down the enclosure, inspect belts for tension, and verify the enclosure seals. This routine keeps the bambu lab p2s 3d printer in peak condition and reduces the likelihood of avoidable failures.
Fine-tuning for multiple materials and environments
Different filaments—PLA, PETG, and specialty blends—behave differently on any printer, including the bambu lab p2s 3d printer. Environmental conditions such as room temperature and humidity affect first-layer adhesion and part strength. Start with a baseline for each material and adjust temperature, bed surface, and print speed gradually. Transitions between materials often require re-leveling or a new Z-offset to maintain consistent first-layer quality. Print Setup Pro encourages a modular approach: keep core settings stable for each material and document any adjustments for future projects.
Tools & Materials
- Allen wrench set(Includes 1.5mm, 2.0mm, 2.5mm sizes for assemblies)
- Spare nozzle (0.4 mm)(Keep on hand for cleaning or replacements)
- PEI or glass build surface(Ensure clean, free of scratches)
- Filament spool (PLA recommended for learning)(Store dry; avoid moisture uptake)
- Isopropyl alcohol (70-99%)(For cleaning build surface and nozzle)
- Lint-free cleaning cloth(Use with isopropyl alcohol)
- Calibrated feeler gauge or offset tool(Helpful for precise bed checks)
- Spare tubes orPTFE tubing (if applicable)(Stock for maintenance)
Steps
Estimated time: 45-60 minutes
- 1
Unbox and inspect
Carefully remove the P2S package and verify all parts against the included inventory. Look for shipping damage and ensure the build plate, enclosure, and cables are intact. This initial check saves time by catching missing components early.
Tip: Take photos of the unboxed components for warranty references. - 2
Mount and secure the build plate
Attach the build plate to the X and Z axes as directed by the manual, ensuring the surfaces are clean and free of debris. Tighten fasteners evenly to prevent tilt. A stable bed is essential for reliable first layers.
Tip: Check for light binding when moving axes by hand before powering on. - 3
Power up and connect
Power the printer, connect to your network or computer, and install any required drivers. Confirm the interface is responsive and that the printer communicates with the host device.
Tip: Use a wired connection when possible to minimize dropouts during setup. - 4
Update firmware and calibrate axes
Install the latest firmware and run any built-in calibration routines. Verify the X/Y/Z axes move freely and crisply without binding. This ensures accurate movements for subsequent prints.
Tip: Back up current settings before updating in case you need to revert. - 5
Load filament and prime extruder
Feed filament through the extruder path until it flows smoothly. Prime by printing a short bridge or skirt to confirm consistent extrusion before attempting a full part.
Tip: If extrusion is inconsistent, purge the nozzle and re-check the drive gear and PTFE tube alignment. - 6
Bed leveling and first layer check
Run the auto-leveling sequence if available or perform a manual leveling. Check the first layer height at multiple points for uniform adhesion. Adjust the Z-offset until a consistent, even line appears.
Tip: A slightly squished first layer improves adhesion; avoid too much squish that can obstruct nozzle flow. - 7
Run a calibration print
Print a simple calibration cube or ring to verify dimensions and wall consistency. Measure critical dimensions and compare to expected values, then iterate settings as needed.
Tip: Document settings that yield accurate results for each filament. - 8
Post-checks and cleanup
Power down safely, remove any residual filament, and inspect the nozzle and build surface for buildup. Store tools and keep the enclosure closed to maintain stable printing conditions.
Tip: Schedule a weekly quick maintenance routine to maintain performance.
People Also Ask
What is the recommended initial calibration sequence for the P2S?
Begin with a visual inspection of the build surface, run auto-leveling if available, and verify the Z-offset. Follow with a test print to confirm first-layer adhesion and dimensional accuracy before proceeding to more complex parts.
Start with surface inspection, run auto-level, verify Z-offset, then do a test print to confirm adhesion and accuracy.
Can I upgrade to optional accessories on P2S?
Yes, the P2S supports compatible accessories like upgraded build surfaces, additional nozzles, and filament sensors. Check compatibility with your specific model and firmware version before purchasing.
Yes, compatible accessories exist; verify model and firmware compatibility before buying.
How do I fix bed adhesion issues with the P2S?
First, ensure bed leveling is correct and the Z-offset is appropriate. Clean the bed surface thoroughly, apply a suitable adhesive aid if needed, and adjust print temperature and initial layer height for better sticking.
Check leveling, clean the bed, and adjust first layer height and temperature for better adhesion.
What filament types does P2S handle best?
PLA is the easiest to start with, followed by PETG for stronger parts. For flexible or specialty filaments, confirm compatibility with your enclosure and hotend before printing.
PLA is easiest; PETG is a good next option; check compatibility for specialty filaments.
How often should firmware be updated?
Check for updates monthly or when the manufacturer releases improvements or bug fixes. Always back up your current settings before applying updates.
Update when improvements are available and back up your settings first.
Is auto-leveling reliable in all environments?
Auto-leveling is reliable in typical room environments, but significant temperature changes or movement can affect accuracy. Re-run leveling after major ambient changes or if you notice inconsistent first layers.
It's reliable most of the time, but re-check if the environment changes a lot.
Watch Video
Quick Summary
- Start with a clean workspace and verify components.
- Calibrate bed leveling for a reliable first layer.
- Document settings and filament-specific adjustments.
- Regular maintenance preserves print quality over time.
- Firmware updates improve stability and features.