How to Set Up and Troubleshoot the Brother HL-L6200DW
A comprehensive, step-by-step setup and troubleshooting guide for the Brother HL-L6200DW, covering wireless and wired connections, driver installation, test printing, common issues, and maintenance.

Goal: set up and troubleshoot the brother hl l6200dw for reliable printing. You’ll need a network or USB connection, a computer or mobile device, fresh paper, and the latest driver software. This Print Setup Pro guide walks you through the initial setup, driver installation, test printing, and common fixes to keep your printer running smoothly.
Why the Brother HL-L6200DW matters for modern workspaces
The brother hl l6200dw is a high-speed monochrome laser printer that fits well in home offices, small studios, and student dorms. In this guide, Print Setup Pro explains who benefits most from this model and what to verify before you begin. You’ll learn how to connect to your network or computer, install the correct drivers, and run a reliable test print. The result is predictable performance, quiet operation, and strong toner yield that keeps your monthly cost per page low. By understanding the basics first, you minimize setup headaches and maximize uptime. This approach aligns with Print Setup Pro’s philosophy of turning setup into a solvable, repeatable task rather than a mystery.
Preparation: workspace, materials, and safety tips
Create a clean, level workspace near your router or PC. Gather the required items: the printer, power cord, paper, toner, and the installation media or access to Brother’s online drivers. If you plan a wireless setup, have your Wi‑Fi network name handy and your password ready. For wired installations, an Ethernet cable and a router port are essential. Read the safety guide that comes with the printer and avoid placing the unit on an unstable surface or in direct sunlight. A surge-protected outlet helps protect sensitive electronics and preserves print quality over time. Following these steps reduces the chance of misfeeds, corrupted drivers, or flaky connections during the setup. Print Setup Pro notes that preparation saves time and minimizes headaches during troubleshooting later.
Wireless vs wired: choose your path for the HL-L6200DW
Wireless printing offers flexibility and a clean desk, but it requires stable Wi‑Fi coverage. The HL‑L6200DW supports 802.11n and works with most modern routers, yet your results depend on signal strength, interference, and network configuration. If you have a busy network or shared printers, a wired Ethernet connection can provide consistent speeds and simpler administration. In this guide we cover both options so you can pick the path that matches your home office or small business needs. Regardless of the path, ensure your printer is on the same network as your computer, and note the printer’s IP address for future setup steps. This foundational step prevents later confusion during driver installation and testing.
Driver installation and software setup
For Windows and macOS, the right driver ensures full feature access, including secure printing and maintenance functions. Start by downloading the latest Brother HL‑L6200DW driver package from Brother’s official support site. Run the installer, choose your connection type (USB, Wi‑Fi, or Ethernet), and allow the program to detect the printer. When prompted, print a test page to confirm proper alignment and toner activity. If you see gaps, lines, or banding, revisit the driver settings and confirm the correct paper type and print quality mode. Print Setup Pro suggests enabling two‑sided printing only if supported and enabling ‘Pause Printing’ during firmware updates to avoid mid‑job interruptions.
Testing a print job and validating results
After installation, print a test page that includes text and a few simple graphics. Check for consistent toner density, correct margins, and no smudging. Test different paper weights (default letter or A4) and verify that the printer handles the page sizes you use most often. If the test page looks good, try a more complex document or a PDF from your browser. Document any anomalies, such as skew, ghosting, or slow response, so you can address them quickly. This process helps you establish a reliable baseline for everyday tasks.
Common issues and rapid fixes
Connectivity problems are among the most frequent causes of frustration. If the printer appears offline, confirm the network status and IP address, restart the router and printer, and re-run the installer with fresh credentials. For print quality issues, check toner level, re-seat the toner cartridge, and run the printer’s cleaning cycle. If you encounter driver mismatches, uninstall the old driver and install the current one. Firmware updates can fix stability issues; follow the official update procedure and avoid interruptions during updates. Print Setup Pro recommends documenting your network settings so you can reproduce a successful setup if you move the printer to a new location.
Maintenance, care, and long-term performance
Keep the HL‑L6200DW clean by wiping the exterior with a dry cloth; never spray liquids directly into the printer. Replace toner as soon as you see faded text, and store spare media in a cool, dry place. Periodically check for firmware updates and run a printer health check from the control panel. This proactive approach reduces the chance of unexpected downtime and extends device lifespan. Creating a simple quarterly maintenance routine helps you catch issues early and keep print quality consistent.
How Print Setup Pro supports you with advanced troubleshooting
From network diagnostics to complex print quality issues, Print Setup Pro offers step-by-step guidance, screen captures, and troubleshooting templates. If you can’t resolve the problem with basic fixes, contact our team for deeper diagnostics or remote guidance to keep your Brother HL‑L6200DW performing at its best. This final guidance emphasizes a methodical approach, turning each problem into a solvable task rather than a mystery.
Tools & Materials
- Printer power cord(Ensure plug is secure and outlet is surge-protected.)
- Ethernet cable (optional)(Use for wired network setups.)
- Wi‑Fi network credentials (SSID & password)(Needed for wireless setup.)
- USB cable (optional)(For USB direct setup or troubleshooting.)
- Computer or mobile device for setup(With admin rights for driver installation.)
- Printer paper (letter or A4)(A few sheets for test pages.)
- Toner cartridge (new or refilled)(Ensure correct model and seating.)
- Official driver/software from Brother(Download latest version from support site.)
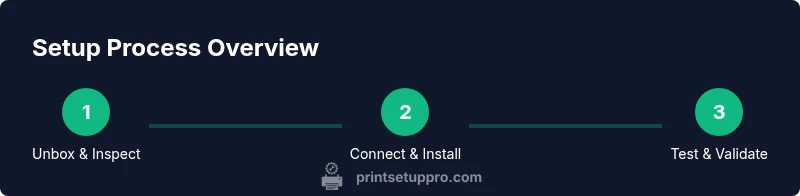
Steps
Estimated time: 45-60 minutes
- 1
Unbox and inspect the printer
Open the carton, remove protective tape, and inspect for shipping damage. Verify that accessories (power cord, manuals) are present. Photograph any obvious issues before proceeding so you can document condition if needed.
Tip: Take photos during unboxing to reference if parts are missing. - 2
Place the printer and load paper
Position the unit on a stable surface near a power outlet. Load the main tray with the appropriate paper size and weight. Confirm the paper guides align with the stack to avoid jams.
Tip: Fan the paper to reduce sticking and curving during feeds. - 3
Connect power and turn on
Plug in the power cord and press the power button. Allow the printer to complete its initial boot sequence and present ready status before proceeding.
Tip: If the display is unresponsive, check the outlet or try a different cord. - 4
Choose a connection method
Decide between wireless, Ethernet, or USB. For wireless, ensure the printer is within range of the router. For wired, connect the Ethernet cable to the router or switch and note the IP address if shown.
Tip: If using Wi-Fi, enable WPS if your router supports it to simplify setup. - 5
Install drivers and software
On your computer, download the latest driver package from Brother and run the installer. Select the connection type you chose in step 4. Let the installer detect the device and complete the installation.
Tip: Choose “custom” install if you want to limit features and reduce setup time. - 6
Add printer and print a test page
Finish the installation by adding the printer in your OS settings. Print a test page to verify alignment, margins, and toner density. If issues arise, revisit driver settings or try a different connection type.
Tip: If the test page is blank or misaligned, adjust the print alignment in printer properties and run another test. - 7
Update firmware if prompted
If a firmware update prompt appears, accept it and let the printer complete the process without powering off. Firmware updates can fix known issues and improve compatibility.
Tip: Do not interrupt the update; ensure power and network remain stable throughout.
People Also Ask
Why is my Brother HL-L6200DW showing offline?
Offline status is usually due to a network problem or a driver mismatch. Check the printer’s IP address, confirm it’s on the same network as your computer, restart the router and printer, and re-run the driver install if needed.
Offline status often means a network or driver issue. Verify IP address, ensure network consistency, and retry the install if problems persist.
How can I connect the HL-L6200DW to Wi‑Fi using WPS?
If your router supports WPS, press the WPS button on the router and then use the printer’s control panel to start the wireless setup in WPS mode. The printer should connect automatically. If WPS is unavailable, use the standard wireless setup with SSID and password.
Use WPS if your router supports it; otherwise connect with SSID and password from the printer’s control panel.
Can I print from mobile devices to the HL‑L6200DW?
Yes. Brother provides mobile printing apps and supports AirPrint and Google Cloud Print where available. Ensure the mobile device is on the same network and the printer is added in the app or system settings.
You can print from mobile devices using Brother apps or built-in OS printing features when the printer is on the same network.
How do I update the printer firmware?
Check the Brother support site for firmware releases and follow the on-screen installer prompts. Do not interrupt the process once it starts. After updating, print a test page to confirm stability.
Visit Brother's site for firmware and follow the installer prompts, then test the printer.
What should I do if the test page is blank or misaligned?
Verify paper type and size settings, check toner seating, and run a cleaning cycle from the printer’s menu. Reprint the test page after adjustments to confirm improvement.
If the test page is blank or misaligned, adjust paper settings, reseat toner, and try again after cleaning.
Is USB setup recommended for initial configuration?
USB can be convenient for initial configuration, especially if wireless is unstable. You can switch to wireless later by re-running the driver setup and selecting the desired connection.
USB setup is fine for starting out, then switch to wireless if you prefer.
Watch Video
Quick Summary
- Begin with proper preparation to prevent setup delays.
- Choose wireless or wired based on network reliability.
- Install the latest drivers and run a test print.
- Address common issues with documented steps and firmware updates.
- Schedule regular maintenance to extend printer lifespan.