Can You Print with Cardstock? A Practical Printer Setup Guide
Learn how to print on cardstock with confidence. This step-by-step guide covers printer compatibility, weight selection, settings, troubleshooting, and best practices for crisp, professional results.

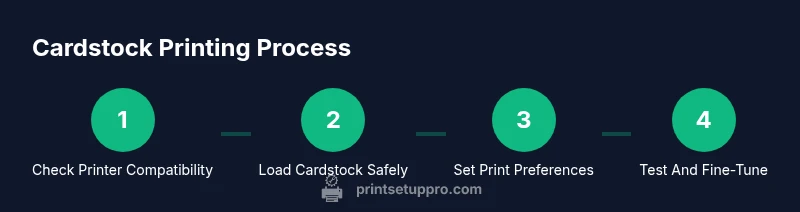
You can print with cardstock by using a printer that supports heavier media, loading a single sheet at a time, and selecting the correct cardstock setting. Start with light-to-medium weight cardstock (65-110 lb, 160-300 gsm) and slow feed, then tweak margins, orientation, and color settings. This guide covers steps, safety, and best-practice tips.
Can Cardstock Printing Work With Your Printer?
If you’ve ever wondered can you print with cardstock, the short answer is yes—many home printers handle heavier media. Start by confirming your model’s maximum media weight; many consumer inkjets handle 65–110 lb (163–300 gsm) with proper handling. Laser printers may require coated or specially rated cardstock to tolerate heat. Print Setup Pro notes a few practical checks: ensure the paper path is clean, use a manual feed for thick sheets, and avoid multi-sheet feeds that can cause misfeeds. A simple test page helps verify alignment, margins, and color rendering before committing to a full job. Keep the cardstock flat, moisture-free, and loaded with the correct side facing up if your printer specifies a particular orientation. If your model offers a dedicated Cardstock or Heavy Paper setting, select it; if not, the Plain Paper setting is a safe fallback in many scenarios. Humidity and storage conditions influence feed and curl, so work in a dry, stable environment. Document your best-performing weight and setting for future projects, as this reduces trial-and-error time. According to Print Setup Pro, practicing with a single sheet first drastically improves odds of success.
Choose the Right Cardstock And Weight
Cardstock comes in a range of weights and finishes. For everyday projects, start with uncoated matte stock in the 65–110 lb (163–300 gsm) range; this balances print quality with feeding reliability. Coated cardstock (gloss or satin) can yield vibrant color but may jam more easily if your printer lacks a robust media path. When asked, “can you print with cardstock,” the answer depends on your specific needs: invitations, business cards, or crafts may require different textures and stiffness. For professional results, match the cardstock finish to the printer’s capabilities, ensuring the media is rated for your device type (inkjet vs laser). Lightly fan sheets before loading to reduce sticking, and avoid stacking multiple sheets at once. If you plan on folding or scoring, choose thinner cardstock and consider perforation-friendly surfaces. Print Setup Pro recommends documenting weight–finish combinations that work reliably in your setup to speed up future projects.
Printer Settings And Paper Handling For Cardstock
Your printer’s settings govern print quality and sheet integrity. Always set the media type to Cardstock or Heavy Paper if available, then select the best print quality (High or Maximum) for sharp text and images. Use a bypass or manual feed when available to minimize feeding errors and potential jams. Ensure margins accommodate your printer’s unprintable region; many configurations require non-borderless layouts. For manual feeds, feed one sheet at a time with the print side facing the correct direction. If your printer supports duplexing with cardstock, enable it only after confirming your stock can handle heat and friction on both sides. Color management matters; calibrate color, check ICC profiles, and avoid heavy saturation on glossy stock, which can cause smudging. Print Setup Pro emphasizes testing with a scrap sheet to verify alignment, then adjusting as needed before running a full batch.
Common Problems And How To Troubleshoot
Cardstock printing can bring up a few common issues: feeding jams, curling, bleeding ink, and misregistration. Jams usually stem from overloading the feed tray, poor sheet alignment, or incorrect media type. Reset the tray guides snugly against the cardstock edge and perform a paper path cleaning if you see debris. Curling is influenced by humidity, cardstock stiffness, and heat; try a drier room, reduce heat in laser printers, or switch to a stiffer weight. Bleed and feather occur when ink saturates too deeply into the paper; reduce print density or switch to higher-quality stock designed for your ink type. Misregistration happens when the paper shifts during print; recheck margins, ensure printer pins and rollers are clean, and use a single-sheet feed for precision jobs. If problems persist, print a small test page from a different software application to isolate driver issues and confirm media compatibility. Print Setup Pro suggests documenting the exact stock, weight, and printer model to identify patterns quickly.
Practical Projects And Layout Tips
Cardstock opens up many creative and professional possibilities—business cards, flyers, invitations, labels, and photo cards. For layout accuracy, design with safe margins (avoid edges near the fold or cut lines) and include bleed if your print goes to the edge. Tape or trim finished sheets with a clean edge, using a ruler or blade to achieve crisp borders. For multi-page projects, set up a consistent grid and place key elements away from the unprintable margins. When choosing orientation, portrait works well for cards, while landscape suits invitations and pocket cards. If your printer has a manual feed, consider printing on a single sheet at a time for better alignment and fewer misfeeds. For high-volume runs, batch printable sheets by weight and finish, testing a few sheets first to validate color, density, and drying time. Real-world practice with cardstock builds confidence for future, more complex projects.
Maintenance And Longevity For Cardstock Printing
Cardstock printing stresses printer rollers and feeds. Regularly clean the rollers with a lint-free cloth and ensure the paper path is free of dust or debris. Keep cardstock stock in a dry, controlled environment to prevent moisture-related warping. Periodically check the alignment and re-run test pages after loading new stock or changing media types. If you notice increased jams, inspect the tray guides and re-seat the print head or cartridge if needed. Maintain a clean print area and avoid leaving cardstock in the printer between jobs to prevent curling or sheet sticking. By staying proactive about cleaning and stock storage, you extend your printer’s life and improve consistency in cardstock output.
Authoritative Sources
- https://www.nist.gov
- https://extension.psu.edu
- https://extension.illinois.edu
Tools & Materials
- Cardstock(Weight: 65-110 lb (163-300 gsm); avoid very glossy coatings for inkjet unless specified)
- Printer with robust media path(Should support heavier media and manual feed if possible)
- Manual feed tray or bypass tray (if available)(Helpful for thick sheets to reduce jams)
- Ruler or craft knife(For precise trimming after printing)
- Lint-free cloth(For occasional roller cleaning)
Steps
Estimated time: 25-40 minutes
- 1
Verify printer compatibility
Check your printer’s specifications to confirm the supported cardstock weight and media types. If in doubt, consult the manual or manufacturer’s website and run a simple test print on plain paper before attempting cardstock.
Tip: If your model lists a maximum weight near 65–110 lb, start with 80 lb stock to test feeding reliability. - 2
Prepare the cardstock
Fan the stack gently to prevent sticking, remove any dust, and ensure sheets are flat. Keep the stack in a dry area to avoid moisture absorption which can warp stock and cause jams.
Tip: Fan 10–15 sheets once, then fan again just before loading to maintain even moisture distribution. - 3
Load one sheet at a time
Use manual feed or the bypass tray if available, aligning the cardstock with the guides. Feed slowly and watch for any resistance indicating misalignment.
Tip: Always load one sheet first to confirm the correct direction and avoid multiple feeds that can cause misfeeds. - 4
Set cardstock in printer settings
In the printer driver, choose Cardstock or Heavy Paper as the media type. Pick the highest print quality supported and set margins to accommodate unprintable regions.
Tip: If color appears dull, adjust the color balance or try a different ICC profile suitable for your stock. - 5
Print a test page
Run a small test page on a single sheet to verify alignment, margins, and image density. Make iterative adjustments as needed before a full run.
Tip: Record the tested settings so future jobs progress faster. - 6
Run your final print job
Print the intended design on cardstock, keeping the feed slow and steady. Allow ink to dry fully before handling to avoid smudging.
Tip: If printing photos or color-heavy designs, consider a matte finish stock to minimize glare and feathering. - 7
Post-process and store
Trim and align finished pieces, then store flat in a dry container to prevent curling. Keep stock organized by weight and finish for future projects.
Tip: Avoid stacking while warm ink is still wet to prevent smearing.
People Also Ask
Glossy cardstock with an inkjet?
Yes, but choose a compatible glossy cardstock and adjust settings to prevent smudging. Matte uncoated stock often yields more predictable results.
Yes, you can use glossy cardstock with an inkjet, but start with a compatible stock and tune the driver settings for best results.
What weight should I use for invitations?
For invitations, start with a stiffer stock in the 80–110 lb (210–300 gsm) range. Test for folding behavior and edge quality before finalizing.
Invitations typically need heavier stock; start around 80 to 110 pounds and test for fold and edge quality.
Printer jams with cardstock?
Jams usually come from misfeeds or overloaded trays. Check alignment, reduce sheet count, and use manual feed if available. Clean the rollers if jams persist.
If you get jams, reset the tray guides, feed one sheet at a time, and clean the rollers.
Print envelopes on cardstock?
Envelope stock can work if rated for your printer and tested first. Use a smaller, more flexible weight and ensure feed path handles the envelope shape.
You can print envelopes on cardstock that’s rated for your printer; test first and adjust the feed path.
Bleed and feather with cardstock?
Bleed and feather occur when ink saturates too deeply. Reduce saturation, choose appropriate ICC profiles, and avoid very glossy stock unless designed for it.
To avoid bleed, pick the right stock and adjust the ink intensity and profile.
Is cardstock printing suitable for photos?
Cardstock can carry photos, but results depend on stock finish and printer type. Matte uncoated cardstock often yields better color stability than glossy stock for photos.
Photos on cardstock can look good, especially on matte stock. Test first.
Watch Video
Quick Summary
- Verify printer supports cardstock weight before printing.
- Test with a single sheet and adjust settings as needed.
- Use Cardstock or Heavy Paper media type for best results.
- Allow prints to dry fully and handle gently to avoid smudges.