How to Check Printer History: A Step-by-Step Guide
Learn how to check printer history across built-in UI, web interfaces, and vendor software. This educational guide covers steps, best practices, and privacy considerations for home offices and small businesses.

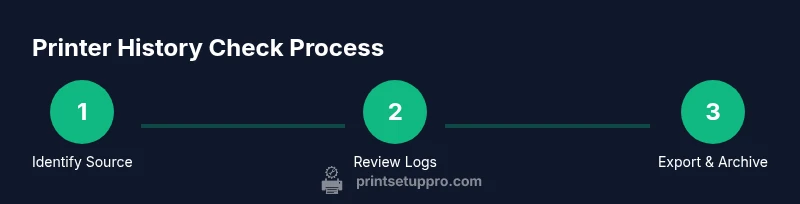
You can check printer history by examining job logs from the printer’s control panel, the printer’s web interface, or the vendor software on your computer. Prepare your admin credentials, a reachable networked printer, and a computer with internet access. This step-by-step approach helps you verify who printed, when, and what was printed, and it includes exporting data for records.
What is printer history and why it matters
Printer history is a record of print jobs processed by a device, including who sent the job, when it was printed, the document name, page count, and status. Tracking this history is essential for security, cost control, and accountability in both home offices and small businesses. According to Print Setup Pro, maintaining an auditable print history helps you detect unauthorized use, identify recurring bottlenecks, and verify compliance with printing policies. While the exact data captured varies by model and software, most modern printers provide a detailed job log that can be accessed through multiple interfaces. Understanding what you can learn from history—such as unusual print times or unexpected users—sets the foundation for proactive maintenance and improved workflows.
In practice, the goal of checking printer history is not to police every print but to establish baseline behavior you can compare against, spot anomalies, and document usage for audits or cost allocations. This makes it a valuable habit for teams sharing resources, students on campus networks, and freelancers who rely on printers for client deliverables. The key takeaway is to know where each log lives (on-device, web interface, or software) and to keep access to logs restricted to authorized personnel.
Access points for printer history
Most printers offer three primary access points for history data: the built-in control panel, the web-based interface, and vendor-provided software. The built-in panel is quickest for recent jobs and can work even if the network is temporarily unavailable. The web interface typically offers more robust logging options, including export to CSV or PDF. Vendor software on a connected computer may provide deeper analytics, especially for corporate environments that use centralized print management. Print Setup Pro recommends starting with the easiest method (the control panel) and escalating to the more detailed options if you need exports or filters for audits.
Prerequisites and safety checks
Before you begin, ensure you have administrative access to the printer or the corresponding print management software. Confirm that you’re permitted to view usage data under your organization or household policy. Have the printer’s IP address or hostname handy, along with any required login credentials. If you’re dealing with sensitive documents or personally identifiable information, brief yourself on privacy policies and data retention rules. For best results, perform this task on a computer connected to the same network as the printer and preserve any exports securely to comply with data protection standards. This preparation minimizes interruptions and ensures you can capture complete, accurate history records.
Step-by-step basics: from the control panel
- Wake the printer and navigate to the Menu or Settings. 2) Locate a section labeled History, Job Log, or Reports. 3) View recent jobs, filtering by date range if available. 4) Note essential fields: timestamp, user, document name, pages, status, and any errors. 5) If available, use the Export option to save a CSV or PDF. 6) Log out when finished to protect access. Pro tip: take a screenshot of the screen if export options are unavailable. This on-device log provides a quick reference for recent activity.
Step-by-step basics: via the web interface
- Find the printer’s IP address (print a network configuration page or check your router's device list). 2) Open a browser and enter the IP to access the admin page. 3) Sign in with administrator credentials. 4) Locate sections like Job History, Usage, or Audit Logs. 5) Review entries (date, user, document, copies, status). 6) Use Export or API access if supported to download a dataset for auditing. 7) Close the session to protect credentials. If the interface supports it, set a retention window that aligns with your policy.
Step-by-step basics: using vendor software
- Install or open the printer’s vendor software on your computer. 2) Connect to the target printer if needed and navigate to the History or Logs module. 3) Filter by date range, user, or device if supported. 4) Review the details for each print job and verify statuses (completed, failed, canceled). 5) Export data in CSV or Excel format for your records. 6) Save any policy-aligned reports in a secure location. 7) If multiple printers exist, repeat the process for each device. Vendor software often provides the most consistent historical data across a fleet.
Interpreting data and exporting for audits
Interpretation hinges on understanding common fields: time zone, user identity, job name, pages, duplexing, color vs. mono, and status. Look for anomalies such as prints from unexpected users, unusual times, or repeated failed jobs. When exporting, choose CSV for compatibility with spreadsheet tools and PDFs for formal reports. Maintain a documented retention policy and encrypt sensitive exports. If your environment uses a print server, consult the server’s logs in addition to device logs for a comprehensive view.
Tools & Materials
- Printer with historical logging capability(Support for Logs/History or Audit logs in UI)
- Admin credentials(Printer or print server admin account)
- Network access to the printer(Same subnet or VPN if remote)
- A computer or tablet with a web browser(Access either local UI or vendor software)
- Print management software (optional)(For fleets, e.g., centralized logs)
- Export-capable interface(CSV, PDF, or Excel export)
- Secure storage for exports(Encrypted drive or secure folder)
Steps
Estimated time: 60-120 minutes
- 1
Prepare and verify access
Confirm you have admin rights, the printer is online, and you know the exact device you want to inspect. This avoids pulling the wrong logs and ensures you can export data when needed.
Tip: Document credentials securely and only for administrative use. - 2
Locate the history source on-device
On the printer, navigate to Logs or Reports to view recent print jobs. Note the available fields and any errors shown in the list.
Tip: If you don’t see a history option, check the user manual for location of logs. - 3
Open the web interface
Find the printer’s IP, open a browser, and sign in as admin. Locate Job History or Usage Logs. Confirm the date range and available filters.
Tip: Use a wired connection if possible to reduce UI timeouts. - 4
Check vendor software (if installed)
Launch the vendor utility and navigate to History/Logs. Compare entries with the device logs to ensure consistency.
Tip: If you manage multiple printers, maintain a per-device log file for clarity. - 5
Export the data
Use Export or Save As to generate a CSV/Excel/PDF file. Include relevant fields: timestamp, user, document name, pages, status.
Tip: Label exports with date and device name for easy retrieval. - 6
Review and interpret the results
Scan for anomalies: unexpected users, unusual times, repeated failures, or large jobs that don’t align with normal activity.
Tip: Cross-check with access logs if available. - 7
Secure and archive
Store exports securely and set retention according to policy. Revoke or rotate admin credentials if there’s a concern.
Tip: Encrypt sensitive exports and limit access. - 8
Document findings and next steps
Record any anomalies with a timestamp and recommended actions, such as policy updates or retention adjustments.
Tip: Create a periodic review reminder to revisit history logs.
People Also Ask
What is printer history and what data does it usually include?
Printer history is a log of recent print jobs and related metadata. It typically includes who printed, when, document name, page count, and job status. The exact fields vary by model and software, but most devices offer a downloadable log for auditing.
Printer history is a log of recent print jobs with details like who printed, when, and the document. It varies by device but is usually downloadable for audits.
Do I need admin access to view history?
Yes. Viewing and exporting history usually requires administrator credentials. If you don’t have them, request access from your IT or device owner and follow your policy for data handling.
Admin access is typically required to view and export history. If you don’t have it, ask your IT or device owner for access.
Can I view history without internet access?
Yes for on-device logs. Some printers store recent jobs locally and show them without internet. However, web-interface or vendor software logs often require network connectivity, so plan accordingly.
You can view some logs offline on the device, but web interfaces usually need network access.
How long are logs retained and can I customize retention?
Retention varies by device and policy. Some printers keep recent jobs for days, others for weeks. Check the retention settings in the logs section and adjust if your policy requires longer records.
Retention varies by device; check the logs settings and adjust per policy.
What if logs show unexpected activity?
Investigate immediately: verify user accounts, confirm device security, and review access policies. If necessary, rotate credentials and tighten access controls.
If you see unexpected activity, verify users, secure the device, and update access controls.
Can I export and share logs with others?
Yes. Use the export function to save logs as CSV or PDF. Share securely with authorized personnel and store copies in a compliant location.
Yes, export logs as CSV or PDF and share securely with authorized people.
What should I do if a printer has no history feature?
If logs aren’t available locally, check for firmware updates, enable auditing in the device’s settings, or use external print management software to capture history.
If there’s no history, enable auditing or use external print management software.
Is printer history compliant with privacy laws?
History data can include sensitive information. Adhere to data protection policies, restrict access, and retain data only as long as needed for audits or policy enforcement.
Yes, treat history data as potentially sensitive and limit access per policy.
Watch Video
Quick Summary
- Check multiple sources for complete history: device, web, and vendor software.
- Export logs regularly to preserve audit trails.
- Identify anomalies early and adjust policies as needed.
- Secure exports and restrict admin access.