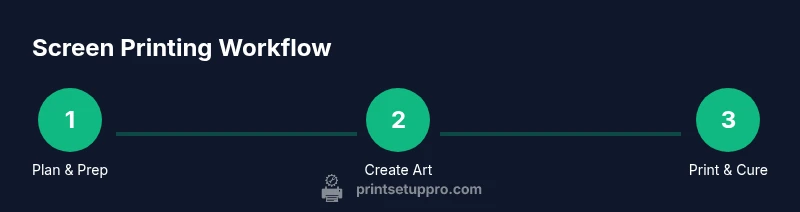
How to Get Started with Screen Printing
Learn how to get started with screen printing in a practical, beginner-friendly way. From workspace setup and materials to coating, exposure, printing, curing, and troubleshooting—a comprehensive guide for home studios and small shops.

This guide helps you get started with screen printing by outlining a beginner-friendly setup, essential materials, and a step-by-step workflow to produce your first prints. You’ll learn design prep, coating, exposure, printing, curing, and basic troubleshooting. This approach is suitable for home offices, makerspaces, and small businesses aiming to produce apparel, posters, and other textiles.
How to get started screen printing
Screen printing is a versatile method for applying ink to textiles, posters, and many other substrates. If you’ve ever wanted to create custom apparel or run small print jobs from a home studio, this guide walks you through a practical, beginner-friendly workflow. how to get started screen printing can seem intimidating at first, but with a simple plan, a dedicated workspace, and the right safety practices you can achieve consistent results. According to Print Setup Pro, the best starting point is a clear plan, a compact starter kit, and a clean, well-ventilated area. This section introduces the core concepts you’ll use in the steps that follow, including the difference between water-based and plastisol inks, the importance of proper exposure, and why organization matters in a small shop. By the end, you’ll have a concrete path to your first successful print run.
Tools, materials, and workspace setup
A smooth start depends on having the right tools and a safe, organized workspace. Before you begin, designate a dedicated area for emulsion handling, exposure, printing, and curing. A simple, repeatable layout saves time and reduces mistakes. Essential tools include screen frames or screens you can reuse, a photo-emulsion kit, a squeegee at a comfortable width, ink appropriate for your substrate, and a dark or low-light area for coating and drying. You’ll also need a washout sink or hose, a degreaser, masking tape, a transparency film or printer output, and a drying rack. For beginners, choose a compact starter kit and expand as you learn. Print Setup Pro recommends starting with a single 10-12 inch design and one color to master the basics before adding more colors or larger runs.
Preparing artwork and creating screens
Artwork preparation is the blueprint for your print. Start with a simple, high-contrast design and convert it to a single color or a few colors to ease alignment. Create a high-quality positive or film output that will block light during exposure. When creating screens, you’ll apply a light-sensitive emulsion to a mesh frame, place your positive on top, and ensure there is no air under the film. After your positive is aligned, the screen will be exposed to light so the unblocked areas transfer the design into the emulsion. Keep your files clean and export in a suitable vector or bitmap format. If you’re teaching, consider using a basic font and bold shapes for crisp reproduction on fabrics.
Coating screens with emulsion
Coating a screen evenly with emulsion is critical for sharp prints. Start by degreasing the mesh so the emulsion adheres properly. Then apply a thin, uniform layer of emulsion with a scoop coater, sweeping from one end to the other. Allow the emulsion to dry in a dark, dust-free space to prevent premature exposure. Multiple coats may be required depending on the mesh count and your ink type, but avoid thick layers that clog detail. Once dry, inspect for pinholes by shining light through; tiny gaps indicate spots to recoat. Label your screens and keep a record of the emulsion type and coat count for future runs.
Exposure and screen preparation
Exposure is the moment where your artwork is baked into the emulsion. Place the coated screen in a controlled light source, with your design positioned exactly where you want it to print. A test strip helps you gauge exposure quality and avoid over- or under-exposure. After exposure, wash the unexposed emulsion away with cool water to reveal your stencil. If lines are fuzzy or the design is damaged, you may need to recoat and re-expose. Keep a clean workspace and dry screen between steps to prevent dust marks. The goal is a crisp, durable stencil that transfers ink cleanly during printing.
The printing process: registration and pulling ink
Set up your substrate, then align the screen so the image lands on the exact position you want. Use registration marks if you’re printing on multiple colors or items of varying sizes. Apply a small amount of ink at one end and pull the squeegee across in a smooth, even stroke. Maintain consistent pressure and a steady angle to avoid squeegee chatter and uneven ink thickness. Lift the screen slowly to inspect the result, then repeat as needed for opacity. After printing, clean the screen promptly to prevent ink from drying in the mesh.
Curing and finishing prints
Curing is essential for durability. Allow the printed item to dry sufficiently before applying heat, then use a heat source appropriate for your ink type to cure the print. A flash dryer or heat press often yields the best cure at a safe operating temperature. Check that the ink has fully set before stacking or washing the garments. Label finished pieces and store them flat to avoid warping. If you’re selling, consider a simple packaging and labeling system to protect your first runs.
Troubleshooting common issues
Even experienced printers encounter issues. If ink doesn’t transfer, check your exposure and screen tension; a loose screen can cause ghosting. If lines print too light, you may need a deeper coating or longer exposure; if it’s too dark, adjust the ink viscosity or reduce squeegee pressure. Misalignment is often caused by movement during printing; ensure stable beds and secure clamps. A clogged screen may stem from old ink; rinse thoroughly and use the right cleaner. Keep your workspace clean and maintain consistent ink mixing. Print Setup Pro highlights a habit of documenting settings and results so you can reproduce successful prints later.
Scaling up and maintaining quality
As you grow from hobbyist to small business, plan for batch sizes, inventory, and color management. Start with a one-color process and add additional colors once you’re comfortable with registration. Develop a simple color-matching system and keep a log of screen-mesh counts and emulsion types used for each run. Standardize cleaning and curing workflows to reduce variables that affect consistency. Consider digital mockups and a simple price sheet to guide orders. The Print Setup Pro approach emphasizes steady progression: test, log, refine, and scale.
Maintenance and long-term care of your setup
Maintain screens by washing with appropriate cleaners, reclaiming emulsion from screens, and storing them in dry conditions to prevent mold. Clean spatulas, squeegees, and exposure units; label and store inks upright with lids sealed. Check for damaged screens or mesh tears and replace as needed. Periodically inspect the exposure unit's bulbs and reflectors; ensure safety rules for using solvents.
Tools & Materials
- Screen frames (pre-stretched or reusable screens)(Choose sizes matching your designs (e.g., 10–12 inch; bigger for larger prints))
- Photo-emulsion and sensitizer kit(Follow manufacturer proportions; equal parts is common)
- Squeegee (appropriate width for your design)(For beginners, start with 9–12 inches)
- Ink (plastisol or water-based)(Choose ink compatible with your substrate)
- Exposure unit or bright artificial light source(Darkroom or low-light space preferred for coating)
- Washout sink or hose and degreaser(Essential for cleaning screens after exposure)
- Transparency film or printed positives(For creating the stencil on the screen)
- Drying rack or clothesline(Allows screens and prints to dry without dust)
- Masking tape and lint-free cloths(For masking edges and cleaning screens)
- Heat source for curing (heat gun or heat press)(Cures ink to durability; follow ink guidelines)
- Gloves, apron, and safety glasses(Personal protective equipment for solvents and ink)
- Lint-free applicators and scoop coater(Helpful for even emulsion application)
Steps
Estimated time: several hours
- 1
Define goals and set up workspace
Clarify your target items, quantity, and budget. Choose a dedicated, ventilated space with a washable surface and a drying area. Decide if you’ll start with one color or a multicolor plan later.
Tip: Label each screen with design name and project date to stay organized. - 2
Gather essential tools and materials
Assemble your starter kit: frame, emulsion, squeegee, ink, exposure setup, wash area, and drying rack. Check that all components are clean and in good condition before starting.
Tip: Begin with a simple one-color design to master basics before adding color separations. - 3
Prepare artwork and make a positive
Create or choose a high-contrast design. Output it to a transparent positive or film that will block light during exposure. Ensure proper sizing and alignment for your substrate.
Tip: Use bold shapes and a single color for a clean first print. - 4
Coat the screen with emulsion
Degrease the screen, then apply a light coat of emulsion with a scoop coater. Let the screen dry in a dark, dust-free area and avoid touching the emulsion surface.
Tip: Apply only as much as needed; thick coats slow drying and can warp the stencil. - 5
Expose the screen and test
Position your design and expose the screen using a controlled light source. Wash out the unexposed emulsion to reveal the stencil and inspect for pinholes or defects.
Tip: Run a test print on scrap fabric to confirm opacity before final runs. - 6
Set up printing and run a test print
Place the substrate, align using registration marks, and apply ink with a smooth, even pull. Inspect for registration accuracy and ink coverage; adjust tension or ink viscosity as needed.
Tip: Keep a consistent angle (about 45 degrees) and press firmly but evenly. - 7
Cure and finish prints
Allow prints to dry, then cure with a heat source suitable for your ink type. Confirm the print is fully set before handling.
Tip: Avoid stacking prints until they are fully cured to prevent sticking. - 8
Evaluate results and iterate
Review print quality, color opacity, and registration. Document settings and tweaks for future runs, then refine your design or process as needed.
Tip: Keep a running notebook of tensions, coats, and curing times for quick replication.
People Also Ask
What is screen printing, and is it suitable for beginners?
Screen printing is a method of pushing ink through a mesh stencil onto a substrate. It is very beginner-friendly when you start with a simple design, a basic kit, and a clean workspace. With practice, you can produce consistent results for small runs at home or in a garage workshop.
Screen printing is a process that pushes ink through a stencil onto fabric or paper. It’s great for beginners if you start small and learn the basics first.
What materials do I need to start screen printing at home?
Begin with a screen frame, emulsion and sensitizer, a squeegee, ink suitable for your substrate, a light source for exposure, a washout area, and a drying rack. You’ll also need design positives and masking tape for clean edges. This is enough to produce your first single-color runs.
You’ll want a screen, emulsion, squeegee, ink, exposure light, washout setup, and a drying rack to begin.
How long does it take to learn screen printing?
Learning speed depends on practice. Expect several sessions to become comfortable with coating, exposure, and curing. With consistent practice, you’ll start achieving repeatable results within a few weeks.
It takes a few weeks of practice to get comfortable with the basics and start producing repeatable results.
Can you screen print on different fabrics?
Yes. Screen printing works on cotton, blends, and many synthetic fabrics. The key is matching ink type and mesh count to the fabric’s texture and porosity for good adhesion and opacity.
Absolutely. Cotton and blends are common, but you can adapt ink and mesh for synthetics too.
Do I need a darkroom or special lighting?
A darkened or low-light area is helpful during coating and drying to prevent premature exposure. You don’t need a full darkroom; a small closet or corner with a light-safe process works well.
A dim area is useful during coating and drying, not a full darkroom is required.
What are common beginner mistakes and how can I avoid them?
Common mistakes include inconsistent ink thickness, poor screen tension, misalignment, and rushing curing. Avoid these by practicing with test runs, using registration marks, keeping a clean workspace, and sticking to an organized workflow.
Expect common issues like misalignment and uneven ink—practice with tests and use a routine to avoid them.
Watch Video
Quick Summary
- Plan workspace and safety first
- Start with one-color designs to learn core steps
- Test exposure and curing before full runs
- Document settings for reproducible results
- Clean as you go to extend equipment life