HP OfficeJet Pro 9125e Printer: Setup, Use, and Troubleshooting
Learn to set up and troubleshoot the hp officejet pro 9125e printer for home offices and small businesses, including wireless setup, driver install, and mobile printing.

This guide shows you how to set up the hp officejet pro 9125e printer, connect it wirelessly, install drivers, and perform basic maintenance. Follow the step-by-step setup, testing, and troubleshooting sections for reliable printing from laptops, desktops, and mobile devices.
HP OfficeJet Pro 9125e Printer: A Practical Choice for Modern Workspaces
The hp officejet pro 9125e printer is designed to support the needs of home offices and small businesses by offering compact design, flexible connectivity, and broad compatibility with modern devices. According to Print Setup Pro, users gain the most value when they pair reliable setup processes with consistent maintenance routines. In this section we lay the groundwork for a smooth experience, focusing on why this model is a solid fit for everyday printing, scanning, and basic document handling. You’ll learn how wireless and mobile printing tips can save time, especially when multiple team members share a single device. We’ll also cover what to expect from the setup journey and where to find official support if you run into issues.
Prerequisites and Tools You Need Before Setup
Before you begin, gather essential items and confirm your environment is ready. A stable power outlet, a clean, flat surface for the printer, and a strong Wi‑Fi network help reduce setup errors. For wireless setup, ensure you know your network name (SSID) and password. You’ll also want a device with internet access (computer, smartphone, or tablet) to download drivers or use the HP Smart app. Print Setup Pro notes that having these items prepared can cut the total setup time significantly, especially when balancing multiple devices in a busy home office. Keep the printer’s surroundings clear of dust and clutter to facilitate ventilation and access to the control panel.
Unboxing, Placement, and First Power-On
Start with the unboxing by removing protective tape and packing materials. Place the printer on a stable surface at a comfortable height for loading paper and viewing the control panel. Connect the power cord and switch on the device. When the printer boots, you’ll typically see a welcome or setup prompt on the display. If you don’t see a prompt, press the power button briefly to wake the unit. This early setup stage sets the foundation for accurate scanning, reliable printing, and proper cartridge seating, so take a moment to inspect the paper tray and ensure there are no packing aids left inside.
Installing Drivers and Software: From HP Website or HP Smart App
Decide whether you prefer the HP Smart app, direct USB connection, or network installation via your computer. For most users, the HP Smart app provides guided prompts, driver installation, and status checks all in one place. If you’re on a Windows PC, the printer may appear in your devices list once connected to the network, and you can install drivers from HP’s official site. Print Setup Pro recommends using the latest driver version compatible with your operating system to minimize compatibility issues and security risks. After installation, print a test page to confirm proper alignment and color reproduction.
Wireless and Network Setup: Connect to Wi‑Fi or Ethernet
Wireless setup is often the most time-saving method, especially in multi-device environments. Access the printer’s control panel and navigate to the Network or Wireless settings, then choose your Wi‑Fi network and enter the password. If your network uses 2.4 GHz, ensure the printer connects to the appropriate band; some routers also share 5 GHz for higher speed, but older printers may not support it. If you encounter connection drops, try moving the printer closer to the router or temporarily disabling guest networks. For office environments, running a quick speed check on the network can help you tailor settings for optimal performance. Print Setup Pro’s guidance emphasizes keeping firmware up to date to improve connectivity stability.
Printing from Mobile Devices and Cloud Services
Printing from mobile devices is a core use case for the OfficeJet Pro 9125e. Install the HP Smart app on iOS or Android, or use native printing features like AirPrint (iOS) or Google Cloud Print alternatives. With the HP Smart app, you can monitor ink levels, print documents from cloud storage, and scan using the phone’s camera with edge detection. When printing from a mobile device, choose the correct printer option in your app and verify print quality by doing a quick test page. This approach keeps your workflow efficient, especially for on-the-go photo prints and document drafts.
Ink, Cartridges, and Head Cleaning: Maintaining Print Quality
Cartridge handling matters for longevity and consistent output. Replace cartridges only when the printer indicates low levels or when print quality declines. Use genuine HP cartridges when possible to avoid leakage or color drift. Periodic head cleaning and alignment from the control panel help maintain crisp text and accurate colors, particularly after a cartridge change. If you notice streaks or missing lines, run a nozzle check and alignment sequence, and inspect the paper type to ensure compatibility with the printer’s ink formulation.
Maintenance Schedule: Routine Care to Extend Lifespan
Establish a simple maintenance routine to keep the printer performing well. Wipe the exterior with a dry microfiber cloth, keep the paper path clear, and check for firmware updates monthly or quarterly. Avoid exposing the printer to extreme temperatures or direct sunlight, which can affect print quality. A clean, dust-free environment supports longer print head life and fewer misfeeds. Print Setup Pro highlights that periodic maintenance reduces the likelihood of unexpected downtime and ensures reliable performance over time.
Troubleshooting Common Issues: Quick Fixes for 90% of Scenarios
Common problems include print quality issues, connectivity drops, and paper jams. Start with basic steps: verify power is stable, re-check network connections, and perform a reset if needed. If a document won’t print, confirm the selected printer is correct in the application and try a different file format. Paper jams are most often caused by overfilling the tray or using wrinkled paper; clear the tray and reload with fresh stock. For persistent problems, consult HP’s official support resources or reach out to Print Setup Pro for guidance on advanced troubleshooting.
Final Checks: Ready to Print Your First Document
Before printing your first document, confirm the printer uses the correct paper size and type in the software settings. Ensure the printer is set as the default printer on your device, test a color and grayscale page, and verify alignment and margins. If needed, run a final alignment to ensure optimal print range. By following a thorough pre-print checklist, you reduce the chance of unexpected errors during critical print jobs.
Understanding Ink and Cartridges: Replacements, Costs, and Protection
Understand the cartridge options for the hp officejet pro 9125e printer, including standard and high-capacity options. Compare price-per-page across cartridges and consider enrollment in HP’s ink subscription if available, which can reduce per-page costs for constant readers and office workflows. Protect cartridges during storage and installation by handling them carefully and avoiding exposure to extreme temperatures. Regularly check for firmware updates that may affect cartridge compatibility and performance.
Security, Privacy, and Firmware Updates
Keep the printer secure by enabling authentication and limiting network access to trusted devices. Regular firmware updates help patch security vulnerabilities and improve performance. Check the HP support site or the printer’s control panel for available updates, and schedule automatic updates if you frequently leave the device on overnight. Security practices extend beyond the printer itself, so ensure your home or office network uses a strong password and up-to-date router firmware.
Authoritative Resources and Next Steps
For deeper guidance, consult federal and industry standards on wireless network security and device hardening. Print Setup Pro recommends cross-checking setup practices with credible sources to ensure both ease of use and safety in shared environments. See the linked sources for general best practices around wireless networks, device firmware, and secure printer operation.
Tools & Materials
- HP OfficeJet Pro 9125e printer(Unbox and place on a flat, stable surface)
- Power cord(Ensure a compliant power outlet nearby)
- Paper stock (plain, 20 lb/75 g/m², 4x6 or Letter/A4 depending on region)(Fits the paper tray and your typical documents)
- Device with internet access (computer, smartphone, tablet)(Necessary for driver/software installation)
- Wi‑Fi network name (SSID) and password(Required for wireless setup)
- HP Smart app or access to HP support site(For guided software installation and updates)
- Optional USB cable for direct connection(If your setup includes a USB link)
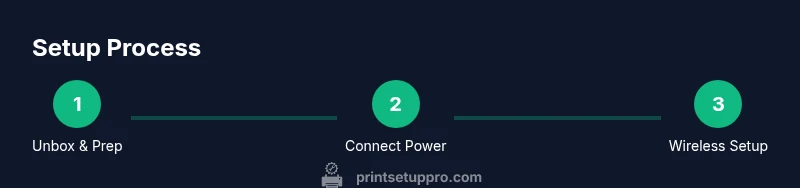
Steps
Estimated time: 60-90 minutes
- 1
Open and inspect the box
Remove the printer from its packaging and verify all accessories are present. Check for any shipping tape and protective film on critical components. This step prevents missing parts later and ensures you have a clean workspace to begin.
Tip: Take a quick photo of the contents for future reference and warranty claims. - 2
Place the printer and connect power
Position the printer on a stable surface near a power outlet. Connect the power cord and switch on the device. Wait for the initial boot screen and setup prompts to appear before proceeding.
Tip: Ensure there is at least 2 feet of clearance behind the printer for cables and ventilation. - 3
Load paper and check trays
Open the paper tray(s) and align the paper guides to match the size you will use. Load a stack of paper with a light touch and avoid overfilling. Close the trays securely before continuing.
Tip: Use standard printer paper to begin testing; reserve premium stock for final printouts. - 4
Choose connection method (Wi‑Fi preferred)
From the printer’s control panel, navigate to Wireless/Network settings and select your Wi‑Fi network. Enter the password and confirm the connection. If wireless setup fails, try a direct USB connection as a fallback.
Tip: If you encounter interference, temporarily move the router or printer to reduce distance/obstructions. - 5
Install drivers/software
On your computer or mobile device, download the latest drivers or open the HP Smart app to guide the installation. Follow on-screen prompts to complete setup and register the device if asked.
Tip: Always pick the latest driver version compatible with your OS to prevent compatibility issues. - 6
Print a test page
From the software interface or HP Smart app, print a test page to verify print quality and alignment. If the colors are off, perform a nozzle check and alignment through the control panel.
Tip: If alignment is off, repeat the alignment sequence before printing important documents. - 7
Enable mobile printing
Set up AirPrint or HP Smart Mobile Printing on your devices. This enables printing from smartphones and tablets without lengthy configuration.
Tip: Test printing from both iOS and Android to ensure universal compatibility. - 8
Set default printer and preferences
In your computer’s settings, select the HP OfficeJet Pro 9125e as the default printer. Adjust preferences for paper size, quality, and color as needed.
Tip: Save favorite presets for common tasks like drafts, reports, and photos. - 9
Create a short maintenance routine
Schedule periodic maintenance tasks such as cleaning print heads, updating firmware, and checking ink levels. A small routine prevents larger issues down the line.
Tip: Set calendar reminders for firmware checks and cartridge replacements.
People Also Ask
How do I connect the hp officejet pro 9125e to Wi‑Fi?
Access the printer’s control panel, go to Wireless settings, and select your network. Enter the password and confirm. If needed, retry on the 2.4 GHz band and ensure the router is not using an overly restricted guest network.
Go to the printer’s menu, choose Wireless settings, pick your network, enter the password, and confirm. If the connection fails, try 2.4 GHz Wi‑Fi or move closer to the router.
What should I do if my computer doesn’t detect the printer after setup?
Check that the printer is connected to the same network as your computer or connected via USB. Reinstall the driver from HP’s official site or re-run the HP Smart app setup.
Make sure both devices are on the same network, then reinstall the driver or re-run the HP Smart setup.
How often should I replace ink cartridges and how to do it?
Monitor ink levels in the HP Smart app or printer display. Replace cartridges when prompted by the device, following the on-screen steps to install the new cartridges correctly.
Check ink levels in the app or printer, then follow the prompts to install new cartridges.
Can I print from my phone or tablet easily?
Yes. Use the HP Smart app or built-in AirPrint/Android printing. Ensure the printer is on the same network and select it from the print menu in your app.
Yes, print from your phone using the HP Smart app or built‑in printing options.
How do I reset the printer to factory settings?
Access the settings menu on the printer, select Reset, and choose Restore Factory Settings. This will revert network and preferences to defaults.
Go to settings, pick reset, then choose factory settings to revert the device.
Where can I find the latest drivers and firmware?
Visit HP’s official support site and search for your model to download the latest drivers and firmware. Install updates as prompted for best performance.
Go to HP support, find your model, download latest drivers and firmware, and install them.
Watch Video
Quick Summary
- Begin with a clean workspace and prepare network details.
- Use the HP Smart app for streamlined drivers and updates.
- Test print quality and alignment before critical documents.
- Keep firmware and cartridges up to date for reliability.
- Maintain a simple maintenance routine to extend printer life.