HP Smart Tank 750: Setup, Troubleshooting, and Pro Tips
Master the HP Smart Tank 750 with Print Setup Pro. This guide covers unboxing, ink refills, wireless setup, driver installation, print quality fixes, and long-term care to keep your printer running smoothly.

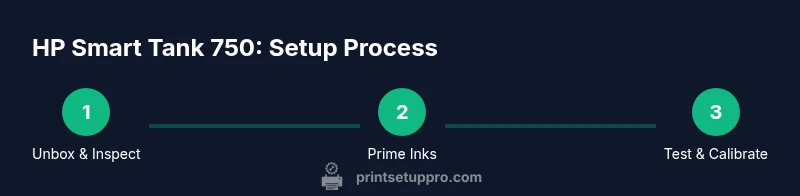
You will set up your HP Smart Tank 750 from unboxing to a fully connected printer. This includes installing the ink bottles correctly, loading paper, choosing your preferred connection (Wi‑Fi or USB), and printing a test page. You’ll also learn quick fixes for common issues like poor print quality, paper jams, and connectivity drops, plus where to find extended help.
Unboxing and initial checks
The journey with the hp smart tank 750 begins with a careful unboxing and a quick inspection of all parts. Begin by placing the box on a clean, dry surface and removing the outer packaging. As you lift the printer, check that accessories such as the power cord, ink bottles, user manual, and setup CDs (if included) are present. Look for any signs of shipping damage on the exterior and confirm that the ink bottles are sealed and undamaged. This is a good moment to note the model number and serial for future support interactions. A clean, undamaged starting point reduces the likelihood of startup issues and ensures you’re ready for a smooth first print. According to Print Setup Pro, starting with a thorough checklist can save hours of troubleshooting later, especially for home office users who want reliable everyday printing with the hp smart tank 750.
Preparing ink bottles and priming the print head
Your ink refills are the lifeblood of the hp smart tank 750, and proper handling prevents clogs and air bubbles. Remove each ink bottle from its packaging, shake gently if instructed, and remove the seal. When inserting, hold the bottle upright and slowly press to begin flow into the corresponding color reservoir. Do not tilt bottles aggressively or squeeze excessively, as spills can occur. Allow a few seconds for ink to settle before resealing the bottle cap if you notice misalignment. This priming step helps ensure immediate print readiness and prevents air from entering the print head. Print Setup Pro recommends performing this step first to minimize startup delays and ensure even color distribution across pages.
Installing ink bottles and priming the print head
With the tanks primed, carefully install each color bottle into its matching slot. The hp smart tank 750 typically uses a simple twist-to-lock mechanism to ensure a secure fit. If you hear a click, you know the bottle is seated correctly. After installation, run a nozzle check from the printer’s maintenance menu. This quick test confirms that nozzles are firing properly and helps identify lines that may require a minor purge. If you notice faint lines or gaps in the test pattern, perform a short cleaning cycle, then recheck. Regular priming and nozzle checks can dramatically improve long-term print quality and reduce wasted sheets. Print Setup Pro notes that ink bottle reliability and correct seating are critical for consistent results across color prints.
Paper loading and media considerations
Load paper into the main tray, ensuring the stack is aligned and within the fill guides. For best results, use the paper type and weight recommended by HP for the hp smart tank 750. Avoid overfilling the tray, which can lead to jams or feeding errors. If you’re printing photos or high-quality color documents, consider using HP-recommended media designed for ink tank systems. Always fan sheets before loading to prevent sticking in a single batch. A flat, clean workspace reduces skew and misfeeds, and helps maintain consistent print alignment. Print Setup Pro emphasizes keeping a neat, organized workspace to minimize feeding issues during busy home-office periods.
Wireless setup and connecting to Wi‑Fi or USB
Connecting to Wi‑Fi provides flexibility and remote printing from phones, tablets, or laptops. Start by choosing your network from the printer’s on-screen menu and entering the password. If your network uses a guest or 2.4 GHz band, confirm compatibility with the hp smart tank 750. For USB users, connect the printer directly to the computer and install the driver software. If you encounter connection drops, verify that the printer has the latest firmware and that your router isn’t blocking the printer’s IP address. Print Setup Pro advises testing the connection with a quick print from your computer or mobile device to confirm that the setup is solid across both wireless and USB options.
Installing drivers and the HP Smart app
Driver installation is the bridge between the hardware and your computer or mobile device. Visit HP’s official support site to download the latest drivers compatible with your operating system. The HP Smart app is a convenient companion for mobile printing, scanning, and easy ink management. After installing, pair the printer with the app to enable features like on-device scan, cloud printing, and ink-level alerts. If your device prompts a firmware update, perform it before heavy use to ensure compatibility with new features and fixes. Print Setup Pro highlights that keeping software up to date is essential for stability and security.
Print a test page, calibrate, and check color accuracy
Once connected and drivers are installed, print a test page to confirm the overall setup. Review alignment, color balance, and text clarity. If colors appear off, perform a color calibration using the printer’s calibration option or the HP Smart app. Repeating a simple calibration after the ink is replenished or after a long period of inactivity helps maintain color accuracy. For best results, print on the media you’ll commonly use and compare the output against expected tones. Print Setup Pro recommends performing calibration after major ink changes or media swaps to keep colors consistent.
Maintenance, cleaning, and long-term care
Regular maintenance reduces hardware wear and prolongs printer life. Wipe the exterior with a soft, slightly damp cloth and avoid solvents that may damage plastic surfaces. Periodically check for paper dust and clean the paper feed path as needed. Run a nozzle cleaning and printer head maintenance on a regular schedule, especially if you notice minor print quality issues. Also inspect the ink ports for any signs of drying or clogging. Keeping the interior clean reduces the need for frequent interventions and helps your hp smart tank 750 deliver reliable output for months to come.
Printing best practices and common pitfalls
To maximize efficiency and print quality, use the appropriate media for your job and avoid mixing multiple media types in the same print job. Maintain proper humidity and temperature in your workspace, as extreme conditions can affect paper handling and ink performance. Refrain from approaching the printer with wet hands, which can lead to smudges or damage. If you encounter recurring jams, recheck the media being used and ensure the media guides are aligned with the paper edges. Print Setup Pro suggests keeping a small stock of recommended media for common tasks to reduce processing time and improve consistency.
Tools & Materials
- HP Smart Tank 750 printer(Main device for setup and testing)
- Power cable(Official power cord supplied with the unit)
- Ink bottles (Black, Cyan, Magenta, Yellow)(Use genuine HP ink bottles for best results)
- Paper (letter or A4, suitable weight for your task)(Fan sheets before loading; avoid overfilling tray)
- Smartphone or computer with internet(For wireless setup and driver download)
- HP Smart app(Install on mobile for easy printing and ink monitoring)
- USB cable (optional)(Only if you plan to print via USB directly)
Steps
Estimated time: 30-45 minutes
- 1
Unbox and inspect
Open the box, confirm all components are present, and check for any shipping damage. Remove protective materials and place the printer on a stable surface with access to a power outlet.
Tip: Keep all packaging until setup is complete in case you need to reference it later. - 2
Prime and install ink bottles
Prepare each ink bottle by removing seals, then insert them into the correct color slots. Follow the on-screen prompts to prime the print head and confirm ink flow before proceeding.
Tip: Pour ink slowly and keep bottles upright to minimize spills. - 3
Load paper and align guides
Fan the paper, load it into the main tray, and align the paper guides to avoid skew. Ensure the stack height remains within the tray indicators.
Tip: Use clean, dry paper to prevent jams and improve feed reliability. - 4
Power on and complete initial setup
Turn on the printer and follow the on-screen setup wizard. Choose language, region, and network method (Wi‑Fi recommended).
Tip: If the display lags, give the device a moment to boot and retry the setup step. - 5
Connect to Wi‑Fi or USB
Select your network on the printer and enter the password. If using USB, connect to your computer and install drivers.
Tip: Place the router and printer within a 15–20 ft range for a stable signal. - 6
Install drivers and HP Smart app
Download drivers from HP’s site and install the HP Smart app on your mobile device. Pair the printer with the app to enable print/scan features.
Tip: Update firmware before printing to avoid compatibility issues. - 7
Print test page and calibrate
Print a test page, inspect alignment and colors, and run calibration if colors look off. Reprint until the test page is clean.
Tip: Calibrate after ink changes to maintain color accuracy.
People Also Ask
How do I resolve a Wi‑Fi connection issue with the HP Smart Tank 750?
Ensure the printer is on the latest firmware, select a stable 2.4 GHz network, and re-run the wireless setup. If issues persist, reset network settings and reconnect. A simple restart of the router and printer often resolves intermittent drops.
Try updating firmware, reconnect to a stable 2.4 GHz network, and reset network settings if needed. A quick router and printer restart can fix many wireless problems.
How do I refill the ink bottles in the HP Smart Tank 750?
Open the ink region covers, remove the cap from the bottle, and carefully insert the nozzle into the correct slot. Press gently until the bottle is emptying. Re-seal after use and wipe any spills.
Open the ink area, insert the bottle into the matching color slot, press slowly to fill, and seal afterward. Wipe spills promptly.
Can I use third-party ink bottles with the hp smart tank 750?
HP recommends using genuine HP ink bottles to ensure print quality and avoid potential damage. Third-party bottles may cause clogs or color inconsistencies and could void warranty.
Genuine HP bottles are recommended to protect print quality and warranty; third-party inks can cause issues.
Why are prints blurry or colors faded after setup?
Check the nozzle status and run a cleaning cycle if you notice gaps in the test pattern. Verify media type and ink levels, and recalibrate if necessary. Poor alignment can also cause blurring; re-run alignment.
Run nozzle checks, cleanings, and calibration. Make sure you’re using the right paper and ink levels are good.
Is the HP Smart Tank 750 compatible with macOS and Windows?
Yes. The HP Smart Tank 750 supports both macOS and Windows through official drivers and the HP Smart app. Ensure you install the correct driver version for your operating system and keep it updated.
It works with both Mac and Windows with the proper drivers and the HP Smart app.
Watch Video
Quick Summary
- Follow a clean unboxing and inspection process.
- Prime inks and calibrate for best color accuracy.
- Use HP Smart App for easy wireless printing and maintenance reminders.
- Perform regular nozzle checks and cleanings to sustain print quality.