iu printer Setup and Troubleshooting Guide
Master iu printer setup and troubleshooting with Print Setup Pro. This guide covers drivers, USB and network connections, test printing, calibration, and routine maintenance to keep your printer reliable.

By the end of this guide you'll be able to set up and troubleshoot your iu printer, from driver installation to network sharing and basic maintenance. You'll need a computer, USB or Wi‑Fi access, and a printer power source. According to Print Setup Pro, a clean install and correct network settings reduce setup time and future jams.
What is an iu printer and why setup matters
An iu printer describes a family of versatile home-office devices commonly used for document and photo printing, often with wireless networking and basic scanning capabilities. The setup phase is the foundation that determines reliability, print quality, and ongoing maintenance needs. According to Print Setup Pro, proper initial configuration saves time and reduces future jams, which is especially important for frequent users and multi-device environments. In this section, we’ll explore practical considerations, like choosing USB versus wireless connections, selecting the right driver, and understanding calibration basics. The goal is to remove mystery from the process so you can print with confidence across different paper stocks, colors, and workloads. Expect to invest a focused 20–40 minutes initially, then keep a simple maintenance routine to preserve performance over months.
If you’re new to printers or upgrading from an older model, plan for a short learning curve. Recognize the key decision points early: will you print from a single PC via USB, or share the iu printer across a small network? The answers shape driver installation, network settings, and troubleshooting steps you’ll perform later. As you proceed, remember that consistent, documented steps speed up future repairs and reduce downtime when work piles up. This guide emphasizes clear, repeatable actions you can perform even on busy days, and it relies on practical, real‑world tips from the Print Setup Pro team.
blockIdedForSEOOnly":false,
Core setup prerequisites for the iu printer
Before you start the setup, gather a few essentials. You’ll need a computer (Windows or macOS) with internet access, the correct printer driver from the manufacturer’s site, and a power source. A USB or network cable helps during the first configuration, especially if you’re troubleshooting offline. Ensure you have the printer’s model number handy to download the exact driver, and confirm whether you’ll print over USB, Ethernet, or Wi‑Fi. If you plan to share the printer, note the network name (SSID) and password. Print Setup Pro recommends keeping firmware up to date and allowing the printer to complete any initial calibration after power‑up.
Have a quiet workspace with ample desk space for unboxing and setup. If you’re connecting via Wi‑Fi, make sure your router supports the printer’s wireless standards and that you’re on a stable 2.4 GHz or 5 GHz band as appropriate. Keep a small tray of spare consumables (paper, a basic set of replacement cartridges) handy so you can test print quality right away. This upfront preparation helps you avoid mid‑setup delays and reduces back‑and‑forth between devices during driver installation.
blockIdedForSEOOnly":false,
Planning your iu printer installation path
A thoughtful plan reduces setup frictions and future headaches. Decide whether you’ll install via USB for one device or set up over the network for multiple computers. If you’re in a shared environment, plan a static IP address to avoid brittle connections when devices reboot. Consider enabling a simple print queue with basic permissions and creating a dedicated user account for print jobs. This forethought minimizes interruptions during busy times and improves consistency across devices. Print Setup Pro emphasizes documenting your steps for future maintenance.
Create a clear naming convention for the printer (e.g., IU-Printer-Home-Office) so that every user can find and select the correct device. If you anticipate occasional offline periods, enable a fallback printing method (local queue on the computer) to prevent workflow disruption. Also decide whether you’ll print color or grayscale by default and tailor driver presets to your most common tasks. A well‑documented plan saves you time when you expand to more devices or switch to a new stock.
Tip: keep a one‑page setup checklist near your workspace, noting driver version, firmware level, and the chosen network protocol. This keeps your future self from re‑solving the same questions each time you add a new computer.
blockIdedForSEOOnly":false,
Connecting the iu printer: USB, Wi-Fi, and network shares
Start with a simple USB connection to confirm the unit powers on and prints a basic page. If you’re using Wi‑Fi, place the printer within good signal range and connect it to your router using the printer’s control panel or software. For network printing, enable sharing on the host computer and install the driver on all client devices. If the printer shows an error, check cable integrity and re‑run the setup wizard. Keep the firmware updated to ensure compatibility with new driver features.
Avoid congestion on wireless channels by reducing nearby interference from other devices such as microwaves or cordless phones. If your network requires a captive portal or guest network, the iu printer might require special authentication steps; consult your router’s documentation for guest network support. When possible, connect critical printers to a wired Ethernet port for maximum reliability, then enable wireless printing for mobile devices to stay flexible.
Print Setup Pro notes that a stable network foundation prevents common printing hiccups and improves job reliability across all connected devices.
blockIdedForSEOOnly":false,
Driver installation and software setup
Install the latest driver from the manufacturer’s website, following the on‑screen steps. Choose the correct port (USB, wireless, or network) and align the printer name with your device for easy access. After installation, print a test page to verify color accuracy and alignment. If you see alignment issues, run the printer’s built‑in calibration tools and recheck media type settings in the driver. Print Setup Pro notes that consistent driver versions across devices reduce conflicts.
During setup, consider enabling automatic updates for both the driver and firmware (if available) to protect against known issues and improve compatibility with new operating system updates. If you encounter driver conflicts with other devices, remove older print drivers and restart the system to force a clean state. Keep a copy of your preferred driver version in a labeled folder for quick rollback if needed.
Tip: document the exact driver version and installation path, so you can recreate the setup later during a device refresh or a system reinstall.
blockIdedForSEOOnly":false,
Network settings, IP addressing, and sharing tips
If you’re printing over a network, assign a static IP to avoid address changes after router reboots. Use the printer’s embedded web server to confirm configuration and enable SNMP for remote monitoring if needed. On Windows, add the printer through Settings > Devices > Printers and Scanners; on macOS, use System Preferences > Printers & Scanners. For mobile printing, enable printer sharing from your router or use the vendor app. Regularly check for firmware updates to maintain security and performance.
To minimize IP conflicts, reserve a unique IP in your router’s DHCP settings and document it with the printer’s MAC address. If you’re in a business setting, configure user permissions to limit who can print large jobs that could overwhelm the queue. When sharing over SMB/Bonjour, ensure the correct protocol is enabled on both the client and the printer to avoid cross‑platform issues.
Print Setup Pro also recommends testing after any network change to confirm that all devices can discover and reach the iu printer reliably.
blockIdedForSEOOnly":false,
Maintenance, media handling, and print quality optimization
Routine maintenance extends the life of your iu printer. Clean the print head and exterior with manufacturer‑approved products, remove dust from paper trays, and replace cartridges only with compatible ones. Use the recommended paper type and finish for best results, and adjust print settings for each media size. If banding or color drift occurs, re‑run calibration and verify that you’re using the correct driver profile. Print Setup Pro reminds readers that consistent maintenance prevents quality degradation over time.
Develop a simple calendar for cleaning cycles, including a quarterly head cleaning and monthly light maintenance of the feed rollers. Store consumables in a cool, dry place and rotate stock to avoid stale ink or toner. When printing photos or graphics, consider color management workflows that align with your monitor’s calibration for predictable color output.
Pro tip: keep a small calibration kit (color targets, sample sheets) on hand so you can quickly verify calibration accuracy after major changes like firmware updates or stock changes.
blockIdedForSEOOnly":false,
Common pitfalls and quick troubleshooting tips
Avoid using counterfeit consumables; they can void warranties and harm print quality. Always check cables and power connections before diving into software changes. If you encounter a ‘printer offline’ message, restart the printer and re‑add it to the system. For persistent issues, consult the manufacturer’s support page and verify that your driver is current. With patience and methodical steps, you’ll resolve most iu printer problems quickly.
If print quality suddenly worsens after a software update, revert to the previous driver version and re‑calibrate. When changing media types, always reset the printer profile to match the new stock. If the word spacing or margins are off, re‑check the page setup in the driver and re‑run a test print to confirm accuracy.
Print Setup Pro emphasizes documenting every change so you can revert quickly if something doesn’t work as expected.
blockIdedForSEOOnly":false,
Final preprint checklist
Before you print, confirm the basics: paper loaded correctly, right paper type selected, print queue is active, and the printer shows ready. Run a test page and inspect alignment, color accuracy, and speed. Document any settings changes for future reference. This final check helps ensure predictable results and saves time during busy periods.
A good preprint checklist includes verifying tray settings, ensuring the correct paper size, and confirming that color profiles are calibrated for the stock. If your iu printer supports mobile printing, test a small job from a phone or tablet as a last step to verify cross‑device reliability. Keeping a short log of test results helps you catch drift before it affects larger print jobs.
blockIdedForSEOOnly":false}
Tools & Materials
- Printer power cord(Plug into a grounded outlet and verify the outlet is working before turning on the printer.)
- USB cable(Use a USB‑A to USB‑B or USB‑C cable as appropriate for the model.)
- Computer with internet access(Windows or macOS; updated OS helps avoid driver issues.)
- Printer driver/software from manufacturer(Download the exact driver for your iu printer model from the official site.)
- Ethernet cable or router access (for network setup)(Commonly optional if you’re using USB; essential for network sharing.)
- Paper stock for testing(Blank, standard, and a specialty stock if you plan specific jobs.)
- Static IP plan or router config info(Helpful for stable network printing and multi‑device setups.)
- Calibration targets or color targets(Use for color accuracy checks during maintenance.)
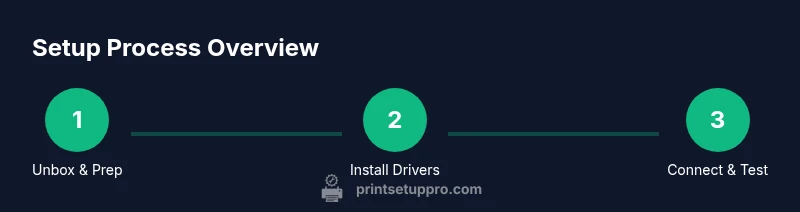
Steps
Estimated time: 30-60 minutes
- 1
Unbox and verify hardware
Unbox the iu printer and verify that all parts are present (power cord, consumables, user manual). Check for any shipping damage and remove protective tapes. This first check prevents wasted time later when components are missing.
Tip: Take photos of the unboxing for future reference. - 2
Power on and perform initial setup
Connect the printer to a power outlet and turn it on. If the device prompts for initial calibration, allow it to complete without interruption. This step ensures the internal alignment starts from a clean baseline.
Tip: Let the printer complete its first calibration before making any print attempts. - 3
Install the driver on your computer
Download the correct driver from the manufacturer’s site and install it. Choose USB if you plan a direct connection, otherwise select the network option. Follow the prompts to finish the installation.
Tip: Restart the computer after installation to ensure the driver loads correctly. - 4
Connect via your chosen method
If USB, connect and wait for the device to appear. If wireless, use the printer’s panel or the driver setup wizard to join the network. For network printing, ensure the device shows as online in the printer list.
Tip: Use a strong Wi‑Fi signal or a wired Ethernet for best reliability. - 5
Add the printer to your devices
On Windows, go to Settings > Devices > Printers and Scanners; on macOS, open System Preferences > Printers & Scanners and add the iu printer. Confirm the default printer setting if you plan to print from multiple apps.
Tip: Set a memorable name like IU-Printer-Home to avoid confusion. - 6
Print a test page
Print a basic test page from the driver’s test utility. Inspect for alignment, margins, and color correctness. If anything looks off, re‑calibrate from the printer menu.
Tip: If colors look off, adjust the color profile in the driver. - 7
Calibrate and finalize settings
Run the printer’s built‑in calibration tools to fine‑tune alignment and color. Save the profile and apply it as the default for routine jobs. This ensures consistency across documents.
Tip: Document the calibration results for future maintenance. - 8
Set up sharing or mobile printing
If sharing, configure a simple print queue and set permissions. For mobile printing, install the vendor app or enable AirPrint/Google Cloud Print as appropriate. Test print from a phone or tablet.
Tip: Limit access to essential users to reduce queues and confusion. - 9
Create a maintenance and update plan
Schedule regular software and firmware checks, clean the printer, and replace consumables when needed. Maintain a small log of changes so you can roll back if issues arise.
Tip: Keep a reminder to review firmware quarterly.
People Also Ask
Why won’t my iu printer connect to Wi-Fi?
Ensure you’re on a supported band and that the correct network name and password are entered. Move the printer closer to the router if the signal is weak, and update the printer firmware if needed. Restarting both router and printer often resolves temporary authentication issues.
Check your Wi‑Fi band, re-enter credentials, and restart devices if needed.
How do I install drivers for the iu printer?
Download the exact driver from the manufacturer’s site, run the installer, choose the correct connection type (USB or network), and complete any on‑screen prompts. Reboot if you encounter conflicts and verify the printer appears in your devices list.
Get the right driver from the official site and install following the prompts.
What should I do if the printer shows offline?
Check that the printer is powered on and connected to the same network as your computer. Re-add the printer in your system settings or run the print‑troubleshooter. If using USB, try a different port and cable.
Make sure it’s online, then re‑add it to your computer.
How can I improve print quality and avoid banding?
Calibrate the printer and use the correct media type in the driver. Check ink or toner levels, and ensure the paper stock matches the settings. Running periodic head cleaning can prevent clogs that cause banding.
Calibrate and adjust media settings for crisp output.
Is it safe to use third‑party ink or cartridges with the iu printer?
Using third‑party consumables can void warranties and may affect print quality. If you choose to use them, test carefully and monitor results, then revert to manufacturer supplies if problems arise.
Third‑party cartridges can affect warranty and quality.
Watch Video
Quick Summary
- Plan your setup with USB or network in mind.
- Install the correct driver first, then test with a page.
- Calibrate after setup to ensure color accuracy.
- Document steps to streamline future maintenance.
- Keep firmware up to date for best stability.