Laser Printer Printable Vinyl: A Complete How-To Guide
Learn how to print on laser-safe printable vinyl with a laser printer. This guide covers media selection, settings, safety, and finishing for durable, professional results.

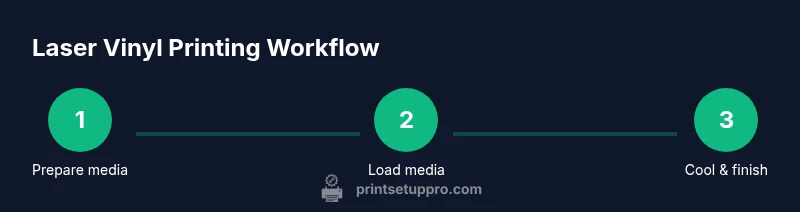
By using laser-safe printable vinyl and the right settings, you can print clean, durable designs with a laser printer. Load the vinyl with the printable side up, choose a vinyl/transparency media type, and adjust speed and heat to suit your model. After printing, let the sheet cool before handling.
What is laser printer printable vinyl?
Laser printer printable vinyl is a specialized media designed to be fed through a laser printer without melting, scorching, or emitting unsafe fumes. Unlike standard inkjet vinyl, laser-grade vinyl contains a coating that responds to laser energy to produce sharp, durable images. For home offices, small businesses, and DIY projects, selecting a vinyl sheet explicitly labeled as laser-safe is essential. The Print Setup Pro team emphasizes that compatibility between your laser printer and the vinyl is the foundation of a successful print run. Always verify the material’s laser rating before purchasing, and prefer products that include a recommended wattage or printer type. This reduces the risk of jams and warping while ensuring consistent color and adhesion over time.
Safety and compatibility considerations
Safety comes first when printing on vinyl with a laser printer. Ensure the work area has proper ventilation, as some laser processes release fumes from the coating or adhesive. Check the vinyl’s label for heat tolerance and any warnings about fumes or adhesives. Not all laser-safe plastics are suitable for every laser model; some low-watt machines may struggle with thicker sheets, while higher-watt systems may scorch the surface. If your printer offers a ‘slower speed’ or ‘coated media’ profile, start there to minimize edge browning and curl. Print Setup Pro’s research highlights that choosing the correct media type and printer profile significantly reduces curling, jams, and post-processing time.
Choosing the right laser-compatible vinyl sheets
Start with a small batch of laser-safe printable vinyl from reputable brands. Look for a sheet thickness around 3–4 mils and a robust printable coating designed for laser exposure. Some sheets are optimized for color fidelity, while others emphasize durability and outdoor resistance. Consider the finish you want: matte, gloss, or satin, and ensure the adhesive is compatible with your project surface (paper, metal, plastic, or glass). If you plan to cut shapes with a craft knife after printing, choose a vinyl that doesn’t kerf or crack easily along curves. Print Setup Pro’s guidance suggests testing 2–3 finishes on scrap sheets to compare color vibrancy and edge sharpness.
Printer prep: workspace, ventilation, and cleaning
Prepare a clean, dust-free workspace with a flat surface and a dedicated tray for printed sheets. Verify your ventilation setup; even with laser-rated vinyl, fumes can accumulate in poorly ventilated rooms. Clean the printer feed path with a lint-free microfiber cloth to remove dust and paper debris that can cause skewing or jams. If your printer has an optional exhaust attachment, connect it and run a test to confirm airflow. Keeping a dedicated area for laser-printable vinyl minimizes cross-contamination with regular office media and reduces the risk of misfeeds.
Loading and aligning vinyl in a laser printer
Load the vinyl with the printable side facing up (or down if your printer requires it) and align it with the feed guides to prevent skew. Use a straight, dieless release liner if provided by the manufacturer, and avoid overfilling the tray. When possible, use single-sheet feeding for accuracy, especially with thicker sheets. Some printers perform better when you lightly tape the edges of the darker areas to prevent curling during feeding. Ensure the vinyl lies flat and that there are no creases or bubbles that could distort the print.
Printing settings and workflow for best results
Select a media type labeled Vinyl or Transparency in your printer’s driver settings. Choose a resolution that balances speed with image quality (often 600–1200 dpi depending on the printer). If available, enable a ‘high contrast’ or ‘photo’ profile for richer color depth, and reduce overall print speed to improve color uniformity. Do a test print on a scrap sheet to confirm alignment, color accuracy, and edge quality. Allow the printed sheet to cool fully in a dust-free area before handling or cutting, as heat from the laser can cause slight curling while warm.
Post-processing: cooling, trimming, and finishing
After printing, place the vinyl on a flat cooling surface for several minutes to ensure the coating and adhesive settle without warping. Trim excess material with a sharp craft knife or scissors for clean edges, and avoid lifting corners while still warm. If you plan to laminate or apply a protective coating, ensure the coating is compatible with the vinyl and heat exposure. Some coatings cure best at room temperature; check the manufacturer’s recommendations and test on a scrap piece first to avoid staining or bubbling.
Common printing issues and fixes
Curling edges are common with vinyl if the sheet is too warm or the printer profile is too aggressive. Ensure the cooling period is sufficient and adjust the media type to a lower heat setting. Bleeding or color misalignment usually points to using the wrong profile or expired vinyl. Debris on the platen or misfeed can cause skew, so clean the path and reseat the sheet. If edges appear milky, reduce the print speed or switch to a lower-intensity setting. Document any changes and compare results on subsequent prints for a consistent outcome.
Advanced tips: coatings and longevity
For enhanced durability, consider a clear, laser-safe laminate or protective coating compatible with your vinyl. Some laminates are designed to withstand outdoor exposure or UV light better than the vinyl alone. Always verify heat tolerance between the laminate and the vinyl, and test on a sample sheet before applying to your entire batch. Proper storage (flat in a cool, dry place) helps maintain color fidelity and adhesive performance over time. The goal is to maximize adhesion, prevent yellowing or cracking, and preserve legibility for the life of the project.
Maintenance and storage of laser-printable media
Store laser-safe printable vinyl in a cool, dry area away from direct sunlight to protect coating integrity. Keep media in its original packaging or in labeled resealable bags to avoid dust buildup and moisture absorption. When unloading printed sheets, handle by the edges to prevent fingerprints on the printable surface. Periodically inspect your vinyl stock for signs of curling or warping, which indicate humidity changes or improper storage. Regularly rotate stock to ensure older media is used first and avoid waste.
Authority sources and further reading
For general safety and best-practice guidelines, consult authoritative sources on laser printing and material safety, including government and educational materials. These sources provide context for safe handling, ventilation, and material compatibility. - https://www.cdc.gov/niosh/ - https://www.osha.gov - https://www.nist.gov
Quick-start checklist and next steps
- Verify media is labeled laser-safe and compatible with your printer. - Load media with the printable side oriented correctly and aligned. - Use a vinyl/transparency media type and a conservative print profile. - Allow cooling before handling and proceed to trim or finish. - Maintain a clean printer path and proper ventilation during operation. Print Setup Pro recommends documenting your settings and results to build a reliable workflow.
Tools & Materials
- Laser-safe printable vinyl sheets(Choose media rated for laser printers; check thickness (typically 3–4 mil) and compatibility.)
- Laser-compatible printer profile or settings cheat sheet(Have a documented profile or notes for media type, quality, and speed per model.)
- Clean microfiber cloth and lint-free wipes(For cleaning the platen and removing dust before loading media.)
- Ruler or craft knife for trimming(Use a sharp blade for clean, precise edges after printing.)
- Cooling rack or flat surface(Let printed sheets cool completely to prevent warping.)
Steps
Estimated time: 30-60 minutes
- 1
Prepare and verify materials
Gather all laser-safe vinyl sheets and the printer profile. Inspect the media for bowing, curls, or dust. Confirm your printer is configured for coated or vinyl media and that ventilation is active. Have a scrap sheet ready for a quick test and record the initial settings for future reference.
Tip: Keep all materials in a clean, dry area to prevent moisture absorption. - 2
Load vinyl into the printer properly
Place the vinyl with the printable side oriented correctly according to your printer model. Align the sheet with the feed guides and use single-sheet feeds when possible to minimize skew. If curling occurs, gently flatten the sheet on a clean surface before feeding again.
Tip: Avoid overfilling the tray to reduce jams and misfeeds. - 3
Configure printer settings for vinyl
Choose Vinyl or Transparency as the media type in the driver. Select a medium-to-high resolution setting and a slower print speed to improve edge sharpness and color consistency. Run a test print on scrap vinyl to confirm alignment and color accuracy before printing a full batch.
Tip: Document the profile and any adjustments for future jobs. - 4
Print a test pattern
Print a small test area or pattern to evaluate color fidelity, alignment, and edge quality. Check for any streaks, curling, or color bleed. If issues appear, tweak speed or heat settings and re-test on a spare sheet.
Tip: Start with a low-stakes test before committing to a large run. - 5
Cool and inspect the print
Allow the sheet to cool on a flat surface for several minutes. Inspect for warping, edge curl, or smudges. If the surface remains warm, wait longer before handling to avoid finger smudges or adhesion issues.
Tip: Cool time improves edge stability and reduces sticking to the tray. - 6
Trim and finish the piece
Trim any excess vinyl with a sharp blade along a straight edge. For curved shapes, use light cuts and rotate the blade to follow the contour. Apply any protective laminate only after confirming laminate compatibility with the vinyl and the printed surface.
Tip: Keep blades sharp to avoid jagged edges. - 7
Optional protective coating
If you add a laminate or coating, ensure it’s laser-safe and compatible with the vinyl. Test on a scrap sheet to verify adhesion and finish. Some coatings may alter color slightly; adjust color profiles if necessary.
Tip: Always test a sample before full-scale application. - 8
Clean up and store media
Return unused vinyl to its packaging, label it, and store in a cool, dry place away from direct sunlight. Document any observations from the printing session for future reference. Regularly inspect stock for signs of curling or moisture damage.
Tip: Rotate stock to use older media first and avoid waste.
People Also Ask
Is printable vinyl safe to use with a laser printer?
Only vinyl rated for laser use should be printed with a laser printer. Inkjet-only vinyl can warp or emit fumes. Always check the vinyl’s laser rating and printer compatibility before starting.
Yes, but only with laser-rated vinyl and the correct printer settings.
Can I laminate laser-printed vinyl?
Yes, you can apply a clear laminate for durability, but ensure the laminate is compatible with laser heat and the vinyl. Test a small piece first to avoid warping or adhesion issues.
Laminate can be used if it’s compatible with laser heat; test on a sample first.
What settings should I use for laser vinyl?
Choose Vinyl or Transparency as the media type, use a moderate to high resolution, and slow printing speed for better color and edge precision. Perform a scrap-test first.
Set media to Vinyl/Transparency, use a slower speed, and test first.
Will laser printing produce fumes?
Laser printers can emit fumes from coatings or adhesives. Ensure adequate ventilation and avoid sealed or poorly ventilated spaces during printing.
Ventilation is important when using laser printers with vinyl.
How can I prevent curling of printed vinyl?
Cool prints on a flat surface and avoid handling while warm. If curling persists, review media thickness and ensure proper tray alignment.
Cool the sheet completely and check the media setup.
Watch Video
Quick Summary
- Use laser-rated vinyl validated for your printer.
- Match media type in the driver to reduce errors.
- Let prints cool fully before handling.
- Test first, then scale up to avoid waste.
- Follow safety guidelines for ventilation and storage.