Leaf Printer: Step-by-Step Setup and Printing on Leaves
Learn how to choose, set up, and troubleshoot a leaf printer for artistic projects, teaching displays, or crafts. This Print Setup Pro guide covers substrates, calibration, safety, and a practical, step-by-step workflow.

By the end of this guide you will be able to select, setup, and troubleshoot a leaf printer for artistic projects or educational displays. You’ll learn about substrate preparation, printing options, and calibration steps that maximize color and longevity. This practical, Print Setup Pro-backed guide helps home office users, students, and DIY enthusiasts achieve reliable results with minimal waste.
What is a leaf printer and how it works
A leaf printer is a printer designed to print on leaf substrates—real dried leaves or leaf-like sheets—using inkjet or compatible colorants. Unlike standard paper printing, leaf printing demands substrate preparation, careful calibration, and sometimes protective coatings to prevent curling and ink bleed. In practice, a leaf printer may be a conventional home printer adapted for leaf media, or a dedicated device engineered to handle organic substrates with specialized feeds and coatings. According to Print Setup Pro, success hinges on controlled substrate preparation, color management, and selecting inks that adhere well to leaf surfaces while resisting environmental factors. The core idea is to achieve vibrant color without damaging the leaf or creating brittle prints. This section sets the stage for practical decisions you’ll make in the sections below.
When you plan to print on real leaves, you must treat them as a fragile, biodegradable media. Expect variability in leaf thickness, moisture content, and surface texture. The goal is to standardize those variables as much as possible, so you can reproduce results across sessions. A leaf printer is a tool, not a magic wand—your results depend on prep, tool compatibility, and process consistency. Below, we cover how to identify suitable substrates, the types of leaf printers available, and what features matter most for reliable results.
Leaf printing substrates: leaves, papers, and leaf coatings
Choosing the right substrate is the most critical step in leaf printing. Real leaves require flatness and dryness; curled or damp specimens will skew feed, cause jams, or distort printed patterns. Flat leaves with uniform thickness are easiest to manage, and you can flatten curls by pressing leaves under a heavy book or a plant press for 24–48 hours. Leaf-shaped sheets or specialty papers designed for botanical prints can offer a predictable surface when real leaves aren’t available. Coatings — such as clear sealants or matte fixatives — can help ink adhere and seal the leaf from moisture, but they may alter color and texture. Print Setup Pro recommends testing coatings on scrap leaves to balance color fidelity and durability. Consider the leaf’s tannins, resin content, and natural oils, which influence how inks dry and cure. Always work in a well-ventilated area when applying coatings or sealants.
In practice, you’ll want a workflow that standardizes leaf prep: air-dry leaves, press flat, optionally apply a light sealer, and allow curing before printing. This standardization makes color management more predictable and reduces post-print distortion. As you experiment, record which leaves respond best to which coatings and print settings to build a repeatable catalog of results.
Types of leaf printers: inkjet vs specialty devices
Most home users will begin with a standard inkjet printer, but you’ll want to confirm it can handle leaf media without excessive curl or feed issues. Some printers support “heavy media” or “card stock” modes that translate to thicker substrates and better ink laydown. Specialty leaf printers, by contrast, are designed to handle irregular shapes, rough textures, and variable thicknesses with specialized rollers, vacuum feeds, or sensor arrays. These devices can deliver more consistent color on botanical substrates but come with higher upfront costs. The practical takeaway is to match your printer type to your projects: simple leaf art may be doable with an ordinary inkjet using correct prep; intricate botanical prints might benefit from a device engineered for uneven media. Print Setup Pro’s guidance emphasizes verifying ink compatibility with organic surfaces and validating feed reliability before committing to larger runs.
In all cases, color management matters: use ICC profiles that approximate leaf surface reflectance, and be prepared to adjust saturation to compensate for leaf translucency. If you print photographs on leaves, consider tests with multiple leaf types to understand how texture affects the final look.
Key features to evaluate before you buy
Before purchasing, map your needs to printer capabilities. Look for a printer with robust media handling, a straight-through feed to reduce jams, and adjustable paper thickness settings that can accommodate flat leaves or leaf sheets. A high native resolution (ideally 1200 dpi or more) helps reproduce fine leaf vein detail and subtle color gradations. Ensure color management options include ICC profile support and color calibration routines. The availability of a large ink pool and fast drying times reduces smudging on delicate surfaces. Consider coatings compatibility—some printers pair well with spray fixatives or varnish compatible with the ink system. Finally, check for good software support and driver updates, as leaf printing is a niche use that benefits from ongoing compatibility improvements. Print Setup Pro notes that choosing the right combination of substrate, ink, and printer features minimizes trial-and-error time and waste.
If you plan to print in batches, also evaluate printer reliability and customer support quality. These soft factors often determine whether a leaf printing project remains feasible as its scope grows. A practical checklist: feed mechanism flexibility, robust cleaning routines for printheads, and a community or knowledge base you can consult when unusual leaf substrates appear in your workflow.
Setting up your leaf printer: unboxing, drivers, calibration
Unboxing a leaf printer requires attention to any accessory trays and the alignment of feeds intended for thicker media. Begin by installing the latest drivers and firmware from the manufacturer’s site, then connect to your computer using USB or wireless methods. Calibrate color and media settings for leaf substrates by using a rough print test on scrap leaves, adjusting saturation and contrast to minimize bleed. If your printer supports a “thick media” setting, use it to improve feed stability with leaves. Print a small calibration chart to check alignment and ensure there’s no skew. Print Setup Pro suggests keeping a log of calibration results to guide future sessions and reduce color drift over time. After initial prints, inspect for curling or edge bleeding and adjust feed tension and print head alignment as needed.
For best results, keep a dedicated leaf-printing workspace with clean surfaces and dust-free air. Consider using scrap leaves as your test media before committing to your final samples. As you progress, save your preferred profiles and keep a notebook of leaf varieties and coating combinations that yield the best results.
Printing on real leaves: best practices
Printing on real leaves combines artistry with careful handling. Begin with flat, dry leaves; store them in a dry environment to prevent mold. Apply a light, even sealer or coating if your ink requires extra adhesion, then allow the coating to cure in a ventilated area before printing. Print one leaf at a time when you’re starting out to monitor ink behavior and curing times. Consider printing in a controlled environment with stable humidity to minimize warping and color shifts. After printing, allow sufficient drying time and avoid stacking prints until fully cured to prevent smudging. If you’re using a protective finish, test it on scrap leaves to confirm it does not alter the color or texture adversely. Print Setup Pro’s experience shows that patience during drying and curing dramatically improves long-term durability of leaf prints.
Be mindful of leaf surface oils and natural waxes, which can hinder adhesion. If you encounter bleeding, adjust the ink type or reduce saturation. For multi-step projects, sequence colors from lightest to darkest to preserve detail and minimize color bleed between layers. Finally, document which leaf types and coatings work best for your subject matter so you can reproduce the look consistently.
Maintenance, troubleshooting, and safety
Leaf printing introduces additional maintenance tasks beyond standard printer care. Regularly clean print heads with manufacturer-approved cleaners, paying attention to any clog-prone channels that handle pigment inks. Inspect rollers and feed paths for leaf debris and wipe them clean to prevent feed jams. Safety matters: work with coatings and sealants in a ventilated space and wear gloves as needed to avoid skin contact with chemicals. If a leaf print warps, adjust the feed tension or try a thinner leaf variation and ensure leaves are fully dry before printing. When jams occur with irregular media, consult the printer’s troubleshooting guide and consider enabling a “manual feed” option for careful alignment. Print Setup Pro emphasizes keeping a log of recurring issues and their fixes to speed up future sessions.
Always store leaf prints in a cool, dry location away from direct sunlight to preserve color and prevent brittleness. If you’re using coatings, verify compatibility with your printer’s ink system and avoid cross-contamination between coatings and inks. A simple routine of weekly maintenance checks reduces the risk of costly downtime during creative runs.
Cost considerations and budgeting
Budgeting for leaf printing projects requires balancing printer capabilities, substrate costs, and consumables. Entry-level leaf printing setups typically fall in the lower price range for printers capable of handling leaf media, while mid-range devices offer better media handling and more reliable calibration. Be mindful that upfront costs may be offset by long-term savings in coatings and maintenance if you routinely work with real leaves. Ongoing costs include ink or pigment supplies, sealants, and specialty leaf substrates. Print Setup Pro recommends budgeting for a dedicated leaf workflow kit that includes a few leaf types, a basic protective coating, a cleaning kit, and a small assortment of test sheets. If you anticipate scaling up, plan for a higher-capacity substrate supply and consider the cost of additional coatings for durability and UV resistance.
When comparing prices, evaluate total cost of ownership rather than upfront price alone, including maintenance, consumables, and potential repair costs. A well-planned leaf printing setup can become a cost-effective, repeatable workflow for artful leaves or educational displays.
Real-world workflows: home office, classroom, DIY projects
A leaf printer fits a range of settings from home studios to classrooms and DIY workshops. In a home office, you might print decorative leaves for calendars, notebooks, or seasonal displays. In classrooms, leaf printing can teach botany, color theory, and creative design; it’s ideal for hands-on projects and student portfolios. DIY enthusiasts often combine leaf printing with resin, varnish, or lamination to create coasters, wall art, or bookmarks. The key is to design repeatable workflows: standard leaf prep steps, consistent print profiles, and a drying/curing plan that fits the project timeline. Print Setup Pro’s guidance in these real-world workflows emphasizes starting small, documenting results, and gradually expanding substrate choices as your confidence grows. With a thoughtful approach, leaf printing transitions from a niche craft to a dependable method for creative expression and practical display pieces.
Tools & Materials
- Leaf printer(Compatible with leaf media and supports appropriate media settings)
- Leaves or leaf-like substrates(Flat, dry leaves; real leaves require flattening and drying steps)
- Flat, clean workspace(Minimal dust and stable surface to prevent curling)
- Printer drivers/software(Install latest versions and ICC profile support)
- Coating spray or sealant(Optional for durability; test compatibility first)
- Tweezers and soft brush(For precise leaf handling and debris removal)
- Lint-free wipe(Use to prepare leaf surfaces and clean substrates)
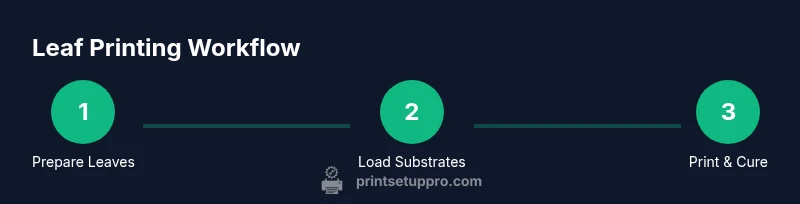
Steps
Estimated time: 90-120 minutes
- 1
Prepare workspace
Clear the area, lay a clean mat, and gather your leaf substrates. Ensure good ventilation if applying coatings and have scrap leaves ready for tests. This ensures you don’t contaminate final prints with dust or oils.
Tip: Work in short bursts to avoid leaf moisture absorption from humid air. - 2
Select leaf substrates
Choose flat, dry leaves or leaf-like sheets. Flatten curled leaves with a weighted press and cut to fit your printer’s media area if needed. Always dry leaves thoroughly before printing.
Tip: Test multiple leaf types on scrap media to identify best results. - 3
Install drivers and firmware
Install the latest drivers and firmware from the manufacturer’s site. Make sure your printer is connected and recognized by the computer before proceeding to calibration.
Tip: Create a system restore point in case driver updates affect other apps. - 4
Configure leaf settings
Select a thick-media or custom leaf profile if available. Adjust paper thickness or feed rate to minimize curling and jams. Enable color management with an ICC profile suitable for leaf surfaces.
Tip: Start with lower saturation and increase gradually after test prints. - 5
Load leaves
Feed leaves one by one, ensuring they sit flat and are properly aligned. Use manual feed if necessary for precise placement and to avoid skew.
Tip: Check for leaf moisture in between feeds to prevent warping. - 6
Print a test pattern
Run a calibration page or color test on scrap leaves. Review color fidelity, bleeding, and alignment. Make incremental adjustments to saturation, contrast, and ink density.
Tip: Document results for future reference and profile tweaks. - 7
Seal and dry
If using a sealant, apply in a well-ventilated area and allow adequate cure time. Drying conditions affect final color and durability; plan for a quiet curing period between steps.
Tip: Label batches so you reproduce the same look later. - 8
Final checks
Inspect prints for edge bleeding, curling, or uneven saturation. Reprint problematic leaves after adjusting settings or coatings. Store completed prints flat and away from heat.
Tip: Maintain a log of leaf types and coatings that produced reliable results. - 9
Maintenance and cleanup
Clean feeds and print heads with manufacturer-approved cleaners. Remove debris from rollers and ensure the device is free of leaf particles after sessions.
Tip: Schedule regular maintenance to prevent downtime during peak projects.
People Also Ask
Can I print on real leaves with a standard home printer?
Yes, with proper leaf prep and coatings, a standard inkjet can produce leaf prints. Start with flat, dry leaves and test carefully to avoid jams or color bleed. Consider a protective sealant for durability.
Yes, you can print on real leaves with a home printer if you prepare the leaves and use a protective coating. Begin with flat, dry leaves and test before doing larger runs.
What leaf types work best for printing?
Flat, dried leaves with consistent thickness yield the best results. Smooth surfaces help ink bond, while very textured or deeply veined leaves may require more calibration or coatings.
Flat, dried leaves with even thickness work best. Texture can affect ink adhesion and color, so you may need extra calibration.
Will leaf prints last long outdoors or in sunlight?
Durability depends on the ink type, coatings, and environmental exposure. Use UV-protective sealants and store prints away from direct sun to maximize longevity.
Leaf prints last longer when protected with UV sealants and kept out of direct sunlight.
What should I do if leaves curl during printing?
Curling can result from moisture or improper feed. Flatten leaves thoroughly before printing, reduce humidity, and adjust feed tension or media type settings.
If curling happens, flatten the leaves and check humidity and feed tension. Adjust printer settings for better leaf handling.
Are there safety concerns with leaf coatings?
Coatings should be used in well-ventilated spaces. Follow product instructions and wear protective gear if recommended by the manufacturer.
Coatings require ventilation and following safety instructions; wear protection as advised.
How can I store printed leaves to avoid damage?
Store prints flat in a cool, dry place away from direct heat. Use protective sleeves or archival materials to prevent moisture and abrasion.
Keep prints flat in a dry, cool spot and protect them from moisture and abrasion.
Watch Video
Quick Summary
- Master leaf substrate prep to stabilize results
- Tune printer settings for leaf texture and color fidelity
- Seal prints when durability matters
- Maintain a repeatable workflow with documentation