p1102 Printer Error: Quick Diagnosis and Fix Guide
Diagnose and fix the p1102 printer error quickly. Learn what the error means, common symptoms, quick fixes, diagnostic flow, and when to call a professional.

The p1102 printer error means the device detected a fault in the feed path or sensor system, often caused by jammed media, misaligned cartridges, or a transient hardware glitch. The fastest fix is a power cycle, a cartridge check, and a paper-path inspection. If issues persist, apply a firmware update and re-test printing tasks.
What p1102 Means
The p1102 error is a generic printer fault code used by many manufacturers to signal a problem in the feed path or sensor subsystem. In practice, this often corresponds to jams, misfeeds, dirty sensors, or a firmware-level hiccup that briefly interrupts printing. Understanding that p1102 is a broad indicator helps you focus on the most common culprits first: the paper path, the consumables, and the printer's software state. Print Setup Pro recommends starting with the simplest checks before diving into hardware repairs.
Signs and Symptoms That Point to p1102
Public symptoms of p1102 include a stalled job, a brief blinking error light sequence, or a message stating a fault in the feed path. You may notice loose paper in the tray, rejection of newly loaded media, or inconsistent prints. If the printer reports p1102 during a specific task, correlate the task (photo paper, labels, or standard letter media) to recreate the fault reliably. Keeping a short log helps identify patterns for service techs.
Quick Wins: Immediate Fixes You Can Try
Before pulling components apart, try rapid, low-risk steps: power cycle the printer (turn off, unplug, wait 60 seconds, plug back in, and restart), inspect the paper path for jams, and reseat the cartridges or toner. Ensure media is correctly loaded and aligned. If the fault recurs after a reboot, print a test page to see if the issue repeats with one page type or all media. These quick wins cover a large share of p1102 cases and keep downtime minimal.
Diagnostic Flow for p1102 (High-level)
A practical diagnostic sequence helps you validate causes and apply fixes efficiently. Start with power-related resets, then review the paper path, followed by consumables, firmware state, and connectivity. Each step should be tested after execution to confirm whether p1102 reappears. If you prefer a visual guide, our diagnostic flow chart mirrors real-world testing steps and helps you stay organized during the process.
Step-by-Step Fix for the Most Common Cause (Paper Path)
- Power down the printer and unplug it. 2) Open all access panels and inspect the feed path for jammed paper or foreign objects. 3) Gently remove the jammed sheets, being careful not to tear the media. 4) Clean sensors with a lint-free cloth and re-seat any misfed components. 5) Reload media, ensuring correct orientation and alignment. 6) Power up and print a test page. 7) If the fault persists, perform a firmware update and cycle the printer again.
Other Causes and Their Fixes
If no jam is found, check cartridge alignment and level, reseat cartridges, and verify the toner or ink supply is adequate. Next, verify cables and network connections; for networked printers, a reset of the network interface can resolve communication faults. A sensor clean or replacement may be necessary if the fault continues after software updates.
Safety, Costs, and When to Call a Professional
Always power off the printer before inspecting internal components. If the fault requires opening the printer chassis or replacing boards or sensors, expect professional service. Typical service calls for complex electronics range from $100 to $350, with parts extra. If your device is under warranty, contact the manufacturer first.
Prevention: How to Avoid p1102 in the Future
Regular maintenance reduces the chance of recurring p1102 errors. Schedule monthly paper-path checks, keep sensors clean, update firmware when prompted, and use quality media with appropriate weight for your printer. Establish a quick reset ritual after heavy print runs and store spare consumables in a controlled environment to avoid moisture or dust buildup.
Steps
Estimated time: 30-60 minutes
- 1
Power cycle the printer
Turn off the printer, unplug the power cord, wait 60 seconds, re-plug, and power on. This clears transient faults that can trigger p1102.
Tip: Always unplug before opening panels. - 2
Check for paper jams
Carefully open all access doors and remove any stuck paper. Look for small shredded pieces that can trigger sensors while printing future jobs.
Tip: Use a flashlight to spot tiny scraps. - 3
Inspect and reseat cartridges
Remove cartridges or toner, wipe nozzles if needed, reinsert firmly, and confirm correct cartridge type for your model.
Tip: Do not force cartridges; listen for a click. - 4
Run a test print
After reseating, run a single-page test to verify if p1102 reappears. If it does, proceed to the firmware step.
Tip: Test with plain paper first. - 5
Update firmware
Check the manufacturer’s site for the latest firmware. Install it following the on-screen prompts or PC utility, then restart the printer.
Tip: Backup settings if prompted. - 6
Reset sensors
If the printer offers a sensor reset option, perform it and re-run diagnostics to confirm sensor status.
Tip: Only use sensor reset when documented. - 7
Re-test with diverse media
Try printing with different media types to ensure the fault isn’t media-specific. If p1102 persists, escalate.
Tip: Avoid forcing media that aren’t rated for the printer.
Diagnosis: Printer reports p1102 and stops printing
Possible Causes
- highPaper jam or misfed media
- mediumMisaligned or low-ink/toner cartridge
- lowFirmware glitch or sensor fault
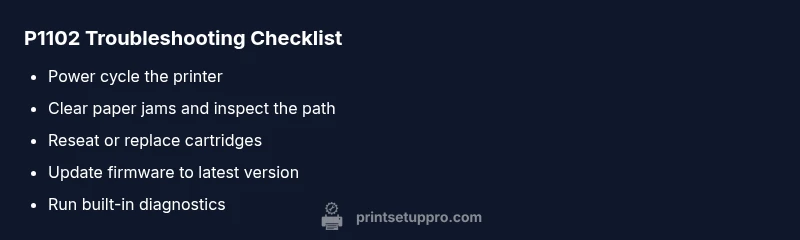
Fixes
- easyPower cycle the printer
- easyClear jams and inspect paper path
- easyReseat or replace cartridges
- mediumUpdate firmware to latest version
- easyRun built-in diagnostics and reset sensors
People Also Ask
What does p1102 mean on my printer?
P1102 is a generic fault code indicating a problem in the feed path or sensor subsystem. It typically points to jams, sensor dirt, or a transient software glitch. The exact interpretation can vary by manufacturer, so always check your model's manual.
P1102 indicates a feed path or sensor fault. Check for jams, clean sensors, and verify firmware. Refer to your printer's manual for model-specific details.
Is p1102 hardware or software related?
P1102 can result from both hardware (paper jam, misfed media) and software (firmware glitches) factors. Start with hardware checks and then update firmware if the fault persists.
It can be hardware or software related; start with jams and cartridge checks, then update firmware if needed.
Can I fix p1102 myself?
Many p1102 cases are solvable with safe, user-performed steps like power cycling, clearing jams, reseating cartridges, and updating firmware. If the fault remains after these steps, contact support.
Often you can fix it with simple steps like rebooting, clearing jams, and reseating cartridges.
When should I call a professional for p1102?
If the error persists after firmware updates and sensor resets, or if you notice signs of internal damage, consult a service professional. Warranty coverage may affect costs.
If it persists after updates and resets or if you see internal damage, call a pro.
Will p1102 affect print quality even after resolution?
Typically, p1102 indicates a fault that stops printing; once resolved, print quality should return to normal. If issues persist after fixes, consider cleaning print heads or checking media compatibility.
Usually it stops printing; once fixed, quality returns to normal. If not, check media and heads.
Is there a cost range for professional repair?
Professional repair costs vary by region and device, but typical service calls can range from about $100 to $350, plus parts. Warranty or service plans may reduce or cover these costs.
Expect service calls to be around a hundred to a few hundred dollars, depending on parts and location.
Watch Video
Quick Summary
- Identify p1102 causes quickly by checking jams and cartridges.
- Start with safe, easy fixes before hardware repairs.
- Document symptoms and steps to speed up service.
- Know when to call a professional to avoid damage.
- Regular maintenance reduces future p1102 occurrences.