Phomemo Printer Setup & Troubleshooting Guide for Home Offices
Learn how to set up, connect, and troubleshoot a phomemo printer in a home office. This Print Setup Pro guide covers drivers, mobile printing, media tips, and maintenance for reliable label printing.

The phomemo printer guide will help you set up, connect, and print with your device, and it covers installing drivers, printing from mobile and desktop, and troubleshooting common issues. You’ll follow a clear, step-by-step plan that gets you from unboxing to your first label and beyond, with maintenance tips to keep accuracy over time in a home office or small business. Print Setup Pro provides practical, actionable guidance.
What is the phomemo printer and who should use it?
The phomemo printer is a compact, thermal label printer designed for quick, on-demand labeling in small spaces. It’s ideal for home offices, classrooms, crafts, and small businesses that need clean, durable labels without the mess of ink. According to Print Setup Pro, this device shines when you want portable labeling that travels between desks, shelves, and workstations. It supports different media widths and connects via USB, Bluetooth, or Wi‑Fi depending on the model. In practice, users gain a fast, low-maintenance labeling solution that suits routine organizing, inventory tagging, and project tracking. If you value speed, simplicity, and a compact footprint, the phomemo printer is a strong contender for your workflow.
Core features that make Phomemo a good fit for home offices
Phomemo’s core strengths lie in thermal printing (no ink), a small footprint, and flexible connectivity. Most models pair with smartphones and computers, supporting formats for labels used on folders, jars, storage bins, and small packaging. Battery-powered variants offer true portability for on-the-go labeling, while USB and wireless options keep the device anchored to a desk when needed. For busy home offices, these capabilities translate into faster label completion, reduced ongoing supply costs, and fewer interruptions during peak hours. Print Setup Pro highlights how predictable, consistent output from a thermal system helps teams stay organized without adding complexity to their setup.
Unboxing and initial setup checklist
When you first unbox the phomemo printer, verify contents: printer body, power cable or battery, label media, quick-start guide, and any USB cable. Check for shipping damage and remove protective films from the feed area. Create a stable workspace with enough clearance for loading media and feeding labels. Power on the device, connect to a computer or mobile device, and prepare the necessary software or drivers. A clean start reduces jams and calibration headaches, setting you up for reliable first prints and easy ongoing use.
Drivers and software on Windows, macOS, and mobile
To get the phomemo printer up and running, install the appropriate drivers or apps for your platform. On Windows and macOS, download the official driver package and follow the prompts to complete installation. For mobile printing, install the phomemo app from your device’s app store. The app guides you through pairing, selecting the default label size, and saving templates. Keeping software up to date ensures compatibility with new label formats and security improvements, reducing the chance of incompatibilities during busy labeling sessions.
Connecting to devices: Bluetooth, USB, and Wi‑Fi
Your phomemo printer may support multiple connection methods. USB provides a reliable wired link for stationary use, while Bluetooth offers wireless convenience for phones and tablets. If the model supports Wi‑Fi, you can print from multiple devices on the same network. Pairing typically involves selecting the printer from your device’s Bluetooth or network list and confirming a pairing code. After connecting, run a quick test print to verify alignment and media feed, so you avoid surprises during larger labeling tasks.
Printing from mobile apps and labels: best practices
Printing from a mobile device is often fastest when you use templates and saved label formats. Use the phomemo app to choose label width, margins, and font size, and to preload common templates for faster print runs. For text labels, keep content concise and ensure good contrast against the label background. When printing from photos or barcodes, verify image size and orientation to avoid crop or skew. Saving successful templates creates a reliable library you can reuse across projects, boosting daily throughput and consistency.
Troubleshooting common issues and quick fixes
If the printer isn’t detected by your device, re-pair the Bluetooth connection or reconnect the USB cable. Misfeeds and skewed labels are often caused by incorrect media loading or dirty rollers; reseat the label roll and clean the feed guides with a soft cloth. If print quality is blurry, verify the media type and confirm there is no protective film on the label surface. For slow prints, confirm you are using the correct label size and avoid overly long jobs that push the device beyond its comfortable processing capacity.
Maintenance and consumables for longevity
Regular maintenance keeps your phomemo printer reliable. Store media in a cool, dry place and keep the feed area free of dust. Periodically clean rollers and guides with a soft microfiber cloth. Use only recommended label types and sizes to prevent jams and edge wear. Replace consumables promptly and keep spare media on hand for high-demand labeling periods. If your model supports firmware updates, install them to preserve print accuracy and compatibility with templates.
Real-world workflows: practical scenarios and setup rhythms
In a home office, a phomemo printer streamlines filing, inventory checks, and project labeling. In classrooms or DIY studios, it supports student projects and craft organization with quick, durable labels. Small businesses can utilize it for packaging tags, shelf labels, and quick price stickers. Establish a simple weekly routine: check media stock, run calibration checks, back up templates, and review print quality. Aligning label decisions with daily tasks minimizes downtime and sustains consistent results.
Tools & Materials
- Phomemo printer (model unspecified)(Include compatible media and a charged battery if applicable)
- Power cable or charger(Use the correct charger for your model)
- Label media rolls (thermal labels)(Choose widths compatible with your printer)
- USB cable (for wired setup)(Only if you plan to connect via USB)
- Smartphone or computer(Needed for software installation and printing)
- Phomemo app or driver package(Download from official source)
- Clean cloth and isopropyl wipe(For occasional roller cleaning)
- User manual or quick-start guide(Reference model-specific steps)
Steps
Estimated time: 30-45 minutes
- 1
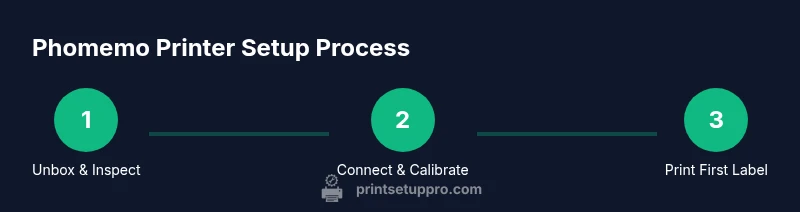
Unbox and inspect
Open the box and verify all parts are present, including printer, media, power cable, and manuals. Check for shipping damage and remove protective films from the feed area. This ensures you start with a complete kit and reduces rework later.
Tip: Take photos of the box contents to confirm everything is included, helpful for returns. - 2
Charge and power on
If the model has a battery, charge fully before use. Connect the power cable and turn on the printer to verify the LED indicators illuminate. A stable power-on sequence confirms the device is functioning.
Tip: If there’s no immediate sign of life, try a different outlet and confirm the power switch is engaged. - 3
Load media correctly
Open the media cover, install the label roll according to the guides, and thread the tape so it feeds straight. Close the cover and perform a quick feed test to verify smooth operation.
Tip: Align the label edge with the guides to prevent skewed printing. - 4
Install drivers/software
On Windows/macOS, install the official drivers; on mobile, install the phomemo app. Follow prompts to complete pairing and select the correct label size as default.
Tip: Restart the device after installation to ensure the printer is recognized. - 5
Pair or connect
Choose a connection method (USB, Bluetooth, or Wi‑Fi depending on model) and complete the pairing process. Run a test print to confirm a clean output.
Tip: If pairing fails, delete the device from Bluetooth/networks and re-pair fresh. - 6
Calibrate and align
Calibrate the printer by printing a test label, checking alignment, and adjusting guides if needed. Proper calibration prevents misprints and wasted labels.
Tip: Note the edge margins for future templates. - 7
Create first label
Design a simple label in the app or software, select size, and print. Review for readability and legibility before proceeding with batch prints.
Tip: Start with a small batch to verify accuracy before scaling up. - 8
Save templates and back up
Store frequently used label formats as templates to speed up future work. Back up templates if your workflow relies on cloud storage or device backups.
Tip: Organize templates by project to reduce search time later.
People Also Ask
What is the Phomemo printer best used for?
Phomemo printers are great for quick, durable label printing in small spaces. They use thermal printing, which means no ink cartridges to buy.
Phomemo printers are ideal for quick, durable labeling in small spaces and use thermal printing, so there’s no ink to replace.
Can I print from my phone with Phomemo?
Yes. Most Phomemo models support mobile printing via the official app or Bluetooth pairing.
Yes, you can print from your phone using the Phomemo app or Bluetooth pairing.
Do I need to buy labels separately?
Yes, compatible thermal labels are sold separately; ensure the width matches your model.
Yes, you’ll need compatible thermal labels sold separately.
Why is my print blurry?
Blurry output is usually due to incorrect label size or dirty rollers. Recheck media loading and clean the guides.
Blurry prints are often caused by wrong label size or dirty rollers.
How do I connect the printer to Wi-Fi?
If your model supports Wi‑Fi, use the app to connect the printer to your network and add it to your devices.
Use the app to connect the printer to your Wi‑Fi network.
What maintenance is recommended?
Regularly clean rollers, store media properly, and update firmware when available.
Regular maintenance includes cleaning rollers and updating firmware.
Watch Video
Quick Summary
- Load media correctly to prevent jams.
- Use templates to accelerate daily labeling tasks.
- Keep drivers and apps up to date.
- Calibrate regularly for consistent print quality.
- Maintain a small library of common label formats.