Printer 4x6 Photo Printing: A Step-by-Step Guide
Learn to print printer 4x6 photos at home with the right printer, paper, ink, and settings. This step-by-step guide covers borderless printing, paper finishes, color management, and a practical workflow for sharp 4x6 prints.

With this guide, you will learn how to reliably print printer 4x6 photos at home using a suitable printer, correct photo paper, and proper settings. We'll cover borderless printing, recommended finishes, ink choices, color management, and a practical workflow you can reuse for albums, gifts, and school projects. According to Print Setup Pro, the right setup makes a dramatic difference in final results.
Why printer 4x6 photos matter in a home setup
Printing 4x6 photos is a practical way to preserve memories, create quick gifts, and build a tangible portfolio of images from your smartphone, camera, or tablet. The 4x6 size is a universal standard that fits most frames and albums, making it ideal for quick projects and classroom displays. For home offices, printing 4x6 portraits or product shots can save time and money compared to ordering prints from a lab. Print Setup Pro emphasizes that consistent results start with choosing the right printer type, loading media correctly, and aligning color settings with the media you select. Remember, the goal is reliability and repeatable quality, not just a one-off print.
Printer capabilities to look for when you’re printing 4x6 photos
Not all printers are created equal when it comes to photo quality. Look for inkjet models that explicitly advertise dye or pigment inks for photos, compatible borderless 4x6 printing, and driver support for color management. Laser printers can produce sharp text and some graphics well, but inkjets generally offer better color depth and smoother gradients for photographs. When evaluating a printer, confirm the maximum print resolution (measured in dots per inch, or DPI) and whether the device can print borderless at 4x6. If borderless printing is essential, ensure the printer supports the exact page size and has edge-to-edge printing capability. The right combination of printer and media leads to richer colors, deeper blacks, and crisper details.
Paper choices that impact 4x6 photo quality
Photo paper matters as much as the printer. Choose 4x6 photo paper that matches your print goals: glossy for high-contrast, vibrant colors; satin or luster for a balanced, subtle finish; or matte for a softer look. Weight matters too—papers around 200–300 gsm provide sturdiness and reduce curl. Always check that your paper is compatible with your printer and that you’re using the correct coating for the inks. Store paper flat in a cool, dry place to prevent warping, and avoid high humidity that can affect image sharpness.
Color management and calibration essentials
Effective color management starts with a calibrated screen and a matching printer profile. Use the manufacturer-provided ICC profiles for your paper, or create a custom profile if you have access to a colorimeter. Calibrating ensures consistent color between what you see on screen and what prints emerge from the printer. If you don’t have calibration hardware, at least set a standard color profile (like sRGB) and keep your printer’s color management settings enabled to avoid color shifts. Print Setup Pro recommends testing with a small batch first to confirm that your monitor, printer, and paper all align before committing to a large print run.
Borderless printing and image sharpness: practical steps
Borderless 4x6 printing can dramatically improve the presentation of photos by avoiding white margins. To achieve this, choose a 4x6 borderless setting in the printer driver and select the correct paper size. Crop the image to account for minor printer unprintable margins if needed, but try to rely on the borderless option first. For sharpness, adjust the image in editing software to a resolution of at least 300 PPI and apply subtle sharpening only if the photo appears soft after a test print. Reserve stronger sharpening for images that require more punch.
A simple workflow you can adopt today
- Inspect the photo for color accuracy and crop to 4x6 (with optional border). 2) Load photo paper and install the correct ICC profile. 3) Set the printer to borderless 4x6 and choose the appropriate paper type. 4) Print a test strip at 4x6 to verify color and density. 5) If needed, adjust brightness and contrast in the image editor and reprint a second test. 6) Print the final batch with a consistent cadence, and store finished prints in protective sleeves.
Troubleshooting common issues
If colors look wrong, verify you’re using the correct ICC profile and that color management is enabled in both the printer driver and your image editor. If prints appear too dark or washed out, recalibrate your monitor and printer, then reprint a sample. Paper curls, banding, or splotches can often be traced to paper quality, moisture, or clogged nozzles. Run a printer head cleaning if edges show faint lines, and ensure that you’re using fresh ink or toner.
Practical tips for minimizing waste and saving money
Print in batches to reduce wasted ink and paper; test with a small trial before producing a large run. Use the same finish across a project (glossy or satin) to keep color consistency. Keep a spare pack of the same paper for color-matched reprints. When possible, print at a consistent time of day to avoid ink settling differences and to track results over time.
Conclusion: establishing a reliable 4x6 print workflow
A consistent workflow reduces surprises and ensures predictable results with printer 4x6 photos. By selecting the right printer, paper, and color management approach, you can produce high-quality prints suitable for albums, gifts, and presentations. The key is to test, adjust, and document your preferred settings so you can reproduce the same look in future batches.
Tools & Materials
- Printer capable of borderless 4x6 printing(Verify model supports 4x6 borderless printing and has compatible drivers)
- 4x6 photo paper (glossy, satin, or matte)(Weight 200–300 gsm is ideal for sturdy prints; keep stock flat and away from humidity)
- ICC color profiles for your paper(Use vendor profiles if available; create a custom profile if you have color calibration tools)
- Ink cartridges or toner for photo printing(Ensure you have full color set (CYMK) and consider dye vs pigment inks based on your needs)
- Computer or mobile device with photo editing software(Apps or software should support 300 PPI, crop to 4x6, and color management)
- USB cable or network access(For wired transfers or networked printing to the printer)
- Trimmer or scissors for trimming edges (optional)(Use only if you need precise borders after printing)
Steps
Estimated time: 45-60 minutes
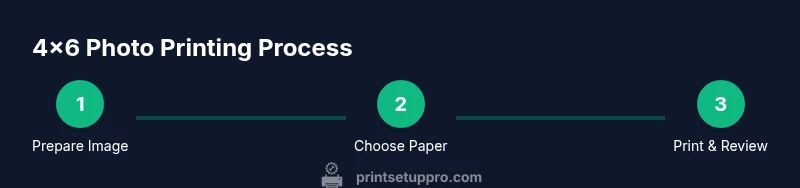
- 1
Prepare the image
Open the photo in your editing software and crop to exactly 4x6 inches. Ensure the resolution is at least 300 PPI for crisp detail, and apply only light sharpening if the image looks soft on screen.
Tip: Crop with a 1:1.5 ratio; this will align with the 4x6 print size and reduce unexpected cropping later. - 2
Load the correct paper and set the driver
Insert 4x6 photo paper, select the correct paper type (glossy/satin/matte) in the printer driver, and enable borderless printing if supported.
Tip: Always check the printer’s printable area; borderless options vary by model. - 3
Choose color management settings
Activate color management in both the image editor and printer driver, and select the ICC profile for your paper when available.
Tip: If you don’t have an ICC profile, use the standard photo color profile (sRGB) and avoid locked color modes. - 4
Print a test strip
Print a single 4x6 test image to verify color, density, and sharpness. Compare the print to the screen and note any discrepancies.
Tip: Make small adjustments to brightness/contrast after viewing the test print before producing the full batch. - 5
Adjust and reprint if needed
If the test looks off, adjust exposure, white balance, or contrast in your editor, recheck the ICC profile, and print another test.
Tip: Document your exact settings for future reference. - 6
Print the final batch
Print the full set of 4x6 photos in batches to minimize waste. Store finished prints in protective sleeves in a cool, dry place.
Tip: Use a consistent print sequence to maintain uniform color and density across the batch.
People Also Ask
What paper is best for 4x6 photo prints?
For high-contrast images, glossy photo paper is a solid choice. Satin or luster finishes offer a balance between color depth and smoothness, while matte is great for a softer look. The key is to pick a paper compatible with your printer and ink type.
Glossy or satin photo paper usually yields the best color and sharpness for 4x6 prints, provided your printer and ink are suited to that finish.
Can all printers print borderless 4x6 photos?
No. Borderless printing depends on the printer model and driver support. Check the printer specifications and driver options to confirm if 4x6 borderless is available, and enable it in the print settings when suitable.
Not every printer can print borderless on 4x6. Check your model and enable the feature if supported.
Do I need to calibrate my monitor and printer for photo printing?
Yes. Calibrating your monitor and using the appropriate printer color profile helps ensure the printed colors match what you see on screen. If you don’t have calibration tools, use standardized color profiles and test prints.
Calibration helps your prints match what you see on screen; use standard profiles and test prints if you don’t have calibration hardware.
What resolution should I target for 4x6 prints?
Aim for images at 300 PPI at 4x6 inches to ensure sharp details. Lower resolutions can appear pixelated, especially in larger prints or when viewed up close.
Target about 300 PPI for clear details on 4x6 prints.
How many tests should I run before a full batch?
Start with one test print, evaluate color and sharpness, then adjust brightness or color settings as needed before printing the final batch.
Always test with at least one print, then adjust if necessary before the full batch.
Is borderless printing required for the best look?
Borderless can improve presentation by removing margins, but not every photo will benefit depending on content. If your subject matters near the edge, borderless printing helps maximize the image area.
Borderless is often best for a clean look, but consider cropping margins if important content is near the edge.
Watch Video
Quick Summary
- Choose a printer with true 4x6 borderless support.
- Match photo paper type and weight to your printer for best results.
- Use ICC profiles and color management for accurate color.
- Test prints save time and reduce waste.
- Document settings for repeatable success.