Printer Table Setup: A Practical Guide for Your Workspace
A comprehensive HowTo guide for selecting, assembling, and organizing a dedicated printer table that fits your space, improves ergonomics, and keeps cables tidy.

In this guide you'll learn how to pick a sturdy printer table and arrange space for a clean, efficient workflow. You will measure the room, select a table with enough width and weight capacity for common printers, and optimize cable management and accessory layout. The goal is a reliable, ergonomic workspace for printer tasks.
Why a Purpose-Built Printer Table Improves Your Workflow
A dedicated printer table is more than a surface; it anchors your whole printing corner and reduces clutter that drags down efficiency. According to Print Setup Pro, having a purposeful setup minimizes reach distances, improves cable management, and supports better posture during long print sessions. In a typical home office, the printer table becomes the command center: it guides where the printer sits, where the power strip lives, and how cables route without tangling. By prioritizing stability, you prevent printer movement during operation, which reduces noise and wear. This section explores why investing in a purpose-built unit pays off in reliability and ergonomics.
Size, Weight, and Ergonomics: Choosing the Right Dimensions
When selecting a printer table, aim for dimensions that match your printer footprint plus room for cables and occasional accessories. A wider tabletop provides space to spread parts and perform maintenance without crowding. Height should align with your chair and workstation to maintain neutral wrists and a comfortable viewing angle. Weight capacity matters: choose a model that can safely support your heaviest printer plus a small loader or scanner if needed. Print Setup Pro analysis shows that ergonomic height and proper leg room reduce posture strain and improve comfort during long printing sessions. Consider the floor area behind the table for cable routing and ventilation to prevent overheating.
Materials and Construction: Budget, Durability, and Stability
Printer tables come in a range of materials from laminate and engineered wood to steel frames with wood tops. Budget options can be perfectly adequate if they offer a rigid frame and stable feet. Midrange tables balance durability and price by combining a metal frame with a reinforced top. For frequent printer use or heavier models, invest in solid wood or steel construction with adjustable feet to compensate for uneven floors. A well-built table reduces wobble, improves alignment, and supports quieter operation by resisting vibration.
Cable Management: Power, Data, and Safety
Cable management is central to a clean, efficient printing workspace. Plan routes that keep power and data lines separate to reduce interference. Use a surge-protected power strip mounted under the tabletop edge, with cables clipped and labeled for easy troubleshooting. Consider grommets or cable sleeves to conceal routing and protect delicate USB, Ethernet, and power cords. Regularly inspect cords for wear and replace frayed cables promptly to prevent hazards.
Layout Scenarios: Small Office, Corner, and Standalone Desk
For small spaces, a compact printer table with a recessed shelf can tuck neatly beside a monitor or filing cabinet. In corner layouts, use L-shaped designs to maximize reach and maintain a straight cable route to the wall outlet. A standalone desk with a dedicated printer shelf can maximize airflow and isolate noise. Each scenario benefits from careful alignment with seating and the printer’s center of gravity to minimize reaching.
Storage and Accessory Integration: Shelves, Drawers, and Mounts
Integrate shelves or drawers to keep media, spare toner, and manuals within arm’s reach. A small under-table shelf is ideal for storing paper reams or spare cables. If your printer requires offline scanning or labeling, add a raised mount or a clamp bracket to position accessories securely. Keep frequently used items in front for quick access and use labeled containers to reduce clutter.
Assembly and Setup: From Unpacking to Ready-to-Use
Start by unpacking the table components on a soft surface to avoid scratching. Assemble the frame on a level floor, then attach the top panel, testing for wobble at each step. Tighten fasteners in a cross pattern to distribute load evenly. Mount any cable-management accessories and mount a surge protector to the underside if possible. Finally, place the printer, connect power and data cables, and run a test print to verify alignment and clearance.
Maintenance and Longevity: Cleaning, Lubrication, and Inspections
Keep the surface clean with a damp microfiber cloth and avoid moisture near electronics. Periodically tighten feet and frame joints to prevent loosening over time. Check cable clips and grommets for wear and replace damaged parts promptly. If the table has adjustable feet, verify they maintain level across different flooring materials to preserve printer alignment.
Common Pitfalls and How to Avoid Them
Avoid tables that wobble or have thin tops that flex under load. Do not place the printer directly on a metal frame without a protective top; use a padded mat to dampen vibration. Refrain from overloading outlets or running cables across doorways or walkways to prevent tripping hazards. Finally, do not neglect ventilation; overheating can shorten printer life and affect print quality.
Quick Setup Checklist
- Measure the available space and printer footprint
- Choose a table with adequate width and a rigid top
- Plan cable routes and install a surge-protected power strip
- Arrange accessories for easy reach and minimal reach distance
- Verify ergonomics: seating height and monitor alignment
- Run a test print and adjust as needed
Tools & Materials
- Tape measure(To precisely measure space and printer dimensions)
- Level(To ensure the table surface is perfectly flat)
- Pencil(For marking placements and cable routes)
- Cord management clips or zip ties(Keeps cables tidy and prevents tangling)
- Surge-protected power strip(Prevent overloads and protect devices)
- Anti-slip desk mat(Reduce shifting and protect table surface)
- Screwdriver set(For assembly and adjustments)
Steps
Estimated time: 60-90 minutes
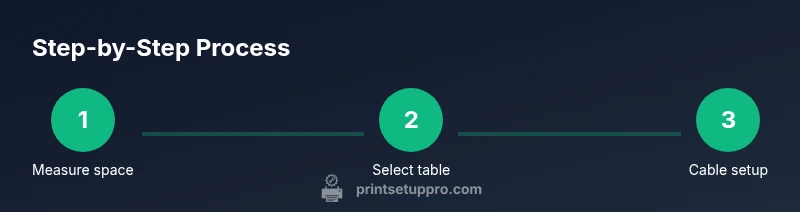
- 1
Measure space and printer footprint
Use a tape measure to document the available width, depth, and the printer’s dimensions. Note clearance for cables and a comfortable working distance. This initial measurement determines the minimum table size and layout.
Tip: Double-check doors and drawers in your path to avoid moving furniture later. - 2
Select a sturdy table with adequate weight capacity
Choose a table that can safely support the printer plus any accessories. Check the frame construction, top material, and feet for stability. A wobble-free surface improves print consistency and reduces wear.
Tip: If possible, test with a similar load before purchase. - 3
Plan cable routes and outlets
Map the path for power and data cables away from the printer’s print area. Plan to use a surge protector mounted under the edge and secure cables.
Tip: Label cords to simplify maintenance. - 4
Mount cable-management accessories
Attach clips, sleeves, or a cable tray to keep cords neat. Ensure there is enough slack for movement without pulling on connectors.
Tip: Avoid tight bends that can degrade cable performance. - 5
Position the printer and accessories
Place the printer where it can receive air flow and avoid heat accumulation. Keep a spare space for headroom during maintenance.
Tip: Leave room to access the back panel without moving the unit. - 6
Check ergonomics and height
Test seating position, monitor height, and arm reach. Adjust chair height or table height to maintain neutral wrists and straight posture.
Tip: Consider an adjustable chair for different users. - 7
Connect and test
Plug in power and data cables, then run a test print to confirm alignment and cable clearance. Watch for any vibrations or interference.
Tip: Pause to re-route if you see excessive cable movement. - 8
Finalize setup and document
Record measurements and setup details for future maintenance or upgrades. Keep the manual accessible for quick reference.
Tip: Take a photo of the final layout for future reference.
People Also Ask
What is a printer table and why do I need one?
A printer table is a dedicated surface designed to hold a printer and related accessories. It improves stability, cable management, and ergonomics, reducing clutter and improving workflow in a home office or studio.
A printer table is a dedicated surface for your printer that helps keep cables organized and tables stable, improving your workflow.
What size should a printer table be for a standard home printer?
Aim for a width that accommodates the printer with space on either side for cables, plus room for a few accessories. The depth should leave room for cable management and airflow. Height should align with your chair and desk setup for comfortable use.
Choose a table width with extra space for cables and a height that matches your chair for comfortable use.
How can I manage cables effectively around a printer table?
Plan routes, use clips and sleeves, and mount a surge-protected strip under the edge. Label cords to simplify maintenance and reduce tangles.
Plan routes and clip cables so they stay tidy and easy to replace.
Can a printer table double as a workspace for other devices?
Yes, if the table top is wide enough and the surface is kept clean and free from clutter. Allocate zones for the printer, a computer keyboard, and a small document area.
Absolutely, as long as you keep a dedicated space clear for the printer and a separate area for your keyboard.
What maintenance is required for a printer table?
Periodically tighten fasteners, inspect cables for wear, and clean surfaces with a damp cloth. Check feet for level to preserve alignment.
Check fasteners, cables, and legs regularly and wipe the surface to keep it clean.
Where should I place a printer table in a small room?
Choose a location that allows comfortable reach and good ventilation, such as a corner with a compact stand or a wall-mounted unit. Ensure access to outlets without obstructing movement.
Put it in a corner or against a wall with easy access to outlets and airflow.
Watch Video
Quick Summary
- Choose a table with adequate width and weight capacity
- Prioritize cable management for safety and efficiency
- Align workspace ergonomics for comfortable long tasks
- Plan layout for airflow and noise reduction
- Document final setup for future maintenance