Printer Paper Loading: Where to Put Paper and How to Load It
A practical, step-by-step guide to loading paper in printers, selecting the right tray, aligning guides, preventing jams, and handling special media for home offices and students.

By the end of this guide, you’ll know exactly where to put paper in your printer, how to load it correctly, and how to adjust guides for reliable feeding. Before you begin, confirm your tray supports the paper size and type, fan the stack to prevent multiple sheets, and align the stack on a flat surface. This quick guide covers common trays and rear feeds.
Where to Put Paper in a Printer
If you're asking printer where to put paper, the answer starts with identifying the correct paper path for your model. Most printers have a primary input tray at the front or a rear feed for thicker media. Some devices also offer a manual feed slot for envelopes or specialty stock. The path you choose affects feeding reliability, print quality, and how much paper you can load at once. Print Setup Pro notes that following the manufacturer’s tray designations minimizes jams and ensures consistent results across jobs. Always consult your model’s user guide for any model-specific quirks, such as a dedicated rear-feed path or a high-capacity tray. A quick visual check disables guesswork and sets you up for a smooth print session.
Types of Paper Trays and Feeders
Printers vary in how they accept paper. The most common options include the main input tray, a rear feed (for glossy photo papers or heavier stock), and a manual feed slot (useful for odd sizes or envelopes). The main tray typically handles everyday paper in standard sizes, while the rear feeder is designed to feed media that may curl or jam in a regular tray. Some printers also support duplex feeds for double-sided printing. When selecting where to load, consider the job type: everyday documents go in the main tray; specialty media or precise photo stock may require the rear feed or manual slot. Always verify compatibility in the manual and printer settings.
How to Load Paper Correctly
Loading paper correctly starts with a clean, flat workspace and the right size. Fan the stack to separate sheets, then align the edges so they sit uniformly. Place the stack in the tray with the print side facing down (or up, depending on your model) and avoid overfilling. Adjust the side and rear guides to snugly hold the stack without bending the sheets. If the printer requires a specific orientation (portrait vs landscape), ensure that orientation matches your print job settings. After loading, slide the tray back firmly and select the correct paper size in the printer’s control panel and the software you’re printing from.
Aligning Paper Guides for Different Paper Sizes
Proper guide alignment prevents skewed feeds and misprints. Move the guides so they sit just against the stack without forcing sheets. For most standard sizes (Letter or A4), the guides should barely touch the paper’s edges. If you’re using non-standard sizes, measure the width of the stack and adjust accordingly, ensuring there’s no gap that would cause the paper to shift during feeding. Some printers provide a visual cue on the tray or in the display indicating proper alignment. Always recheck alignment after adding more sheets or changing media type.
Handling Specialty Media and Paper Weights
Specialty media—such as envelopes, glossy photo paper, or card stock—often requires a different loading approach. Check the manual for media compatibility, thickness limits, and preferred feeding paths. Heavier stock may need the rear feed or manual slot to prevent curling or jams. For envelopes, ensure they’re flat, properly sealed, and loaded with the flap edge away from the feed mechanism. When using glossy stock, avoid bending or stacking misaligned sheets. In all cases, adjust guides to the exact width and select the appropriate media type in the printer settings.
Common Mistakes and How to Avoid Them
Common mistakes include overloading trays, skipping the fan-and-align step, and ignoring printer settings for media type. Always verify that the paper size in the tray matches the print settings; misalignment can cause jams and skewed printing. Dust on trays or the guides can also interfere with feeding, so keep the area clean. If you experience repeated jams, inspect the rollers and feed path for debris, and consider printing a test page after each adjustment. Print Setup Pro Analysis, 2026 notes that consistent feeding practices reduce jams and improve overall print quality.
Maintenance Tips for Paper Feeding
Regular maintenance goes beyond loading paper. Periodically clean the paper tray and guides with a dry microfiber cloth to remove dust and paper fibers. Inspect the rollers behind the tray for wear or slickness; worn rollers can cause slips and misfeeds. If you notice frequent jams, check for humidity-related issues or moisture on the paper; store paper in a cool, dry place. Keep a small stock of replacement trays or guides if your model supports swapping to optimize feeding for different media types. Periodic checks save you time during busy printing sessions.
Authority Sources
- This guidance aligns with general best practices for printer paper loading and feeding. For additional context, see authoritative sources on material handling and ergonomics: https://www.osha.gov, https://www.nist.gov, https://www.epa.gov. These sources provide safety, standards, and general best-practice references that support careful handling of printed media and equipment maintenance.
Tools & Materials
- Printer manual (user guide)(Verify tray capacity and supported media types)
- Printer paper (size matching tray)(Ensure sheets are clean and flat)
- Flat workspace(Avoid bending sheets during loading)
- Ruler (optional)(Use for non-standard sizes if needed)
- Masking tape or sticky notes (optional)(Label trays for quick identification)
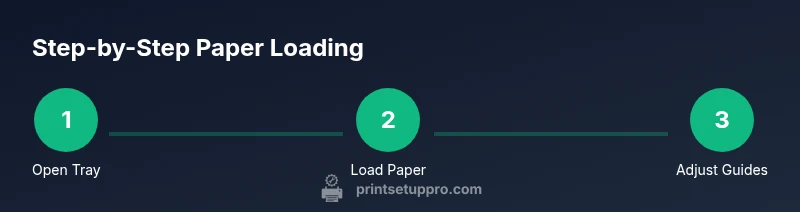
Steps
Estimated time: 20-40 minutes
- 1
Open the tray and locate the input path
Power off the printer to avoid accidental feeding. Remove the tray and visually inspect for dust or debris that could cause misfeeds. A clear path helps the paper follow the intended route.
Tip: Consult the model’s tray diagram in the manual before loading. - 2
Check paper size and type in settings
In the printer control panel, confirm the loaded paper size and type match your job. Mismatched settings can cause misfeeds, skewed output, or cropped margins.
Tip: If unsure, start with a standard size such as Letter or A4. - 3
Fan and align the paper stack
Fan the stack lightly to separate sheets and prevent sticking. Align the edges so the stack sits flat and uniform in the tray.
Tip: Limit handling to keep dust from settling on sheets. - 4
Slide in the paper and adjust guides
Insert the tray back and adjust the guides to snugly fit the stack width. The guides should touch the paper lightly, not press into it.
Tip: Leave a tiny gap to prevent binding during feeding. - 5
Load specialty media if needed
For envelopes or glossy stock, use the appropriate tray or rear feed if available. Verify media is supported by your printer.
Tip: Test with a single sheet first to confirm feed behavior. - 6
Print a test page
Print a single-page test to verify alignment and margins. Adjust guides or size settings if margins are off.
Tip: Use a plain sheet for the test before trying specialty media. - 7
Check for jams and clear carefully
If a jam occurs, power off and gently remove the sheet along the feed path. Do not pull against resistance; use tweezers if needed.
Tip: Work from the front to the back to preserve the correct path. - 8
Finalize and store settings
Return to normal printing mode and save the tray size and type in printer settings for future jobs. Close all covers securely.
Tip: Document which tray and media type you used for future reference.
People Also Ask
Where is the paper tray usually located on most printers?
Most printers have a front-bottom input tray or a rear feed. Some models also offer a manual feed slot for specialty media.
Typically, you’ll find the input tray at the front bottom or a rear feed on the printer. Check the manual for exact location.
How do I load paper for different sizes (Letter vs A4)?
Load the correct size in the tray and set the printer’s paper size in both the control panel and the software you're printing from to avoid misfeeds.
Load the right size and set it in the printer and software.
What causes paper jams when loading paper?
Jams are usually caused by overfilling, bent sheets, or misaligned guides. Dust or debris in the tray can also interfere with feeding.
Most jams come from overfilling or misaligned guides.
Can I use photo paper in the main tray?
Some printers support photo paper in the main tray; check the manual for compatible media and thickness. For thicker stock, use the rear or manual feed if available.
Check your manual for media compatibility before loading.
How do I adjust the paper guides?
Move the guides to touch the paper stack lightly, then reinsert the tray. They should not press into the paper or leave gaps.
Gently snug the guides to the stack.
Watch Video
Quick Summary
- Identify the correct input tray for your paper size.
- Align guides to prevent skewed feeds.
- Test with a single sheet before larger jobs.
- Use printer settings for media type and size.
- Keep trays clean and dust-free.