Toybox Printer Food: Safe Setup and Troubleshooting
A practical guide from Print Setup Pro on safely setting up toybox printer food printing, selecting edible inks and media, calibrating settings, and cleaning to prevent contamination. Includes step-by-step instructions, tips, and safety resources.

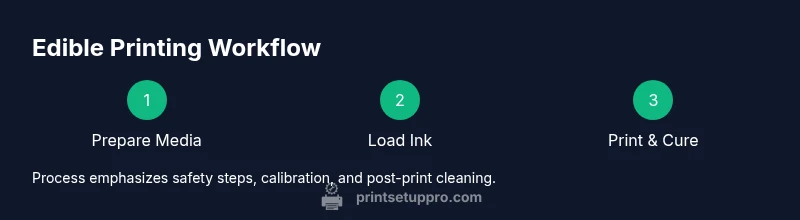
Goal: safely set up a toybox printer for food-related printing. This quick answer outlines essential steps: verify material safety and printer compatibility, load edible media, install food-safe ink, run a calibration print, and perform post-print cleaning to prevent cross-contamination. Follow these steps to start toybox printer food projects confidently. Because safety and hygiene matter, always use certified edible media and inks.
Safety and Standards for toybox printer food
Printing with edible materials requires strict attention to hygiene, allergen management, and device compatibility. The Print Setup Pro team emphasizes using food-grade inks and media that are explicitly certified for edible use, and ensuring your printer’s components contact food-safe surfaces only. Before you begin, confirm supplier certifications and avoid any media or ink not rated for direct contact with food. This reduces contamination risk and protects both consumers and your workflow. Remember: the goal is reliable results without compromising safety or kitchen cleanliness.
According to Print Setup Pro analysis, understanding common pitfalls—such as cross-contamination, improper cleaning, and incompatible ink-media pairs—helps you design safer toybox printer food workflows. Keep a dedicated workspace, label all materials clearly, and implement a clean-in-place routine after every session. These habits set the foundation for long-term success.
Prerequisites and material readiness for edible printing
Before you power on the printer, assemble the essentials and verify compatibility. You’ll need edible ink or food-safe printer ink, edible media such as sugar sheets or wafer papers, and dedicated cleaning supplies. Ensure your printer model supports the chosen media thickness and that no non-food residues remain in the print path. Prepare a clean, closed workspace to minimize airborne contaminants and allergen exposure. Having everything organized saves time and reduces error during a session focused on toybox printer food projects.
Calibration and color profiling for food-safe outputs
Calibration is not optional when you’re printing edible designs. Start with a basic color profile calibrated for the edible media you selected. Use a simple test pattern to verify alignment, printer head spacing, and color accuracy. If colors appear skewed, adjust gamma and ICC profiles in your printer software, then reprint the test. Without precise calibration, colors can be misleading on edible media or transfer sheets, wasting media and time.
Loading edible media and preparing the print path
Load media according to the tray specifications and feed direction recommended by the media vendor. Align edges carefully to avoid skew, and avoid forcing media through if it’s snagging. When introducing edible sheets, use a clean entry path and check for any residual dust that could affect print quality. If damp or curled media is detected, replace with dry sheets to prevent jams and inconsistent deposition.
Ink management and priming for safe edible printing
Install edible ink cartridges or bottles that are certified for use with food-contact surfaces. Prime the print head as directed by the manufacturer and perform a short nozzle check to confirm even deposition. Run a gentle calibration pass on a test sheet before attempting a larger design. Keeping ink handling separate from non-food materials minimizes cross-contact and preserves flavor integrity.
Printing a sample design and evaluating results
Begin with a simple, high-contrast design to clearly see ink deposition and color accuracy on edible media. Check for smudging, banding, or color bleeding, and adjust print speed or temperature if your printer supports it. Allow printed items to cure or dry per media guidelines, noting any odor or surface tack that could indicate issues with ink or media interaction.
Post-print hygiene, cleanup, and storage
After printing, clean the print head and feed paths with a food-safe cleaner, following the manufacturer’s recommended sequence. Wash hands and wear disposable gloves when handling edible media, and segregate kitchen-clean tools from non-food equipment. Store inks and media upright, in a sealed container, away from heat and direct sunlight to preserve stability and safety.
Ongoing maintenance and compliance for long-term use
Create a maintenance calendar that includes regular nozzle checks, media batch tracking, and periodic professional testing if you scale up production. Document every run: media batch, ink batch, and clean-up steps, so you can trace outcomes back to materials. Stay updated with safety guidelines from credible sources and integrate any new recommendations into your workflow.
Tools & Materials
- Edible ink cartridges or inks (FDA-compliant)(Ensure compatibility with your printer model and edible-safe certification)
- Edible printing media (edible paper or transfer sheets)(Choose sheets rated for your printer type and temperature)
- Printer-safe cleaner or 70% isopropyl alcohol(For between-prints cleaning to prevent cross-contamination)
- Lint-free microfiber cloths(For blotting and drying without leaving fibers)
- Food-safe gloves(Hygienic handling of edible media and designs)
- Protective mat or parchment paper(Minimizes mess during setup and printing)
Steps
Estimated time: 60-90 minutes
- 1
Verify safety and compatibility
Confirm that the edible inks and media are compatible with your toybox printer model. Check supplier documentation for food-safety certifications and approved use. This prevents waste and potential safety risks.
Tip: Keep a running log of compatible media for quick reference. - 2
Prepare work area and clean printer
Power down, unplug, and wipe all surfaces with a food-safe cleaner. Remove any prior non-food residues from the print path to avoid contamination. This step reduces cross-contact risk.
Tip: Use disposable wipes for hygiene and replace gloves after cleaning. - 3
Load edible media correctly
Insert edible media into the correct tray, aligned with the feed mechanism. Do not force media through if it binds or resists. Proper loading improves print accuracy and prevents jams.
Tip: Test feed with a simple strip before full design printing. - 4
Install edible ink and prime print head
Install edible inks per manufacturer instructions and perform a nozzle check. Run a short calibration pass to ensure consistent deposition on edible media.
Tip: Keep ink bottles capped when not in use and store upright. - 5
Run a calibration print on test media
Print a basic calibration pattern to verify alignment, color, and edge quality. If alignment drifts, re-calibrate and adjust the ICC profile if available.
Tip: Use high-contrast colors to easily spot misalignment. - 6
Print a sample design
Proceed with a small design to evaluate color fidelity and media interaction. Allow adequate curing time per media guidelines and check for odor or surface tackiness.
Tip: Print at reduced scale first to save media during testing. - 7
Post-print cleaning and allergen precautions
Clean the print head and path with food-safe cleaner; avoid cross-contact with non-food components. Wear fresh gloves when handling completed edible prints and label batches clearly.
Tip: Establish a dedicated cleaning routine for edible prints. - 8
Maintenance and storage
Store inks and media in sealed, labeled containers away from heat. Create a maintenance log to track consumables and cleaning cycles for traceability.
Tip: Schedule routine checks and refresh media every few months depending on usage.
People Also Ask
Is edible ink safe to use on foods intended for consumption?
Edible inks are specifically produced to be food-grade and safe for consumption, but you must verify the ink's certification and ensure it is used with approved media. Always follow supplier guidelines and local food-safety regulations.
Edible inks are designed for food contact, but verify certification and follow guidelines to stay safe.
Can I use regular printer ink for food printing?
No. Regular printer inks are not intended for direct contact with food and may contain additives not approved for consumption. Use only edible inks and media certified for food use.
No, avoid regular inks for food printing; use edible inks and media.
What edible media types work best for a toybox printer?
Common edible media includes sugar sheets and wafer papers designed for compatibility with home printers. Check media thickness, drying time, and heat tolerance for your specific model.
Sugar sheets and wafer papers are typical edible media; verify compatibility with your printer.
How do I prevent cross-contamination between edible prints?
Maintain separate tools and surfaces for edible printing, clean the printer path thoroughly between runs, and store edible media away from non-food items.
Keep tools separate and clean between runs to prevent cross-contamination.
What signs indicate unsafe printing conditions?
Look for persistent off-odors, unusual textures, color bleed, or unexpected reactions between media and ink. If unsure, halt printing and reassess materials and procedures.
Watch for off smells or strange textures. Stop and reassess if in doubt.
How often should I replace edible inks and media?
Follow the manufacturer’s shelf-life guidance and storage recommendations. Replace if discoloration, clumping, or odor develops.
Replace per supplier guidance; if in doubt, don’t use questionable media.
Watch Video
Quick Summary
- Verify edible materials before printing.
- Maintain strict hygiene to prevent cross-contact.
- Calibrate and test prints before final designs.
- Store media and inks properly for safety and quality.
- Consult official safety guidelines for food-grade printing.