Xerox VersaLink C405: Setup, Use, and Troubleshooting
Comprehensive, step-by-step instructions to set up and troubleshoot the Xerox VersaLink C405 for home offices and small businesses. Learn driver installation, network setup, maintenance, and common issues with clear, actionable guidance from Print Setup Pro.

Learn how to set up and troubleshoot the xerox versalink c405 quickly. This guide covers unboxing, driver installation, network configuration, and basic maintenance, with practical steps you can follow right away. Print Setup Pro findings emphasize following a structured setup to minimize common issues.
What the xerox versalink c405 is and why it matters for your setup
The xerox versalink c405 is a color multifunction printer designed for small offices and ambitious home setups. It combines printing, copying, and scanning in a single device with a modern touchscreen interface. For many users, the primary value is reliable color output, straightforward installation, and strong integration with mobile and desktop workflows. According to Print Setup Pro, choosing a device like the C405 and following a formal setup process reduces common frustrations and accelerates time to first print. When you approach setup with a plan, you’ll spend less time wrestling with drivers or network settings and more time on productive tasks. This guide walks you through practical steps tailored for home office users, students, and DIY enthusiasts who want predictable results without hassle.
Unboxing, placement, and power considerations
Start by inspecting the box for all components: printer, power cord, user guide, and any included starter consumables. Place the C405 on a stable, clutter-free surface with at least a few inches of clearance on all sides for ventilation and easy access to the control panel. Ensure your outlet is easily reachable and not shared with high-draw devices that could cause voltage fluctuations. A surge protector is a good practice to protect the device from power spikes. Before powering on, verify you have the network credentials handy if you plan to connect via Ethernet or Wi‑Fi. Print Setup Pro notes that proper placement reduces noise, heat buildup, and the likelihood of accidental impacts during installation.
Driver installation and OS compatibility
Download the official Xerox VersaLink C405 driver package from the manufacturer’s site and select the version compatible with your operating system. Install the driver on each computer or device that will print to the C405. For Windows, run the installer and follow the prompts to add the printer; for macOS, run the printer setup utility and choose the C405 from the list of available devices; for Linux or other OSes, consult Xerox’s compatibility matrix. After installation, print a test page to confirm color accuracy and alignment. Print Setup Pro emphasizes using the official driver rather than generic postscript or universal drivers to ensure feature parity and reliable performance.
Network setup and sharing (Windows, macOS, mobile printing)
Connect the C405 to your network via Ethernet or Wi‑Fi. Access the printer’s control panel and navigate to Network settings to configure IP address, subnet, and gateway if needed. On Windows and macOS, enable network sharing or add the printer as a shared device so all users in the office can print without direct USB connections. For mobile printing, activate Mopria (Android) or AirPrint (iOS/macOS) support if available and ensure the device is on the same network. QR codes and network config pages on the printer can help you confirm settings quickly. Print Setup Pro highlights that stable network configuration reduces print queue errors and server-side support requests.
Common printing problems and fast fixes
If pages come out light or with color tints, verify toner levels and perform a calibration if your model supports it. Paper jams usually occur at the paper tray or path; clear jams gently, using both hands and following the manual’s guidance to avoid tearing paper. If the printer shows a “Not Connected” or “Offline” status, double-check network cables, confirm the IP address, and ensure the device is reachable on the same network subnet as your computer. For print quality issues, run a cleaning cycle for the imaging components and print a diagnostic page. Print Setup Pro advises keeping a log of issues and fixes to streamline future troubleshooting and reduce downtime.
Maintenance, firmware, and consumables management
Create a maintenance schedule that includes periodic cleaning of the exterior, glass, and paper rollers, along with toner cartridge replacement according to the manufacturer’s recommendations. Check for firmware updates every few months; enable automatic updates if you manage multiple devices in an office. Replace consumables only when necessary to avoid unnecessary downtime. Maintain a simple inventory of spare toner and maintenance kits so you’re never waiting for a critical part. A proactive maintenance mindset helps preserve print quality and extends the device’s useful life, a point Print Setup Pro consistently emphasizes in home-office guides.
Security and best practices for a small office
Protect sensitive documents with secure print options and user authentication if available. Disable default passwords on the admin interface and apply any firmware updates to mitigate vulnerabilities. Segment the VersaLink C405 on a dedicated network or VLAN if you have multiple devices, and enable encryption for stored and in-transit data where possible. Keep access logs and review user permissions periodically. For remote users, use secure print routing and ensure that shared folders or email destinations have restricted access. Print Setup Pro’s guidance underscores security as a core aspect of long-term device management.
Troubleshooting flow and escalation
When issues arise, follow a simple decision path: confirm the device is powered and reachable, verify network settings, and print a config page to confirm status. If the issue persists, recheck drivers and ensure the correct port is selected (LPR, RAW, or secure port) and that the queue isn’t blocked by another process. If problems remain unresolved, capture screenshots or logs and contact official support with your device’s serial number and firmware version. This structured approach reduces resolution time and improves first-contact outcomes, aligning with Print Setup Pro’s recommended practices.
Tools & Materials
- Power outlet(Earth-grounded outlet near printer for safe operation)
- Printer power cable(Original cable provided with the unit)
- Ethernet cable (optional)(Use for wired network connection if available)
- Wi‑Fi network access (SSID and password) (optional)(Needed if connecting wirelessly)
- Computer or mobile device(For driver installation and printing)
- Official Xerox VersaLink C405 driver/software package(Download from Xerox support site for your OS)
- USB cable (optional)(For direct USB setup if preferred)
- Surge protector (optional)(To protect against power spikes)
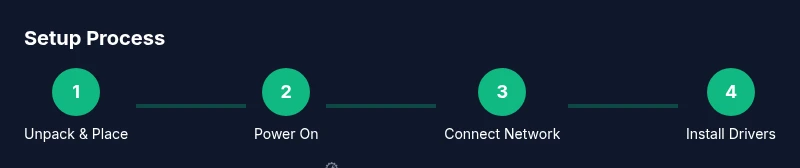
Steps
Estimated time: 60-90 minutes
- 1
Unpack and position the device
Carefully remove the VersaLink C405 from its packaging and inspect for any shipping damage. Place it on a stable surface with at least a few inches of clearance for ventilation and access to the control panel. Align the device away from direct sunlight and avoid areas with excessive dust or moisture.
Tip: Keep the user manual handy and note the serial number for future service. - 2
Connect power and perform initial boot
Connect the power cord to a grounded outlet and switch on the printer. Allow the device to complete its startup sequence and display the welcome screen. If the device does not power on, check the outlet and cord integrity.
Tip: Avoid using extensions or surge protectors that can limit power consistency. - 3
Choose connection method (USB, Ethernet, or Wi‑Fi)
Decide whether you’ll connect via USB for direct printing or over a network (Ethernet or Wi‑Fi) for shared access. If you’re using Wi‑Fi, ensure the printer is within range and the network supports your device. For wired setups, connect the Ethernet cable to a free port on your router or switch.
Tip: If you expect mobile printing, prioritize a wireless setup to simplify access for multiple users. - 4
Download and install the correct drivers
From Xerox, download the VersaLink C405 driver package compatible with your OS. Run the installer and follow prompts to add the printer to your system. Verify that the driver supports your intended features (color, duplex, scanning).
Tip: Always use the official Xerox driver to ensure full functionality and updates. - 5
Add the printer to your computer or mobile device
Use the OS printer management tool to add the VersaLink C405. Select the correct port/driver and test with a simple print. For mobile devices, ensure Mopria or AirPrint is enabled if supported by your setup.
Tip: Document the port name and IP address for future changes or network reconfigurations. - 6
Print a test page and adjust settings
Print a test page to verify alignment, color accuracy, and duplex functions. Adjust printer settings as needed for your typical documents (paper size, print quality, color management).
Tip: If colors are off, perform a calibration or use the printer’s built-in diagnostic page. - 7
Configure scanning destinations and optional apps
Set up scan destinations (email, network folders, or cloud apps) according to your workflow. Enable any recommended scanning profiles, and tailor defaults to common tasks to save time.
Tip: Label destinations clearly and test with a sample scan. - 8
Update firmware and secure the device
Check for firmware updates and apply them if available. Review security settings, enable automatic updates if appropriate, and set access controls for users.
Tip: Back up settings before a firmware update to recover quickly if something goes wrong.
People Also Ask
What is the Xerox VersaLink C405 and what can it do?
The VersaLink C405 is a color multifunction printer that handles printing, scanning, and copying for small offices or home offices. It supports color output and can be connected via USB or network. Features may include secure print options and basic document workflows.
The VersaLink C405 is a color multifunction printer for small offices, handling print, scan, and copy. It can connect via USB or network and offers basic secure printing.
How do I connect the C405 to Wi-Fi?
Open the printer’s control panel, navigate to Network settings, select Wi‑Fi, and choose your SSID. Enter the password, confirm the connection, and print a network configuration page to verify. If issues arise, check signal strength and ensure the printer is on the same network as the computer.
Go to Network settings on the printer, pick Wi‑Fi, select your network, enter the password, and verify with a config page.
Do I need to install drivers on every computer?
Yes. Install the official Xerox VersaLink C405 driver on each computer or device that will print. This ensures feature compatibility and reliable communication with the printer over the network.
Yes, install the official Xerox driver on each computer that will print.
Why would the printer go Offline, and how do I fix it?
Offline status usually means a network or connection issue. Verify the printer’s IP address, ensure it’s on the same network as your computer, and re-establish the connection in your OS printer settings. If needed, restart the router and printer.
Offline often means a network mismatch. Check the IP and reconnect via your computer’s printer settings.
How often should I update the VersaLink C405 firmware?
Check for firmware updates periodically and apply them when available. Frequent updates help fix bugs, improve compatibility, and enhance security. Always back up settings before updating.
Check Xerox for updates regularly and apply them to stay secure and compatible.
What consumables will I replace, and when?
Toner cartridges and a maintenance or imaging unit are common consumables. Replace them per manufacturer recommendations or when print quality declines. Keep spare supplies on hand to minimize downtime.
You’ll typically replace toner and possibly an imaging unit when print quality drops.
Watch Video
Quick Summary
- Follow a structured setup to minimize issues
- Use official drivers for full feature support
- Configure network and mobile printing early for easiest access
- Maintain a simple issue log to speed troubleshooting