3D Printer for Cookie Cutters: A Practical How-To
Learn how to pick and use a 3d printer for cookie cutters, choose safe filament, optimize slicer settings, and finish with food-safe coatings for repeatable results.

You’ll learn to select a suitable 3d printer for cookie cutters and begin printing safe, durable cutters. This guide covers printer selection, filament choices, slicer settings, and design tips to ensure clean edges and food-contact safety. By following these steps, home bakers, hobbyists, and small shops can create custom cutters confidently. We’ll also discuss maintenance, calibration, and common mistakes to avoid. This quick path helps you avoid failed prints and wasted filament.
Why a 3d printer for cookie cutters matters
For bakers, hobbyists, and small bakeries, a 3d printer for cookie cutters opens endless customization—shapes, sizes, and intricate details you can't achieve with store-bought metal cutters. According to Print Setup Pro, having a dedicated tool for edible shapes saves time and allows rapid experimentation with holiday motifs, monograms, and event-themed designs. This one capability dovetails with broader Print Setup Pro research on accessible at-home manufacturing in 2026, emphasizing practical, repeatable results over flashy technics. When you choose a printer, focus on stability, safe extrusion, and a reliable bed surface. A printer that holds calibration well reduces edge wobble and helps you consistently reproduce complex contours like stars, animals, and alphabet letters. In the long run, owning a 3d printer for cookie cutters can cut costs, reduce dependency on third-party suppliers, and empower you to prototype custom shapes for cookies, fondant stamps, and clay projects.
Key factors when choosing a 3d printer for cookie cutters
Selecting a 3d printer for cookie cutters should balance price with performance. Look for a heated bed, good bed leveling, a stable frame, and an enclosure if you print in a kitchen to minimize drafts. A larger build volume allows bigger shapes and multi-piece designs, but compact printers are often easier to calibrate. Reliability matters more than the newest feature set: a printer that consistently produces clean layers reduces post-processing. Filament compatibility is critical for cookie cutters: choose materials that print smoothly, shrink less during cooling, and are compatible with food-safe coatings. From the Print Setup Pro perspective, the most practical setups emphasize ease of maintenance, affordable spare parts, and robust community support. In practice, start with a modest printer in a safe, non-kitchen area, and evaluate its performance with simple shapes before committing to complex cutters.
Filament and material considerations for cookie cutters
Filament choice drives edge quality and surface finish. For cookie cutters, food-contact safety is paramount. Food-safe PLA or PETG options are commonly recommended, but you must verify certifications and handling guidelines from the manufacturer. Print at moderate temperatures and with a non-toxic cooling profile to reduce stringing and deformation. Keep separate filament spools for edible projects to avoid cross-contamination. If you plan to coat the final cutters with a sealant, ensure the chosen sealant is labeled food-safe and compatible with your printer's materials. Also consider dishwasher compatibility and heat resistance when using thick-walled shapes near ovens.
Slicing settings that matter for cookie cutters
Begin with a 0.2 mm layer height and a 0.4 mm nozzle; adjust if your printer uses a different standard. Use a moderate extrusion temperature to minimize oozing and edge blobbing; enable linear advance if supported. Set wall thickness to at least 1.2 mm for rigidity, and keep infill at 0% to maximize material efficiency, since cookie cutters are hollowed shapes that rely on outer walls. Enforce outer wall perimeters with a slight corner smoothing. Remove supports unless your design requires overhangs; otherwise enable minimal support and ensure clean removal. Calibrate retraction to reduce stringing, and consider a 90–120 second cooling pause between layers for better edge definition.
Design tips for cookie cutter shapes
Start with a base shape in a vector editor and extrude to create the cutter body; export as STL for most slicers. Maintain a wall thickness between 1.5–2.5 mm to withstand pressure during dough cutting, and add small fillets on inner corners to prevent sharp edges. Design flat bottoms for stable cutting and nested shapes to maximize batch printing. Include a small handle or loop if you plan multiple shapes. Keep tolerances loose by about 0.2 mm to account for filament variability and printer precision; test print tiny samples first to fine tune.
Post-processing and finishing
After printing, let the cutter cool completely before handling to avoid warping. Remove any support material with pliers and file rough edges with a fine file or sandpaper. Wash thoroughly with soap and water before any dough contact, and consider sealing with a food-safe epoxy or oil coating for extra safety; ensure the sealant is compatible with the plastic used. Dry cutters completely and store in a clean container away from dust. Finally, test-cut sugar cookies to evaluate edge sharpness and dough release, adjusting wall thickness as needed.
Maintenance and safety for kitchen 3d printing
Keep the printer in a well-ventilated area away from kitchen surfaces and food prep zones. Regularly clean the nozzle and bed, inspecting for filament debris and residue that could contaminate future prints. Use a dedicated spool and print surface for edible projects to reduce contamination risk. Calibrate bed leveling and run a test print weekly to maintain accuracy. If any part shows wear, replace it promptly; old nozzles and belts can cause imperfect edges. Finally, store tools safely and supervise use around children.
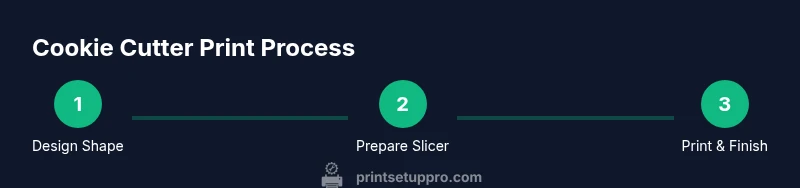
Practical workflow: from design to bake
Design your cutter in a simple CAD tool or import an STL from a design library. Check wall thickness and corner radii, then export as STL. In Cura or another slicer, select 0.2 mm layer height, 0.4 mm nozzle, and 1.6 mm wall thickness; slice and save G-code. Print a small batch of test cutters, then post-process and bake to validate performance. Iterate designs based on dough behavior and edge sharpness until you’re satisfied with the results.
Quick-start checklist for your first print
- Confirm your printer is on a stable surface and bed is level. 2) Load a food-safe filament and a dedicated slicer profile for cookie cutters. 3) Import a simple cutter shape and set a 0.2 mm layer height with a 0.4 mm nozzle. 4) Print a small batch and inspect edges for burrs or gaps. 5) Post-process by removing supports, sanding edges, and applying a food-safe coating if desired. 6) Bake a test cookie to verify release and edge durability, then iterate as needed.
Tools & Materials
- 3d printer(A stable, easy-to-calibrate model with a heated bed is ideal)
- food-safe filament (PLA or PETG)(Choose filament marketed as food-safe; confirm certifications)
- slicer software (e.g., Cura)(Prepare prints with cookie-cutter profiles)
- food-safe sealant or coating(Optional; used to enhance safety; ensure compatibility)
- silicone spatula or scraper(For safely removing finished cutters)
- calibrated test shapes(Print a few small shapes to validate tolerances)
Steps
Estimated time: 2-4 hours
- 1
Choose and set up your printer
Select a printer with a heated bed and solid frame. Position it on a stable surface away from kitchen splashes. Level the bed and verify nozzle height before any printing; these basics prevent early edge issues.
Tip: Record your initial bed height and nozzle temp as a baseline for future prints. - 2
Prepare your cutter design
Open a CAD or design file and verify wall thickness, corner radii, and overall dimensions. Export as STL and inspect for non-manifold edges that could cause slice errors.
Tip: Run a small test shape first to check tolerances before committing to batch prints. - 3
Slice with edible-friendly settings
Load the STL into Cura or your slicer, apply a 0.2 mm layer height, 0.4 mm nozzle, zero infill, and a minimum 1.2 mm wall thickness. Enable safe cooling and review the preview for gaps or blobbing.
Tip: Disable supports unless your shape has overhangs; unnecessary supports complicate cleanup. - 4
Print a test batch
Print a small run of basic shapes to validate edge quality and dough release. Check for burrs, warped edges, or sticking issues on the bed.
Tip: Pause between layers if your printer supports cooling pauses to improve edge definition. - 5
Post-process the cutters
Carefully remove supports, trim burrs with a fine file, and smooth edges with light sanding. Wash thoroughly before any dough contact and consider applying a food-safe sealant after drying.
Tip: Handle freshly printed edges with gloves to avoid cuts and keep surfaces clean. - 6
Test with dough and refine
Use cookie dough to test release and edge sharpness. If pieces stick or tear, adjust wall thickness and corner radii in your design and reprint a small batch.
Tip: Document any changes to compare progress across iterations.
People Also Ask
Is a heated bed necessary for cookie cutter prints?
A heated bed helps with adhesion and consistent cooling, reducing warp. It is especially beneficial for larger shapes, but not strictly mandatory for all PLA or PETG cookie cutters. If you don’t have a heated bed, ensure good bed adhesion with a suitable surface and proper first-layer calibration.
A heated bed helps with adhesion and cooling; it’s helpful for larger shapes but not strictly required if you have good bed adhesion and calibration.
Are food-safe filaments truly safe for cookies?
Food safety depends on multiple factors including the filament, coatings, and handling. Use filaments marketed as food-safe and practice strict hygiene; even then, the printed surface may not be perfectly food-contact safe. Consider sealing with a food-safe coating if your project requires it.
Food safety depends on the filament and coatings; use a food-safe option and consider a food-safe sealant if needed.
What design file formats work best for cookie cutters?
STL is widely supported by most slicers; ensure the model has proper wall thickness and no non-manifold edges. You can also use OBJ for certain workflows, but STL remains the most universal choice for cookie cutters.
STL is typically best for cookie cutter designs because it’s widely supported by slicers.
Can I reuse prints for multiple batches?
Yes, if you thoroughly clean the cutters to remove dough residues and ensure no coating degradation, you can reuse them for multiple batches. Inspect for burrs and edge wear between uses.
Yes, with thorough cleaning and inspection for wear between uses.
How long does a cookie cutter print typically take?
Print times vary with size and complexity. Simple shapes may finish in under an hour, while larger or highly detailed cutters can take longer. Plan for multiple iterations and respect cooling times between stages.
Times vary; expect shorter sessions for simple shapes and longer ones for bigger, detailed cutters.
Should I have a separate printer for edible projects?
Separating devices can reduce cross-contamination risk and simplify kitchen safety. If you only have one printer, designate a dedicated area and clean thoroughly before any edible-use prints.
Separate devices are safer for edible projects; if not possible, isolate and clean meticulously.
Watch Video
Quick Summary
- Choose a printer with a stable bed and easy maintenance.
- Use food-safe filament and verify coatings before use.
- Aim for 1.2–2.0 mm wall thickness for rigidity.
- Test with small shapes before batch printing.