3d Printer for Dragons: A Step-by-Step Guide to Dragon Model Printing
Learn how to select and use a 3d printer for dragons, from setup to finishing dragon models. Practical steps, materials, safety tips, and Print Setup Pro insights for home offices and hobbyists.

By the end, you’ll know how to pick a 3d printer for dragons, set it up for large, intricate dragon models, and choose materials for durable, vibrant finishes. You’ll assess build volume, heat management, and safety, plus a practical, step-by-step workflow recommended by Print Setup Pro. This quick answer sets expectations and shows exact criteria to compare printers and materials.
Dragon-Printing Foundations
Printing dragon-themed models combines artistry with engineering. Dragons demand large build volumes, robust layer adhesion, and careful heat management to capture scales, wings, and fine textures without warping. According to Print Setup Pro, the most important foundations are a printer with adequate build volume, a stable enclosure or cabinet to regulate temperature, and a reliable extrusion system that can handle high-temp materials. In practice, start by selecting dragon models that fit within your printer’s capabilities and plan for a scalable workflow: test small, then scale up. A well-planned approach reduces failed prints and saves material. As you design your dragon projects, consider objectives like display size, color intensity, and the level of detail you want to achieve. This helps you tailor printer specs, filament choices, and finishing steps to your unique dragon world.
Dragon-Printing Foundations (Expanded)
To begin, inventory your space and power setup. Dragons lean on consistent power, stable airflow, and a clean workspace to avoid issues with dust and moisture that can ruin delicate textures. Start with a dragon model that has a few tiny scales and a simple wing silhouette to validate bed adhesion and layer quality. This foundational testing helps you tune temperature, cooling, and retraction so you can reproduce larger, more complex monsters later. Print Setup Pro recommends documenting every test print so you can compare results and iterate effectively without repeating mistakes.
Tools & Materials
- 3D printer with large build volume(Aim for at least 300x300x300 mm; enclosure recommended for stability)
- Enclosed print chamber or enclosure(Reduces warping and fumes; helps with PETG/resin printing)
- High-temperature hotend/upgraded extruder(Capable of 230-260°C for PETG/PLA blends; check filament specs)
- Rigid build plate or glass bed(Smooth, flat surface improves first-layer adhesion)
- Filaments/resins (PLA, PETG, or resin)(Multiple materials enable detail and strength; choose based on model size)
- Digital calipers(Accurate measurements for scaling and fitment)
- Slicer software (e.g., Cura, PrusaSlicer)(Crucial for dragon-specific settings like supports and infill)
- Post-processing tools (sanding sponges, hobby knife, gloves)(For finishing dragon textures and edges)
- Adhesion aids (glue stick, blue painter’s tape, or hairspray)(Helps the initial layer grip large dragon bases)
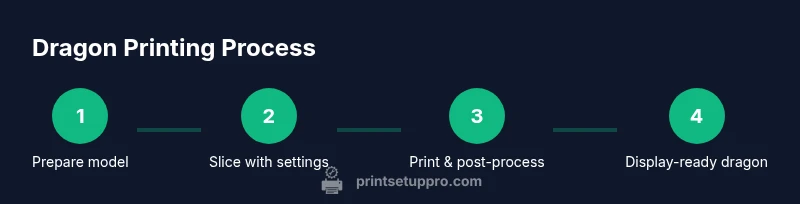
Steps
Estimated time: Total time varies by model size: typically 6–40+ hours per dragon, plus 2–6 hours for post-processing and painting.
- 1
Define dragon model size and scale
Select a dragon file that fits your printer's build volume or rescale a model in your slicer to preserve detail while staying within the bed size. Verify proportions to maintain silhouette integrity when scaling. Keep a reference sketch to compare scale across steps.
Tip: Start with a 60-120 cm wingspan model in a test file to assess scale against your printer. - 2
Prep printer and enclosure
Clean the build plate, ensure enclosure is vented, and preheat the nozzle to the material’s recommended temperature. Calibrate bed leveling and verify that the bed is within optimal distance for proper adhesion.
Tip: Use a brimming bead of filament or a light glue-stick layer to improve initial layer grip. - 3
Prepare model in slicer with supports and orientation
Import dragon model, orient for best layer visibility (flattening major ridges if possible), and configure supports only where needed to minimize post-processing. Choose layer height that balances detail with print time; thicker layers for large wings, thinner for facial features.
Tip: Enable gradual infill for large hollow areas to reduce warping and save material. - 4
Start print and monitor first layers
Begin with a controlled first layer; watch for consistent extrusion and adhesion. Pause if you notice bed squish or poor first-layer height, and adjust bed leveling as needed.
Tip: Enable z-hop and adjust cooling to prevent oozing on delicate dragon fins. - 5
Remove supports and clean print
Carefully remove supports after print completion using pliers or flush cutters; avoid forcing delicate scale edges. Sand rough surfaces lightly to prepare for priming.
Tip: Use a hobby knife at a low angle to minimize accidental gouges in fine scales. - 6
Post-process: priming, sanding, and painting
Prime the model to reveal surface imperfections, then sand smooth before applying base coats. Build up color with thin layers to preserve fine scale details and glaze in a protective clear coat for durability.
Tip: Seal resin dragons with a UV-resistant topcoat to prevent yellowing. - 7
Display and maintenance
Display dragon prints on a stable stand or shelf away from direct sunlight and moisture. Regularly clean the printer and perform routine maintenance to keep layer quality consistent for future dragons.
Tip: Keep a print log to track material batches and print conditions for future repeatability.
People Also Ask
What is the best 3d printer for dragon prints?
There isn't a single best printer; prioritize large build volume, enclosure, reliable extrusion, and strong bed adhesion for dragon models. Evaluate the printer's heat management and available upgrades before purchasing.
There isn’t one perfect printer; look for a large build volume, an enclosure, and reliable extrusion for dragon prints.
Which materials are best for dragon models?
PLA and PETG provide easy handling and durability for larger dragons. Resin offers exceptional detail but requires post-curing and proper ventilation.
PLA or PETG are great starting materials; resin gives finer detail but needs curing and ventilation.
How long does it take to print a dragon statue?
Print durations depend on scale, layer height, and infill. Large dragons can take many hours to days, but breaking the project into sections helps manage timing.
Times vary with size; plan for hours to days depending on scale and settings.
Do dragon prints require supports?
Most dragon models need supports for wings and tails; configure supports to minimize damage to delicate areas and remove cleanly after printing.
Yes, most dragon models need supports; use them wisely to minimize marking.
Is resin better than filament for dragons?
Resin yields finer details but requires a ventilated workspace and post-curing. Filament printing is more forgiving and easier for beginners.
Resin looks amazing but needs ventilation; filament is easier.
How should I finish dragon prints for display?
Prime, sand, and paint in thin layers to preserve details. Seal with a clear coat for durability and UV protection.
Prime, sand, paint, and seal for best results.
Watch Video
Quick Summary
- Choose a printer with ample build volume and a stable enclosure.
- Plan dragon prints with precise orientation and minimal, strategically placed supports.
- Practice post-processing to achieve lifelike textures and durable finishes.
- Document settings and results to improve future dragon projects.