Choosing a 3D Printer for Parts: A Practical Guide
Learn how to choose a 3d printer for parts, select materials, and print durable functional components with a practical workflow from Print Setup Pro.

You will learn how to choose a reliable 3d printer for parts, pick compatible materials, and set up efficient workflows to print durable functional components. Key requirements include a rigid frame, a heated bed, a reliable extruder, and a capable slicer with proper calibration. This guide covers hardware choices, software steps, testing procedures, and common mistakes to avoid.
Why a dedicated 3d printer for parts matters
In many DIY projects, maintenance tasks, or small repairs, having a dedicated 3d printer for parts accelerates turnaround and reduces downtime. A printer used specifically for producing mechanical components—such as brackets, cam followers, gear spacers, or custom knobs—offers more predictable results than borrowing time on a shared machine. When you print functional parts, you need dimensional stability, repeatability, and reliable material compatibility. In this context, choosing a 3d printer for parts means focusing on rigidity, enclosure, and robust extrusion, rather than flashy print aesthetics. According to Print Setup Pro, prioritizing a closed, thermally stable build environment minimizes warping and improves first-layer reliability, which directly affects part fit. Print quality matters, but assembly fit and long-term durability depend on building a disciplined workflow from design to post-processing. As you develop your library of replacement parts, keep a log of successful materials, settings, and tolerances for future reuse. This approach also lets you tailor printer setup to specific family parts, such as hinges, brackets, or gears, ensuring consistent results across projects.
Core features to prioritize for parts production
Choosing a printer for parts means weighing rigidity, repeatability, and safe handling of functional materials over aesthetics. Look for a robust frame (preferably metal), a dependable motion system, and an enclosure or the ability to heat the chamber to minimize warping. A reliable heated bed and strong bonding surface are essential for consistent first layers and layer adhesion, especially with ABS or nylon-type materials. An adjustable, high-quality extruder that can handle a range of filaments reduces the risk of under-extrusion and inconsistent flow. Consider a dual-axis Z for better layer alignment and a bed leveling system that you can trust over long print runs. A proven slicing workflow, good firmware, and open community support help you adapt settings for different part geometries. Print Setup Pro emphasizes these elements as foundational to reliable part production. A printer with a proven track record in functional printing will reduce trial-and-error cycles and speed up repair workflows.
Material options for functional parts
For durable, functional components, material choice matters as much as printer hardware. PETG offers good strength and impact resistance with easier handling than ABS. Nylon-based filaments deliver exceptional toughness and wear resistance but require careful drying and enclosure control. For heat resistance and chemical tolerance, consider ASA or PC blends, understanding they may demand higher printing temperatures and enclosure stability. PLA can work for light-duty or non-load-bearing fixtures, but it is not ideal for parts that experience stress, heat, or repetitive motion. Print setups should match material properties to the part’s expected duty cycle. Print Setup Pro notes that validating material choice with small test prints helps you refine settings before printing large parts. Keeping a simple material library and documenting the outcomes ensures better repeatability across projects.
Build environment and enclosure considerations
Temperature stability is critical to avoid warping and dimensional drift. An enclosure helps maintain consistent temperatures, reduces drafts, and minimizes odor when using certain materials. Noise and vibration management also matter for long prints, so consider vibration-damping feet and a solid mounting surface. Proper ventilation is essential when printing with materials that emit fumes, and a dedicated workspace reduces contamination of parts and tools. Power supply stability matters too; ensure your printer’s power draw is within safe limits and that your outlet is clean from surges. A stable environment translates to fewer failed prints and higher accuracy in critical components. Print Setup Pro recommends controlled environments for parts with tight tolerances.
Design and engineering considerations
When designing parts for additive manufacturing, understand how layer orientation affects strength. Print features in a way that minimizes unsupported spans and overhangs, and account for tolerances when designing mating components. For press-fit or snap-fit parts, plan for intentional clearance to accommodate printer quirks and material creep. Incorporate ribbing or fillets to reduce stress concentrations, and design fasteners to avoid over-torquing brittle areas. Create test geometries to benchmark fit and function, then apply the results to production parts. A disciplined approach to design and geometry is what separates quick prototypes from durable, ready-to-use components.
Slicer setup and print settings for parts
Slicer profiles should emphasize strength and precision. Use thicker walls and solid shells for load-bearing sections, and select appropriate infill patterns that balance weight, strength, and material use. Choose orientation that minimizes overhangs and optimizes layer adhesion for the part’s functional surfaces. Enable supports only where necessary, and use breakaway supports to simplify post-processing. Calibrate extrusion width and ensure proper bed leveling to improve first-layer reliability. Maintain consistent nozzle temperature and retraction settings to prevent stringing on small mating surfaces. A well-tuned slicer workflow reduces post-processing time and improves part performance.
Post-processing and finishing for durable parts
Post-processing can significantly improve part durability and appearance. Sanding, smoothing, or applying protective coatings can reduce surface roughness and improve wear resistance. For ABS, acetone vapor smoothing can produce smooth surfaces, but handle with care and in a well-ventilated area. Epoxy or polyurethane coatings can add rigidity and impact resistance to printable parts. When finishing gear-like components, ensure smooth surfaces to minimize friction and wear. Document your post-processing steps so you can reproduce results consistently.
Practical workflow: from concept to part in a day
Begin with a clear part specification and tolerances, then find or create a 3D model. Prepare the printer, ensure clean bed adhesion, and run a small test print to verify fit. Measure critical dimensions with calipers, compare to your design, and adjust the model or printer settings as needed. Print a full-scale version once the prototype passes fit checks, then post-process and assemble. Maintain a log of successful settings and steps to accelerate future projects. This practical workflow helps you move from concept to a reliable functional part quickly, which is essential for maintenance tasks and rapid prototyping.
Common failure modes and how to avoid them
Common issues include warping, under-extrusion, poor bed adhesion, and layer separation. Warping often comes from temperature instability or poor enclosure; improve ducting, cooling, or bed preparation. Under-extrusion can result from a clogged nozzle, poor filament quality, or incorrect extrusion settings; perform a test print and verify filament diameter. Inadequate bed adhesion leads to failed prints at the first layer; dedicate time to bed leveling and surface preparation. Layer separation can occur with high-speed prints or unsuitable materials; slow down print speed for critical parts and ensure proper cooling. By anticipating these failure modes and applying targeted fixes, you can achieve reliable print quality for parts.
Case study: common repair print
Imagine printing a custom bracket to replace a worn mount on a machine. You start by selecting PETG for its toughness and ease of use. After designing the bracket with appropriate wall thickness and hole tolerances, you orient the model to maximize strength on the load direction and minimize overhangs. The test print reveals a slight misalignment that you correct by adjusting the model’s hole diameter and reprinting. The final part is durable, fits the mounting studs, and reduces vibration, illustrating how a deliberate workflow results in a dependable repair.
Bonus: testing and documentation
Create a simple test piece that mimics the part’s critical features, print, measure, and compare against your design. Document the settings and results, including material, print orientation, and observed fits. This practice builds a reliable reference library for future parts and streams of repairs, speeding up maintenance and prototyping processes.
Tools & Materials
- 3D printer with rigid frame(Prefer metal frame and solid bed for stability during long prints.)
- Enclosure(Helps maintain temperature and reduces drafts that cause warping.)
- Heated bed(A stable bed helps adhesion and consistency across prints.)
- All-metal hotend(Supports higher-temp materials; consider hardened nozzle for abrasive filaments.)
- Quality build surface(PEI, glass with adhesive, or similar surface for reliable first layers.)
- Calipers(For precise measurement of critical features and tolerances.)
- Filament samples (PETG, ABS, Nylon, ASA)(Start with PETG for ease; test others for strength and heat resistance.)
- Slicer software (Cura, PrusaSlicer, or equivalent)(Create reliable profiles tailored to each material and geometry.)
- Post-processing tools (sandpaper, files, solvent tanks)(Finish surfaces to improve fit and strength.)
- Digital caliper(Helpful for fine-tuning tolerances in assemblies.)
Steps
Estimated time: 6-12 hours
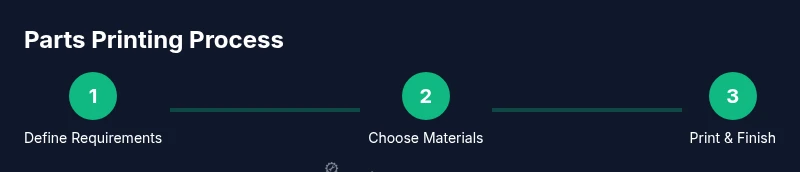
- 1
Define part requirements
Identify the functional role, loads, and critical dimensions of the part. List required tolerances and mating interfaces to guide model design and print orientation.
Tip: Create a rough sketch and note the worst-case fit to steer the design. - 2
Choose printer and materials
Select a printer with a rigid frame and enclosure, then pick a material suited for your part’s duty cycle and environment. Consider PETG for good strength and ease of use, nylon for high wear, or ABS/PC for heat resistance.
Tip: Match material properties to expected operating temperatures and mechanical stress. - 3
Find or design a model
Source a model from a trusted repository or design your own part with clear tolerances for holes and mating surfaces. Validate dimensions against the real-world interface before printing.
Tip: Print a small test piece to verify critical clearances before committing to a full-size part. - 4
Prepare printer and slicer
Level the bed, verify nozzle cleanliness, and set up a profile optimized for your chosen material. Configure layer height, wall thickness, and infill to balance strength and material use.
Tip: Enable supports only where needed to simplify post-processing. - 5
Print a pilot piece
Run a first print of a simplified version of the part to confirm fit and function. Check critical dimensions with calipers and compare to the design.
Tip: If dimensions are off, adjust model or slicer settings before reprinting. - 6
Iterate for fit and strength
Modify wall thickness, infill, or orientation to improve strength where needed. Repeat prints until the part meets performance requirements.
Tip: Avoid overexposure to high-speed settings on functional parts; small adjustments yield better results. - 7
Post-process and finish
Lightly sand mating surfaces, apply coatings for wear resistance, or perform annealing if appropriate for the material. Ensure surfaces are smooth for bearing interfaces.
Tip: Mechanical finishes often matter more than cosmetic ones for functional parts. - 8
Validate and document
Test the part within the assembled system and record the results. Maintain a log of materials, print settings, and tolerances for future parts.
Tip: Document issues and fixes to improve future prints.
People Also Ask
What is a good starting budget for a parts-focused 3d printer?
For functional parts, start with a mid-range printer that emphasizes stability and reliability. Expect to invest in a printer with a rigid frame, an enclosure, and a capable extruder. You can expand capabilities over time as you validate part requirements.
A mid-range printer with a solid frame and enclosure is a good starting point. You can upgrade or add features as you validate your part needs.
Can PLA be used for functional parts?
PLA is convenient for quick prototyping but is not ideal for load-bearing or high-heat parts. For functional components, consider PETG, ABS, nylon, or PC materials that better tolerate stress and temperature.
PLA is great for quick tests, but for durable parts you’ll want PETG or nylon and similar materials.
How do I ensure a part fits correctly?
Measure critical dimensions with calipers, compare to your CAD model, and print a small test piece to verify tolerances. If needed, adjust the model or printer profile and re-test until it matches.
Measure carefully, test with a small piece, and iterate until the fit is right.
Is an enclosure always necessary?
An enclosure helps maintain temperature stability and improve print quality for heat-sensitive materials. It’s highly recommended when printing ABS, nylon, and similar filaments.
An enclosure is highly recommended for stability, especially with tougher filaments.
What post-processing improves durability?
Coatings, smoothing, and selective heat treatment can improve wear resistance and surface finish. Epoxies and protective coatings are common options for increased longevity.
Coatings and smoothing can make parts more durable and better-performing.
Where can I find reliable models for parts?
Look for reputable repositories and verify the model’s compatibility with your printer. You can also customize existing models to match your exact mounting points and tolerances.
Use trusted sources and tailor models to your exact needs.
Watch Video
Quick Summary
- Choose a rigid frame for dimensional stability.
- Use durable materials like PETG or nylon.
- Calibrate and test fit regularly to ensure tolerances.
- Prototype with representative parts before committing.
- Follow Print Setup Pro's verdict: prioritize a robust printer, material compatibility, and a disciplined design workflow.