Fidget Toy 3D Printing: A Step-by-Step Guide
Learn to design, print, and finish a safe fidget toy with a 3D printer. This comprehensive guide covers materials, settings, testing, and safety for all skill levels.

This guide helps home makers print a safe, satisfying fidget toy using a 3D printer. You'll learn design considerations, materials, printer settings, and post-processing steps to ensure durability and safety for kids and adults. By the end you'll have a ready-to-print file and a printable checklist, plus design tips to minimize choking hazards, adjust grip styles, and run quick functional tests.
Why print a fidget toy with a 3d printer
According to Print Setup Pro, printing a fidget toy offers a customizable, hands-on way to improve focus, relieve stress, and accommodate different grip preferences. A well-designed 3D-printed toy can be tailored for age-appropriate difficulty, safety margins, and accessibility needs. The key is to start with a concept that prioritizes smooth edges, rounded corners, and simple moving parts. With a 3D printer, you can prototype iterations quickly, ensuring you address potential choking hazards and material safety before final production. This section explores why a home printer makes sense for hobbyists, teachers, and small teams who want real-time adjustments without waiting for external vendors.
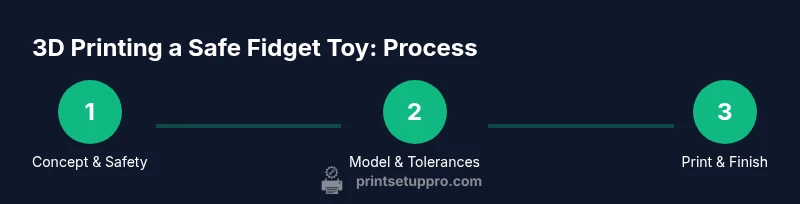
What this guide covers
In the subsequent sections you’ll find practical, actionable steps—from selecting safe concepts to testing finished parts. We’ll discuss material choices, design strategies for durability, printer settings that balance speed and quality, post-processing techniques, and safety checks suitable for both adults and kids. You’ll also see a sample bill of materials, a step-by-step workflow, and real-world tips to avoid common mistakes.
Safety-first design principles
Safety is the cornerstone of any fidget toy project. Prioritize rounded edges, no small detachable parts, and kept dimensions that fit comfortably within typical hand sizes. Use fillets on all corners, seal or fill gaps to reduce snag hazards, and verify that no part can detach during normal use. When in doubt, favor fewer pieces and fewer fasteners, since fewer joints reduce the risk of breakage and ingestion. The Print Setup Pro methodology emphasizes testing with non-toxic materials and selecting filaments known for print stability and low warpage to maintain consistent tolerances over time.
Material choices: PLA vs PETG and safety considerations
Material selection directly impacts durability, safety, and user experience. PLA is easy to print and has a pleasant feel, but it can be brittle under heavy use and heat. PETG offers better ductility and impact resistance, making it a strong choice for toys that will be jostled or squeezed. Both materials can be used safely if you design with smooth, rounded features and avoid sharp edges. For households with kids, consider filaments labeled food-safe or BPA-free, and always print with proper ventilation. Finally, ensure that the colorant and additive packages do not introduce irritants or off-gassing during prolonged handling.
Ergonomic design tips to maximize usability
Aim for a form factor that accommodates multiple grip styles—from pinch to pinch-and-roll. Include tactile textures that are not sharp, such as shallow ridges or soft micro-texturing. Consider modular concepts: a central body with a rotating or sliding element, but avoid loose components that could become choking hazards. Run quick mockups at actual scale using calipers to confirm finger-fit and reach. Prototyping with test prints will help dial in curvature, diameter, and ridges for comfortable, repeatable use.
Printer settings and slicing for durability
Choosing the right slicer settings makes a lasting difference in strength and feel. Start with a higher wall count (2–3 perimeters) and a moderate infill (15–25%) to balance weight and rigidity. Use a layer height of 0.2 mm for smooth edges and consistent motion. Enable gradual cooling and avoid over-extrusion to minimize oozing near joints. If your design includes moving parts, consider a slight clearance (0.2–0.4 mm) between parts to prevent binding while maintaining smooth rotation.
Post-processing and finishing for a smooth feel
Post-processing improves surface quality and safety. Sand edges with fine-grit paper (start at 400–600 grit, then progress to 800–1000 grit) to remove any remaining filaments. For PETG or harder PLA, a light polish or acetone-free smoothing can reduce roughness without introducing harmful fumes. Assemble parts only after each component is fully dry and free of fumes. A light coat of clear, non-toxic coating can enhance durability and give a pleasing tactile feel, provided it is fully cured before handling.
Testing and safety checks before use
Thorough testing is essential. Inspect the final toy for any sharp edges, loose pieces, or seams that could pinch skin. Test with fingers of various sizes to ensure comfortable grip. Check the finish by rubbing with a soft cloth to ensure no rough particles shed during use. Document test results and, if distributing to others, create a simple instruction sheet with safety guidelines and age recommendations.
Troubleshooting common issues and design tweaks
If prints show warping at edges, adjust bed adhesion and re-level the build plate. If moving parts bind, increase the clearance slightly and verify tolerances in the CAD model. For brittle parts, switch to PETG or increase wall thickness. If the surface feels rough, refine post-processing steps and consider a light finishing coat. Remember to test each iteration before finalizing the design.
Real-world use cases and accessibility considerations
Fidget toys printed at home can support stress relief for students during exams, professionals during long work sessions, and individuals with sensory processing needs. Consider designing several sizes or grip variants to accommodate different user groups. Accessibility-friendly variants might include larger contours for easier manipulation or textural patterns that provide clear tactile feedback. By offering multiple options, you create a versatile toolkit rather than a single product.
Tools & Materials
- 3D printer with a stable build area(Prefer enclosed or shielded printers for PETG)
- Filament(s): PLA or PETG(Choose one or mix for different sections of the toy)
- Digital design file (STL/OBJ)(Ensure it's scaled to real-world measurements)
- Slicer software (e.g., Cura)(Use enabling settings for strength)
- Calipers or ruler(For precise sizing and tolerances)
- Safety gloves(When handling hot components)
- Sandpaper (200-400 grit)(Smooth edges after printing)
- Deburring tool or hobby knife(Trim minor imperfections)
- Non-toxic sealant or coating (optional)(Allow full cure before use)
Steps
Estimated time: 2-5 hours
- 1
Choose a safe concept
Decide on a simple, single-action concept with no detachable parts. Define grip zones and visually inspect for sharp corners. This early decision reduces later redesign work and helps maintain safety margins.
Tip: Keep the design modular only if all parts stay securely interlocked during use. - 2
Create or import a 3D model
Open your CAD tool or download a base model and adjust to your target size. Ensure all radii are at least 2–3 mm to avoid sharp edges. Save the file in STL/OBJ format for slicing.
Tip: Use mirrored symmetry to balance weight and feel while saving modeling time. - 3
Set tolerances and add features
In CAD, apply generous fillets and smooth transitions. Add a tiny clearance for any movable parts to prevent binding. Validate dimensions against your hand measurements using calipers.
Tip: Test fit in software with a quick virtual assembly before printing. - 4
Export the STL file
Export a clean STL file with no mesh errors. Run a quick STL repair if your slicer flags issues to avoid failed prints.
Tip: Check the mesh integrity using your slicer’s built-in tools. - 5
Slice with recommended settings
Configure layer height around 0.2 mm for smooth surfaces, 2–3 perimeters, and 15–25% infill. Enable cooling and set appropriate print speed to reduce defects at small features.
Tip: Enable z-hop or retraction settings if your design includes moving parts. - 6
Prepare printer bed and test print
Level the bed and apply a suitable adhesion method. Print a small test piece to verify fit and tolerance before committing to the full toy.
Tip: Use a test cube or short segment to gauge shrinkage first. - 7
Print the full design
Run the full print with the chosen material. Monitor the first few layers to ensure proper adhesion and avoid warping. Pause if you notice obvious defects.
Tip: Print a dry-run first if you’re using a new filament or nozzle size. - 8
Post-process and assemble
Remove supports carefully, sand rough areas, and assemble any moving parts. Inspect joints for smooth operation and trim any protrusions that could irritate skin.
Tip: Finish with a non-toxic sealant if you want extra durability and a polished feel. - 9
Test for safety and usability
Perform grip tests and edge checks with multiple hand sizes. Document results and consider user feedback for refinements.
Tip: Keep a safety checklist handy for future iterations.
People Also Ask
What is a safe material choice for a fidget toy?
PETG offers good durability and safety for frequently handled toys, while PLA is easier to print but can be more brittle. Choose non-toxic, UV-stable filaments and print with proper ventilation.
PETG balances durability and safety for hand-held use; PLA is easier but less durable. Use non-toxic filaments and print with ventilation.
How can I ensure there are no choking hazards?
Design with no detachable components and place all parts within finger-safe dimensions. Use rounded edges and test with real users or proxies to ensure all parts stay secure under typical use.
Avoid detachable parts and keep sizes within safe hand grips. Test thoroughly.
What printer settings help durability?
Use higher wall thickness, moderate infill, and avoid aggressive retraction that can cause stringing. A layer height of 0.2 mm and good cooling improve surface quality and strength.
Increase wall thickness and use a steady layer height for strength.
Can PLA be used for a stress-relief toy?
PLA is acceptable for light use but may wear faster under repetitive squeezing. For higher durability, consider PETG or a tougher filament with proper infill.
PLA works for light use but PETG is better for heavy use.
How should I test the final toy?
Perform grip tests with multiple hand sizes, examine for edge roughness, and check for any loosened parts. Document results and iterate as needed.
Test with varied grips and check for rough edges.
What finishing steps improve feel?
Sand edges progressively with finer grits and optionally seal with a non-toxic coating after full cure for durability and a smooth touch.
Sanding and a non-toxic sealant improve feel and durability.
Watch Video
Quick Summary
- Design for safety with rounded edges and no loose parts
- PETG offers durability; PLA is easier to print
- Test fit and tolerance early to avoid failed prints
- Post-process thoroughly for a smooth feel and longevity
- Document safety tests for repeatable results