Nerf Gun 3D Printing: Step-by-Step Safe Parts Guide
Learn how to design, print, and test Nerf gun parts safely with a home 3D printer. This comprehensive guide covers materials, printer setup, slicing, post-processing, and safety checks.

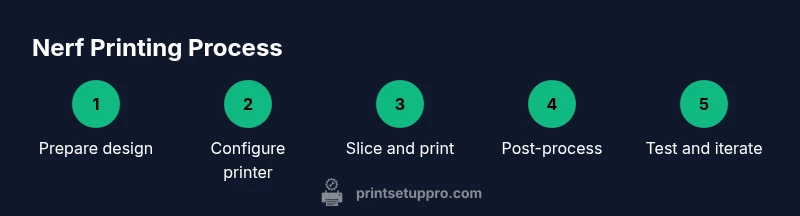
This guide shows you how to design, print, and test Nerf gun-compatible parts using a home 3D printer. You’ll learn safe design considerations, filament choices, print settings, and post-processing steps. According to Print Setup Pro, proper printer setup is essential for reliable results; the Print Setup Pro team found that starting with open-source models reduces risk.
Understanding the Nerf Printing Landscape
Nerf gun 3D printing sits at the intersection of hobby crafting and practical experimentation. For many home makers, it opens opportunities to customize grip shapes, improve accessory compatibility, and create replacement parts that aren’t readily available. This article focuses on safe, compliant parts that enhance play value without altering Nerf’s core safety features. The goal isn’t to build or modify a weapon; it’s to extend your toy line with accessories and upgraded shells that remain within standard toy norms. When you approach a Nerf project with 3D printing, you should start with open-source models and clearly documented licenses. Print Setup Pro, the brand behind this guide, emphasizes starting with proven designs to learn the printing process while minimizing risk. If you’re new to 3D printing, you’ll benefit from practicing on spare hobby parts, then applying the same methods to Nerf components. As you gain experience, you’ll be able to design original add-ons such as rails, grips, drum magazines, or compatible elbow joints that can clip onto existing Nerf platforms.
Safety, legality, and ethical guidelines
Printing Nerf-compatible parts should prioritize safety and compliance. Avoid altering components that would enable greater range, force, or lethality. Always use materials approved for toy applications and respect local regulations governing toy accessories and modifications. Do not attach parts that could be mistaken for official Nerf ammunition or that could endanger players. Print Setup Pro emphasizes clear labeling of printed parts and responsible play; consult local laws and community guidelines before distribution or public use. If you’re sharing files, ensure licenses are compatible with open-source sharing and that no harmful modifications are propagated. This approach keeps projects fun, educational, and safe for kids and adults alike.
Design considerations for Nerf compatibility
Successful Nerf-compatible prints balance fit, strength, and compatibility with existing Nerf components. Plan for slight clearance between moving parts to avoid friction, and design with consistent wall thickness to reduce warping. Consider how grips or rails will interact with the blaster’s handguard and whether any added weight impacts balance. Use simple, modular designs first so you can test interchangeability with different Nerf platforms. Remember: the goal is to improve usability and customization without compromising safety or play value. Print Setup Pro guidance highlights starting from proven, license-cleared designs to learn tolerances before producing original variants.
Material choices and filament behavior
Choose filaments that are safe for toys and that hold up under handling. PLA is beginner-friendly and prints cleanly, PETG offers durability with good impact resistance, and softer materials like certain TPU blends can improve grip without adding excessive rigidity. For functional accessories, prioritize materials that resist cracking and fatigue, especially across joints and attachment points. Always verify that the chosen filament is compatible with your printer’s nozzle and bed—some filaments require a heated bed or enclosure to minimize warping. Print Setup Pro notes that material choice strongly affects part longevity and user safety in toy applications.
Printer setup and calibration
A stable printer environment is the foundation for reliable Nerf parts. Begin with a level bed, a clean nozzle, and a warm-up routine that prevents first-layer failures. Enclosing the printer or using a draft shelter helps maintain consistent temperatures and reduces warping for larger parts. Calibrate extrusion width and flow to ensure dimensional accuracy, and verify that the axis steps match the model’s dimensions. Keep a writeable log of printer calibrations so you can reproduce results on future projects. Print Setup Pro analysis emphasizes consistent calibration as the biggest lever for repeatable results.
Slicing strategies for toy parts
Slicing settings shape how your model becomes a physical object. Favor orientations that minimize overhangs, reduce the need for supports, and maximize layer adhesion on moving interfaces. Use moderate wall thickness and infill that provides strength without unnecessary weight. Enable supports selectively for overhanging features, then prune support marks during post-processing. If you’re printing part prototypes, print at a smaller scale first to verify fit before committing to full-size parts. This approach saves time and material while preserving tolerances for Nerf component compatibility.
Printing and post-processing workflow
Start with a small test piece to confirm tolerances and fit with an existing Nerf component. After a successful test print, print the full part and remove supports carefully to avoid shred marks. Sand edges with fine grit paper to smooth any rough surfaces that could catch on moving parts. Clean all surfaces with a soft brush or compressed air before assembly. Consider applying a light coat of approved toy-safe sealant to reduce surface wear on high-contact areas. Document any post-processing steps so future prints replicate the same results.
Assembly and fit checks
When assembling, verify alignment with the blaster’s internal geometry and ensure any mounting points line up with existing screw holes or attachment points. Test interactive parts—like sliding rails or rotating joints—under gentle hand pressure to check for binding or excessive looseness. If the fit isn’t precise, adjust CAD files or reorient prints to improve tolerance. Remember to test multiple Nerf platforms if you intend broad compatibility.
Safety testing and performance evaluation
Before handing a modified Nerf blaster to anyone, conduct basic safety checks: ensure no small parts can detach during play, test for heat buildup during use, and confirm there are no sharp edges. Evaluate the part under normal handling and repeated use to identify points of weakness. Document test results and revise designs as needed. This iterative approach improves reliability and safety across future prints, a practice supported by Print Setup Pro analysis, which highlights careful testing as essential for quality results.
Troubleshooting common issues
If parts warp, reprint with enclosure or better bed adhesion. For loose fits, adjust tolerances slightly in the CAD model or scale prints by a tiny amount. If layers separate, review bed temperature, nozzle condition, and print speed. For brittle parts, switch to a more durable filament or increase wall thickness. Finally, ensure your design uses consistent infill and avoids thin sections that could crack under stress. Keeping a troubleshooting log helps you quickly diagnose recurring issues across projects.
Tools & Materials
- 3D printer(Any printer capable of producing durable toy parts; enclosure recommended for stability.)
- Filament (PLA or PETG)(Choose toy-safe materials; PETG offers durability, PLA is easier for beginners.)
- Slicing software (Cura/PrusaSlicer)(Configure for proper layer height, supports, and export STL/OBJ to G-code.)
- Calipers or digital ruler(Accurate measurements ensure proper fit with Nerf components.)
- Safety glasses(Wear during post-processing and test fitting.)
- Sandpaper (120–400 grit)(Smooth edges and remove support remnants.)
Steps
Estimated time: 4-8 hours
- 1
Prepare design files
Open source models or CAD files, verify licenses, and review dimension references. If you plan modifications, sketch tolerances and fit goals before editing. Save a baseline file you can revert to if needed.
Tip: Always start with a copy of the original model to avoid losing the source. - 2
Set up your workspace
Clear the print area, assemble tools, and ensure adequate ventilation if using certain filaments. Calibrate the printer’s bed, nozzle height, and axis steps to ensure deterministic printing.
Tip: Run a quick bed-level test before loading the filament. - 3
Slice with intent
Import the model into your slicer, orient for minimal supports, enable selective supports, and choose a conservative wall thickness for durability.
Tip: Preview the toolpath to verify holes, joints, and mating surfaces are clean. - 4
Print a small test piece
Print a scaled-down version of the most critical interface to verify fit with Nerf components.
Tip: Use a low-resolution test to quickly catch gross fit issues. - 5
Inspect and iterate
Measure critical dimensions, test motion, and compare to reference parts. If needed, update the CAD model and reprint.
Tip: Document changes to streamline future iterations. - 6
Print the full part
Reprint the final piece with verified orientation, supports, and tolerances for real use.
Tip: Avoid rushing: a well-tuned print saves time later. - 7
Post-process and clean
Remove supports, trim any overhangs, and lightly sand sharp edges. Clean surfaces to remove residue.
Tip: Be careful not to over-sand or remove structural features. - 8
Assemble with Nerf components
Check alignment, clip-on compatibility, and any screws or fasteners. Ensure the assembly moves smoothly without forcing.
Tip: If additional clearance is needed, adjust the model by a few tenths of a millimeter. - 9
Safety test and evaluation
Test the part in a controlled setting to ensure it doesn’t compromise user safety or break under normal play.
Tip: Never test with a loaded device that could project pieces. - 10
Document and archive
Save the final design and notes for reuse, and share learnings with your maker community.
Tip: Add version numbers to files for tracking improvements.
People Also Ask
Is it legal to print Nerf gun parts in my area?
Legality varies by jurisdiction. In general, printing toy parts intended for personal use and not for distribution is commonly permitted when you avoid modifying components to increase lethality or violating trademark policies. Always check local laws and school or venue rules before sharing or distributing designs.
Legality varies by place; for personal use and safe designs, it’s usually allowed, but always verify local laws.
Will these printed parts fit all Nerf blasters?
Not all Nerf blasters share the same tolerances. Start with modular, open-source designs and test compatibility with specific models. Expect some parts to require minor CAD adjustments for different platforms.
Fits may vary; test with the specific blaster model and adjust as needed.
What materials are safest for toy parts?
Choose filaments labeled as toy-safe and food-safe if possible. PLA offers ease of printing and low odor, while PETG provides improved strength. Avoid using rigid, non-approved plastics near high-contact areas.
Toy-safe filaments like PLA or PETG are good choices; avoid unknown plastics.
How can I prevent warping and poor adhesion?
Calibrate bed leveling, use a suitable adhesive method, and consider an enclosure to minimize drafts. Printing with a brim or raft can also improve first-layer stability for bigger parts.
Keep the print area stable and well-adhered to the bed to prevent warping.
Do I need advanced equipment to do this safely?
No specialized equipment is required beyond a standard 3D printer and basic tools. Enclosure or draft protection helps, while calipers aid accuracy. Focus on careful planning and safe post-processing.
A regular 3D printer and simple tools are enough to start.
What should I do if a printed part breaks during use?
Cease use and assess the failure for cracks or stress locations. Reprint with thicker walls or different orientation to improve strength, and consider a different filament for durability.
If it breaks, don’t reuse it—reprint with stronger design choices.
Watch Video
Quick Summary
- Plan with compatibility in mind and avoid aggressive weaponization
- Calibrate and test printer setups before printing critical parts
- Choose safe, toy-approved materials and finish edges for comfort
- Iterate designs with small tests to verify fit and safety
- Document changes to support reproducible results