Guide to 3D Printers: Setup, Use, and Troubleshooting
An in-depth, step-by-step guide to 3D printers for home offices and students, covering setup, materials, software, safety, and troubleshooting.

This guide helps you choose, set up, and troubleshoot a 3D printer for home offices, classrooms, and hobbyists. You’ll learn how to compare FDM vs resin systems, select a starter machine, prepare your first print, and perform basic calibration and maintenance to boost success. This concise overview sets expectations and maps the steps you’ll follow.
Why a Practical Guide to 3D Printers Matters
For home office users, students, and DIY enthusiasts, a well-structured guide to 3D printers reduces wasted filament, failed prints, and setup headaches. By focusing on safe operation, reputable hardware choices, and a clear workflow, this guide from Print Setup Pro helps you go from unboxing to confident printing with fewer detours. Understanding terminology, print routines, and maintenance basics saves time and money over the long run.
Understanding 3D Printing Technologies: FDM vs SLA vs SLS
Three common technologies define the market: FDM (fused deposition modeling) using thermoplastics, SLA (stereolithography) using resins cured by light, and SLS (selective laser sintering) using powder materials. FDM printers are generally beginner-friendly and affordable, making them ideal for learning and prototyping. Resin-based SLA printers deliver high detail for miniatures and precision parts, though post-processing and odor management require care. SLS is typically premium and industrial, offering strong, durable parts without support structures. Your choice hinges on cost, print quality, material properties, and post-processing needs.
Note from Print Setup Pro: When starting, prioritize reliability, availability of replacement parts, and community support. This guidance is designed to help you compare options without overwhelming you with jargon.
Choosing the Right Printer for Your Needs
Begin by defining your goals: simple prototypes, educational projects, or detailed miniatures. Consider build volume, print speed, filament compatibility, and the size of models you plan to print. Look for a printer with proven reliability, an active user community, and accessible spare parts. For many beginners, a mid-range FDM printer with a heated bed and open-source firmware provides a balanced mix of performance and upgradeability.
Getting Started: Unboxing, Assembly, and First Calibration
Begin with a clean workspace and read the user manual carefully. Unbox the printer, install any required firmware, and connect to a computer or SD card as directed. Level the bed and verify nozzle distance using a calibration sheet or paper feel test. Perform a first test print with a simple, flat object to gauge adhesion and extrusion flow. Keep a log of settings for future reference.
Slicing Software and Print Preparation
Slicing is the bridge between your model and the physical print. Popular slicers like Cura and PrusaSlicer let you set layer height, infill, supports, and extrusion temperature. Import your model, verify scale, and choose a conservative first-layer height to improve bed adhesion. Slice a test file with basic parameters, then adjust based on observed results. Save the G-code to your printer’s media source and monitor the first layer closely.
Materials and Consumables: Filaments and Resins
Filament choices drive strength, flexibility, and surface quality. PLA is forgiving and beginner-friendly, while PETG offers durability with moderate printing difficulty. ABS requires enclosure control due to warping, and specialty materials like nylon or flexible TPU have unique handling needs. Resin printers require careful post-processing and safety measures, including proper ventilation and protective gear. Always store consumables properly to avoid moisture absorption.
Maintenance, Safety, and Troubleshooting
Regular maintenance keeps a printer reliable: clean the nozzle, check belts for tension, inspect the build plate, and verify wiring connections. Safety matters: avoid touching hot components, never leave a printer unattended during operation, and keep work area ventilated when printing with resins. Common issues include bed adhesion problems, stringing, and ghosting; approach fixes with a methodical, documented process and incremental tests.
Budgeting and Long-Term Costs
Initial investment varies by technology and features, but plan for the printer itself, consumables, and spare parts. Ongoing costs include filament, resin, replacement nozzles, build surfaces, and occasional upgrades or maintenance kits. A practical approach is to start with a reliable, mid-range system and scale with your printing ambitions rather than chasing top-tier features from day one. Print Setup Pro’s guidance emphasizes sustainable budgeting over flashy upfront statements.
Tools & Materials
- 3D printer (FDM or resin)(Choose one that matches your goals (budget, detail, and material type).)
- Power cable and power outlet(Ensure a stable power source with adequate clearance.)
- Filament spool (PLA recommended for beginners)(Start with a forgiving material and a color you like.)
- Slicing software (e.g., Cura, PrusaSlicer)(Install and create calibration profiles.)
- Bed adhesion aids (glue stick or Magigoo)(Helpful for stubborn first layers.)
- Calipers or a ruler(For precise measurements during calibration.)
- Spatula/print removal tool(Use gently to avoid damaging the build plate.)
- Isopropyl alcohol and lint-free cloths(Clean surfaces and tools after prints.)
- Safety gear (gloves, goggles)(Recommended when handling resins.)
- Post-processing tools (pliers, hobby knife, sanding paper)(Improve surface finish and detail.)
Steps
Estimated time: 60-90 minutes
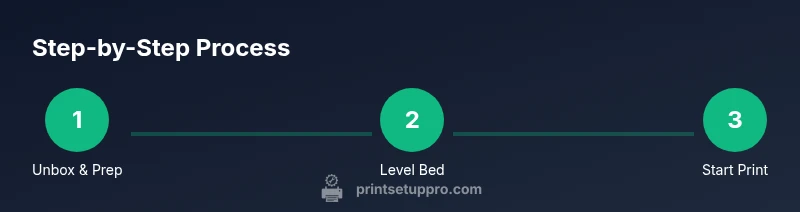
- 1
Unbox and prepare the printer
Unbox the printer on a stable surface and remove packaging. Verify all components are present and follow the setup wizard to connect power and any required cables. This initial setup reduces later troubleshooting and ensures firmware is up-to-date.
Tip: Take photos of each setup stage to reference later if needed. - 2
Level the build surface
Begin with a cold, clean surface. Calibrate bed height using a sheet of printer paper at multiple points across the bed. A consistent gap ensures first-layer adhesion and print quality.
Tip: Do not rush; small adjustments yield better results than large twists. - 3
Load filament and prime extrusion
Insert the filament, feed it into the extruder, and perform a prime to ensure material flows smoothly. Watch for any grinding or slipping, which indicates a feed issue that needs attention before printing.
Tip: Cover the nozzle area to prevent drafts that could cool and warp the first layer. - 4
Import model and configure slice settings
Open your model in the slicer, verify scale and orientation, and select a conservative first-layer height. Enable supports only if necessary and confirm infill patterns suit the object’s purpose.
Tip: Run a small test print to validate settings before committing to a large model. - 5
Start the first test print and monitor
Start with a simple, flat object to gauge bed adhesion and extrusion. Observe the first layer closely and pause if you see gaps or deformation to adjust bed level or nozzle flow.
Tip: Keep notes on temperature, speed, and layer height for future reproductions. - 6
Post-process and refine
Once printed, remove the part carefully and evaluate the finish. Use basic post-processing like light sanding or solvent smoothing as appropriate for the material. Store prints and leftover filament properly to minimize material changes.
Tip: Label parts and keep a log of settings for repeatability.
People Also Ask
What is the best starter 3D printer for beginners?
The best starter printer balances reliability, community support, and ease of use. Look for a model with a heated bed, straightforward setup, and readily available replacement parts. Start with a reputable brand and a widely supported firmware to minimize early frustrations.
For beginners, pick a reliable model with strong community support and a heated bed to simplify initial prints.
What is the difference between FDM and resin printers?
FDM printers melt and extrude plastic filament to build parts, offering lower cost per print and easier cleanup. Resin printers cure liquid resin with light for high-detail parts but require post-processing and ventilation considerations.
FDM is affordable and easy to start; resin gives high detail but requires more post-processing and safety steps.
Do I need a heated bed?
A heated bed helps with adhesion and reduces warping on certain materials, especially ABS and PETG. For PLA, a heated bed is beneficial but not always essential if you have good bed adhesion methods.
Yes, a heated bed improves adhesion for many materials, but PLA can print without one if adhesion is managed.
Which slicer software should I use?
Cura and PrusaSlicer are popular, feature-rich choices with active communities. They support standard file formats and offer presets to simplify setup for beginners.
Cura or PrusaSlicer are solid starting points with plenty of learning resources.
What are common causes of failed prints?
Common causes include poor bed adhesion, incorrect nozzle height, filament moisture, and slicer misconfigurations. Tackle each factor methodically and test with small prints before committing to larger builds.
Bed adhesion and height are frequent culprits; check those first before changing many settings.
Watch Video
Quick Summary
- Define goals before buying a printer.
- Choose FDM for ease and cost; SLA for detail when safe handling is ready.
- Master bed leveling for reliable prints.
- Regular maintenance prevents downtime and improves results.
- Plan for consumables and spare parts to manage costs.