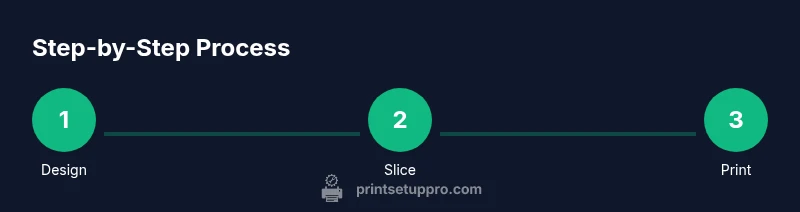
How to Make 3D Printer Models: A Complete Step-by-Step Guide
A comprehensive, beginner-friendly guide to designing, exporting, slicing, printing, and finishing 3D printer models for reliable results.

This guide shows you how to create printable 3D models from concept to finished part. You’ll learn design basics, exporting STL files, selecting slicer settings, and post-processing tips for reliable prints. By following the steps, you’ll improve model fidelity, minimize failed prints, and tailor models for your printer and material.
Understanding goals and constraints for your model
If you’re wondering how to make 3d printer models, the first step is to define the purpose of the part. Is it a functional component that will bear weight, a snap-fit assembly, or a cosmetic object? Write down the critical dimensions, tolerances, and surface finishes you require. Consider the printing material’s properties—PLA prints easily with good dimensional stability, while PETG offers strength and chemical resistance. Print Setup Pro emphasizes starting with a simple test target and validating it in your real assembly to avoid surprises later. Document the end-use environment, including temperature, exposure to sunlight, and potential impact, so you can choose the right filament and print settings. Remember that every choice—layer height, wall thickness, and infill pattern—affects strength, weight, and print time. In this first block, the aim is to translate a concept into measurable requirements that your CAD model can meet. With clear goals, subsequent steps become faster and more predictable, reducing iterations and material waste. The keyword how to make 3d printer models should guide your decisions from the outset, ensuring every feature serves the intended function.
CAD design foundations and workflow
Before you draw, establish a workflow that balances creativity with printability. Start with simple, modular parts that can be assembled post-print. Choose units consistently (millimeters are standard in most CAD tools), and set an origin that aligns with how you’ll place the part on the printer bed. Build with manufacturability in mind: avoid extremely fine features that your printer cannot reliably reproduce, design fillets instead of sharp edges where possible, and maintain minimum wall thickness to prevent brittle sections. As you model, frequently check scale, fit, and clearances against the intended mating parts. Print Setup Pro recommends creating a small prototype of critical features to validate fit before committing to a full-size print. Regularly save versions to compare design iterations and capture valuable learnings for future projects.
Exporting and verifying STL/OBJ integrity
Exporting to STL or OBJ is not the final step—verification matters. Ensure your mesh is watertight with no holes, non-manifold edges, or inverted normals. Use your CAD software’s validation tools or a dedicated mesh checker to catch issues that slicers will struggle with. When you export, confirm the unit scale matches your slicer expectations; mismatches here lead to parts that are too small or too large. After exporting, load the file in a viewer to inspect the geometry and confirm it matches your intent. If you discover minor defects, fix them in the CAD file and re-export instead of patching in the slicer. This practice reduces failed prints and returns you to a clean starting point for slicing.
Slicing: translating a model into printable instructions
Slicing converts your 3D model into layers and toolpaths that the printer executes. Start by choosing a slicer that fits your workflow (Cura, PrusaSlicer, or others). Import the STL/OBJ, then orient the model to minimize overhangs and supports; the goal is to reduce material usage while preserving strength and finish. Adjust the layer height, infill pattern, wall thickness, and top/bottom layers to meet the required balance of speed, strength, and surface quality. Consider adding a brim for adhesion on small footprints and enabling vertical expansion to accommodate slight bed-level variations. Print Setup Pro suggests running a quick test print on a small section of the model to fine-tune temperature, speed, and cooling before committing to a full print.
Printer preparation: calibration, bed leveling, and material choice
A successful print begins with a well-prepared printer. Level the bed and verify nozzle height for a consistent first layer. Check that the filament diameter matches your slicer settings and that the extruder feeds smoothly. For beginners, start with a forgiving material like PLA and an adhesive bed surface to improve first-layer success. Keep the printer in a stable environment away from drafts and dust. If you’re switching filaments, recalibrate extrusion width and temperature to prevent under- or over-extrusion. Printing calibration artifacts (a small cube or benchy) helps you quickly assess dimensional accuracy, surface finish, and layer consistency. Print Setup Pro’s guidance highlights these preparatory steps as key to predictable results and fewer post-process fixes.
Printing, monitoring, and early validation
Begin printing with a monitor on day one, especially for complex or new designs. Watch for first-layer adhesion, layer gaps, and scorching or stringing symptoms. If the print stalls or jams, pause safely and inspect the nozzle and filament path. For difficult geometries, consider printing in multiple parts and assembling later, which reduces print failures and improves tolerances. After printing, remove supports carefully, then perform a light sanding on rough surfaces. If you’re aiming for a glossy finish or precise color alignment, plan a post-processing workflow that includes smoothing, priming, and painting. Print Setup Pro emphasizes patience during post-processing; the best finishes often come from methodical, careful work rather than rushing.
Troubleshooting: common issues and fixes
Warping, stringing, or layer misalignment are common, especially with new materials or warm environments. Warping can be mitigated with a heated bed, enclosure, or brim; stringing is often a temperature and retraction setting issue; layer shifts indicate mechanical looseness or timing problems. Keep a running log of temperatures, speeds, and environmental conditions to identify patterns. Calibrating the printer’s axes, re-tensioning belts, and cleaning the nozzle can address many mechanical causes. When in doubt, simplify the model and reduce print speed for initial tests to isolate the root cause.
Project walkthrough: from idea to finished model
Imagine you’re designing a small gear housing. Start with a clear requirement: it must snap into place with a 0.25 mm clearance. Model the housing in CAD with generous tolerances during prototyping, then verify fit using a quick STL check. Export, slice with careful orientation, and print a test piece. If the fit is tight, increase clearance slightly and reprint a smaller section. Once you confirm the fit, print the full part, perform post-processing such as deburring and painting, and assemble with the surrounding components. This hands-on walkthrough demonstrates how a simple concept becomes a reliable, functional 3D-printed model.
Final checks and iteration planning
Before concluding, re-check critical dimensions against your requirement sheet and ensure the finish aligns with expectations. Create a short iteration plan that outlines potential design changes, printing parameters to test, and a schedule for future improvements. Document the successful settings, including slicer profiles, nozzle size, and material type, so you can reuse them for similar projects. A disciplined approach to iteration saves time and accelerates skill development in 3D modeling and printing.
Tools & Materials
- CAD software (e.g., Fusion 360, FreeCAD)(Free options available; choose based on comfort level)
- 3D printer(Any common FDM/FFF printer)
- Filament (PLA recommended for beginners)(Stock for testing; PETG or ABS for stronger parts)
- Calipers or ruler(Accurate measurements for fits)
- Slicer software (Cura, PrusaSlicer)(Import STL/OBJ and set print profiles)
- Bed adhesion aids (glue stick, blue tape)(Improves first layer adhesion)
- Spare nozzle and tools for maintenance(Useful for nozzle clogs or wear)
- Fine-grit sandpaper and hobby knife(Post-processing and cleanup)
- Safety gear (glasses, heat-resistant gloves)(Protection when handling hot parts)
- Digital caliper for tolerances(Precision checks during design)
Steps
Estimated time: 2-6 hours
- 1
Define model goals and constraints
Identify the intended use, required tolerances, and finish. Document critical dimensions and potential assembly constraints.
Tip: Write measurable criteria (e.g., 0.05 mm fit tolerance). - 2
Choose CAD tool and set units
Pick a CAD program and establish consistent units; ensure origin alignment with the print bed.
Tip: Enable symmetry where applicable to speed design. - 3
Create base geometry
Draft the main shapes, keeping features modular and adjustable for easy edits.
Tip: Start with a rough block; refine features gradually. - 4
Ensure watertight mesh and appropriate thickness
Verify closed surfaces; avoid fragile features. Maintain minimum wall thickness for durability.
Tip: Run a mesh check and keep walls 1.2–2 mm as a safe baseline. - 5
Export and verify STL/OBJ
Export with standard units; inspect the file in a viewer for holes or non-manifold edges.
Tip: Keep original CAD file for quick edits. - 6
Import into slicer and set orientation
Position for minimal supports; orient faces to reduce overhangs and maximize strength.
Tip: Enable auto-supports only where necessary to save cleanup time. - 7
Configure slicer settings
Choose layer height, infill, walls, and supports. Start conservative and adjust after a test print.
Tip: Use a brim for small footprints to improve bed adhesion. - 8
Run a calibration print
Print a small section to validate dimensions and surface quality before committing to the full part.
Tip: Document temperature and speed that produce reliable results. - 9
Print final model and post-process
Remove supports, trim artifacts, sand rough spots, and apply finishing if desired.
Tip: Cool slowly to avoid warping; wear gloves when handling hot parts.
People Also Ask
What software is best for beginners making 3D printer models?
Beginners should start with user-friendly CAD like FreeCAD or TinkerCAD. As skills grow, consider Fusion 360 or Blender for advanced features.
For beginners, start with FreeCAD or TinkerCAD; as you gain skill, switch to Fusion 360 or Blender for more features.
How long does it take to print a model?
Print duration depends on size, layer height, and infill. Small parts finish quickly, larger, detailed models take hours.
Print time varies with size and settings; expect minutes to hours for typical models.
Do I need a slicer, or can I print directly from CAD?
A slicer is required to convert 3D models into printable layers and machine instructions.
Yes, you need a slicer to turn CAD models into printer-ready instructions.
What does 'watertight' mean in 3D printing?
Watertight means the mesh has no holes or non-manifold edges, ensuring a solid, printable model.
It means the mesh is sealed and print-ready without gaps.
How can I fix warping or layer separation?
Improve bed adhesion, stabilize ambient temperature, and adjust cooling. Consider a heated bed or enclosure for larger prints.
Try better bed adhesion and stable temperatures; slow down slightly if needed.
Should I split complex parts into multiple pieces?
Yes, splitting complex models can reduce support needs and improve print reliability. Ensure joints have adequate clearance.
Splitting parts can simplify printing and assembly.
Watch Video
Quick Summary
- Plan practical goals and tolerances first
- Export clean, verified STL/OBJ files
- Slice with orientation and supports to minimize waste
- Post-process for best fit and finish
- Maintain a calibration practice for consistency