What Is Wrong With My 3D Printer? Practical Troubleshooting
An urgent, practical guide from Print Setup Pro to diagnose and fix common 3D printer problems, with baseline checks, calibration, and safe, step-by-step fixes.

The most likely issues are simple setup or maintenance gaps rather than hardware failure. Start with a quick baseline: confirm correct nozzle temperature, re-level the bed, check for a clogged nozzle or tangled filament, and run a calibration print. If these steps don’t fix it, follow the diagnostic flow in the body for deeper fixes.
What is wrong with my 3D printer?
When a 3D printer misbehaves, the first instinct is to assume something dramatic happened. In reality, many failures stem from simple setup gaps or routine maintenance that were missed. According to Print Setup Pro, identifying the root cause begins with a structured baseline assessment before jumping to complex repairs. This guide emphasizes a practical, hands-on approach designed for home users, students, and DIY enthusiasts who need quick, reliable fixes without specialized tools. By building a clear picture of symptoms, you can often restore reliable printing in a single sitting and reduce downtime for future projects.
Quick baseline checks you can perform now
Before diving into diagnostics, perform a quick round of checks that apply to most common failures:
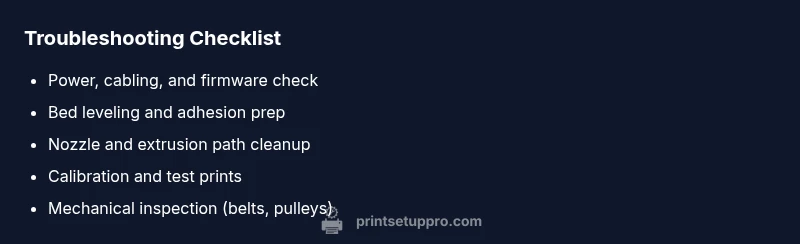
- Verify the printer is powered on and connected to a stable power source.
- Confirm bed leveling is correct and the nozzle is close but not touching the bed.
- Check for obvious filament tangles, jams, or loose spool placement.
- Ensure the correct filament type and diameter are selected in your slicer and printer firmware.
- Inspect belts for looseness or obvious wear and replace if needed.
These steps are low-risk and high-yield. If the problem persists, proceed to the diagnostic flow and deeper fixes described later in this article.
Common root causes: mechanical, thermal, or material issues
Most print problems fall into three broad categories:
- Mechanical: loose belts, misaligned gantry, or wobbly build plate can cause layer shifts or ghosting.
- Thermal/Extrusion: under-extrusion, over-extrusion, or temperature fluctuations disrupt consistent filament deposition.
- Material/Software: incorrect slicer profiles, oozing from a clogged nozzle, or filament moisture can degrade print quality.
Print Setup Pro Analysis, 2026, notes that many failures are user-caused, underscoring the importance of a disciplined approach to setup, calibration, and routine maintenance.
Understanding these categories helps you map symptoms to likely causes and select the right fixes without guessing.
Baseline checks: power, cables, firmware, and filament path
If you still see issues after initial checks, verify:
- Power supply stability and all connected cables are secure.
- Firmware is up to date and the correct four parameters (steps per mm, endstop logic) are set.
- The filament path is clear from spool to nozzle; remove tangles and ensure a smooth run.
- The hotend reaches and maintains the target temperature with PID control.
Document any abnormal readings to guide the next steps and keep your printer from drifting into new issues.
Calibration and test prints: cubes, towers, and simple geometry
Calibration is the heart of reliable printing. Start with:
- A calibration cube to test dimensional accuracy and extrusion width.
- An extrusion test to confirm consistent flow and nozzle pressure.
- A temperature tower to identify the best hot-end temperature for your filament.
- A first-layer test for bed adhesion and initial squish.
Record the results and adjust based on observed discrepancies. Small calibration tweaks often yield significant quality improvements.
Diagnostic flow at a glance: symptoms to diagnosis to fix
This section maps common symptoms to probable causes and practical fixes. It’s designed as a quick-reference guide while you’re at the printer.
- Symptom: inconsistent extrusion → Diagnosis: extrusion path or nozzle clog → Fix: clean nozzle, check drive gears, and reload filament.
- Symptom: layer shifting → Diagnosis: belt or gantry issue → Fix: tighten belts, inspect pulleys, and ensure smooth motion.
- Symptom: bed adhesion failure → Diagnosis: leveling or surface prep → Fix: relevel bed, rerun adhesion aids like brim or raft, and clean the bed surface.
If symptoms persist after these checks, move to the step-by-step fixes for the most common causes in the next section.
Safety and common mistakes to avoid
Safety is essential when working with hot components and moving parts. Always unplug before servicing and never perform maintenance with the printer powered. Avoid forcing components or using metal tools on hot surfaces, which can damage the nozzle or wiring. A common mistake is skipping calibration after hardware changes, which reintroduces issues despite the fix. Always re-run tests after any adjustment.
Steps
Estimated time: 45-60 minutes
- 1
Power down and inspect basics
Ensure the printer is unplugged. Inspect power cable, USB/SD connections, and the controller board for any obvious damage or loose connectors.
Tip: Firm but gentle reseating of cables can fix intermittent faults. - 2
Unload filament and clean the nozzle
Heat the nozzle to a safe working temperature and carefully purge filament. Remove any stringing or debris that may be clogging the nozzle.
Tip: Never use metal tools when the nozzle is hot; risk of burns or damage. - 3
Level the bed and confirm a good first layer
Perform a fresh bed level using paper or a feeler gauge. Confirm the nozzle is not too close to or too far from the bed, and run a small test line.
Tip: Level the bed warm if your printer supports it; gravity and deformation change with temperature. - 4
Calibrate extrusion and steps per mm
Print a simple test segment to measure actual extrusion versus expected. Adjust the E-steps per mm accordingly in firmware.
Tip: Make small adjustments and re-test to avoid overshoot. - 5
Run a calibration cube or tower
Use standard calibration models to assess dimensional accuracy and temperature performance. Iterate until dimensions match target values.
Tip: Document the target temps and measured values for future reference. - 6
Inspect mechanicals and firmware
Check belts for tightness, pulleys for secure screws, and perform a firmware update if available.
Tip: Always back up current settings before upgrading firmware.
Diagnosis: Printer stops mid-print or exhibits inconsistent extrusion and misaligned layers.
Possible Causes
- highBed not leveled or warped print surface
- highNozzle clogged or partial extrusion
- mediumLoose belts or drifting gantry
- lowTemperature instability (heater PID or thermistor issue)
Fixes
- easyRelevel the bed and verify the surface is flat; recheck adherence with a fresh print
- easyClean or replace the nozzle; purge the extruder to ensure smooth filament flow
- mediumTighten and inspect Y/Z/X belts and pulleys; test for smooth motion with a bench run
- hardCheck heater cartridge and thermistor; perform a PID tune if necessary
People Also Ask
What is the most common reason a 3D printer stops mid-print?
Mid-print stops are usually caused by extrusion jams, temperature instability, or bed collision. Start by checking the nozzle, temperature readings, and bed level, then run a small calibration print to verify flow. If the issue persists, follow the diagnostic flow to identify deeper causes.
Most stops come from jams, temperature issues, or bed interference. Check the nozzle, temps, and bed level, then test with a calibration print.
How do I fix bed adhesion problems?
Bed adhesion problems typically arise from poor leveling, dirty bed surfaces, or inappropriate first-layer height. Relevel the bed, clean the bed surface, and adjust the first-layer height and extrusion width. Consider using a brim or raft if adhesion remains weak.
Relevel the bed, clean the surface, and adjust the first layer. Brims or rafts can help if adhesion is still poor.
Why is my extruder skipping or under-extruding?
Skipping or under-extrusion can result from a clogged nozzle, reduced drive gear tension, or incorrect extrusion settings. Clean the nozzle, inspect the drive gears, and verify extrusion steps per mm. Re-test with a calibration cube after adjustments.
Clogs, loose gears, or wrong extrusion settings can cause skipping. Clean the nozzle, check gears, and re-test extrusion.
How often should I calibrate my printer?
Calibrate whenever you notice dimensional drift, print quality changes, or after hardware changes. A baseline calibration schedule—every few months or after major changes—keeps prints accurate.
Calibrate when you see drift or after hardware changes. Regularly updating calibrations keeps prints accurate.
Can software updates fix print quality issues?
Software and firmware updates can fix bugs and improve control algorithms but aren’t a substitute for physical checks. Use updates to enhance stability, then verify hardware and calibration as well.
Updates can help stability, but you still need to check hardware and calibration.
Is it safe to replace the nozzle myself?
Yes, nozzle replacement is common but requires caution. Ensure the printer is cool, use proper tools, and follow manufacturer guidelines. If you’re unsure, seek professional help to avoid burns or damage.
Replacing a nozzle is safe if you wait for it to cool and follow instructions. If unsure, get help.
Watch Video
Quick Summary
- Start with baseline checks before complex repairs.
- Calibrate bed leveling and extrusion for accuracy.
- Run tests to confirm fixes and prevent repeat issues.
- Document settings to simplify future troubleshooting.