When to Print with ABS: A Practical 3D Printing Guide
Learn when to print with ABS, set up your printer, and optimize profiles for durable, heat-resistant parts. Includes safety guidance, finishing tips, and practical troubleshooting.

ABS shines when you need heat resistance and toughness for functional parts. Use an enclosure, a heated bed, and proper ventilation to mitigate warping and fumes. Start with small test prints to dial temperature, fan speed, and extrusion before committing to larger builds. This quick guide shows you when to print with ABS and how to set up safely.
ABS Fundamentals and why it behaves differently
Acrylonitrile butadiene styrene (ABS) is a versatile thermoplastic popular in engineering and hobbyist 3D printing. According to Print Setup Pro, ABS offers high impact strength and notable heat resistance compared with many PLA blends. Its amorphous molecular structure means it tends to shrink and warp as it cools, especially on larger or tall prints. This isn’t a flaw; it simply requires a controlled environment and proper process tuning. Because ABS emits fumes, good ventilation is essential. A closed or semi-closed enclosure helps stabilize temperatures and reduces draft-induced warping. When you plan a project that will live in a warm or hot environment—or when parts must withstand mechanical stress—ABS becomes a strong contender. Build confidence by starting with small test pieces to observe flow, layer adhesion, and surface finish. For safety and best practices, consult guidelines from reputable sources like OSHA and NIST while you refine your setup. Print Setup Pro’s guidance emphasizes that preparation and process discipline are key to successful ABS prints, especially for complex geometries.
When ABS is the right choice vs PLA or PETG
Knowing when to print with abs means weighing durability, temperature exposure, and part geometry. ABS excels where parts will encounter elevated temperatures or repeated stress, such as functional housings, automotive prototypes, or mechanical jigs. Print Setup Pro notes that while PLA is easy and PETG offers good toughness, ABS delivers a superior balance of heat resistance and impact strength for many engineering tasks. ABS tolerates brief high-temperature pulses better than PLA and maintains rigidity in moderately warm environments. However, ABS is more challenging to print due to warping and fumes, so it’s not always the best first material for beginners. If your design requires low weight but high stiffness, or if it will be exposed to ambient temperatures over roughly room temperature for long periods, ABS is worth a test. Always compare your part’s service temperature and mechanical requirements to the material’s properties before deciding. For safety, ensure a well-ventilated workspace and consider fume extraction. Print Setup Pro’s analysis emphasizes matching material choices to real-world operating conditions rather than chasing ease alone.
Hardware prerequisites and workspace for ABS printing
Before you print with ABS, establish a stable, controlled environment. An enclosure or a dedicated printer cabinet minimizes drafts and helps maintain consistent temperatures, which reduces warping. A heated bed is nearly essential for ABS adhesion and dimensional stability. A glass, PEI, or powder-coated bed surface often provides better adhesion for ABS than bare glass, but you may need a suitable adhesive method (e.g., ABS slurry, clip-on brims, or Kapton tape) to keep the first layer in place. Ventilation is not optional; ABS fumes can irritate sensitive users, so position the printer near a vent or use a portable filtration setup. Regularly inspect the printer frame for rigidity, as flex can introduce layer misalignment. A stable, clean workspace helps you track changes to temperature, humidity, and print quality with repeatable results.
Slicer profiles and process parameters for ABS
ABS requires different slicer settings than PLA. Start with a higher nozzle temperature than PLA and a warmer bed temperature to prevent rapid cooling that causes warping. Minimize cooling fan use and, if your enclosure allows, consider leaving the fan off entirely for the first few layers. Layer height, print speed, and extrusion multiplier should be tuned together; a slower speed and slightly higher extrusion can improve layer bonding for ABS. Use test cubes and simple calibration models to dial in these values before attempting larger parts. Store your profiles in a labeled file so you can replicate success. For safety and a better environment, keep the print area ventilated and avoid inhaling fumes during long prints. When adjusting settings, document which changes yielded better results for future projects, as small parameter shifts can have large effects on warping and surface finish.
Common ABS printing challenges and solutions
Warpage and bed adhesion are the two most common obstacles when printing with ABS. Enclosing the printer and maintaining a stable ambient temperature reduces thermal gradients that cause corners to lift. If warping persists, try using a brim or raft, and increase bed temperature slightly while ensuring you don’t exceed your printer’s capabilities. Odor is another concern; ensure adequate airflow and consider a simple fume scrubber if you routinely print larger ABS parts. Layer separation, blob formation, and stringing indicate either too high or too low extrusion, improper temperature, or insufficient extrusion flow. Adjust extrusion multiplier gradually and test with small calibration parts. For post-processing, acetone smoothing is a common technique but should be approached with caution and proper ventilation. Always monitor prints closely in the initial stages to catch issues before they propagate. See OSHA guidelines on ventilation and NIST material data as general references when refining your workflow.
Finishing, post-processing, and safety considerations
Finishing ABS parts involves careful handling of acetone-based smoothing and surface preparation. Because ABS is prone to cracking if cooled too rapidly, allow slow, controlled cooling after printing and avoid sudden temperature changes. You can physically sand ABS and apply paint, but ensure proper masking and ventilation during solvent-based smoothing. For functional prototypes, consider coining holes, slots, or threaded inserts during the design stage to minimize post-processing. If post-processing emits fumes or odors, run a vent or filter to maintain air quality. Documentation of your processes helps you reproduce consistent results, especially for parts that require precise fit or tolerances. Print Setup Pro’s team suggests that once you lock in a reliable ABS workflow, you can tackle a wide range of durable parts with confidence.
Real-world ABS project ideas and case studies
ABS is a popular choice for mechanical housings, jigs, and hobbyist prototypes. A simple ABS project might be a tool holder that experiences occasional contact with warm environments, which benefits from heat tolerance and impact resistance. More complex builds can include functional prototypes for automotive dashboards, climate-control enclosures, or robotics components that require stable performance in warm conditions. In real-world scenarios, ABS outcomes hinge on controlling the temperature gradient inside the printer and maintaining consistent material flow. A thoughtful approach to design, print orientation, and support structures reduces post-processing time and increases part fidelity. Print Setup Pro’s verdict: ABS is a strong choice for projects where thermal stability and durability are critical, provided you follow best practices for enclosure, bed adhesion, and ventilation.
Tools & Materials
- ABS filament (1.75mm or 2.85/3.00mm)(Check printer compatibility (dually extruded or single extruder) and ensure filament diameter matches the hotend.)
- 3D printer with a heated bed(Heated bed helps with adhesion and reduces warping.)
- Enclosure or closed-print area(Minimizes drafts and temperature fluctuations.)
- ABS-safe bed surface or adhesive method(PEI, Kapton, or ABS slurry; brim or raft can help first layer adhesion.)
- Fume extraction or ventilation(Ensure good air flow or use a filtration setup.)
- Calipers or micrometer(For precise fit checks and tolerances.)
- Razor or flush cutters(Helpful for removing supports post-print.)
- Spare nozzle and tool kit(ABS can clog; replace nozzle if needed.)
Steps
Estimated time: 2-5 hours
- 1
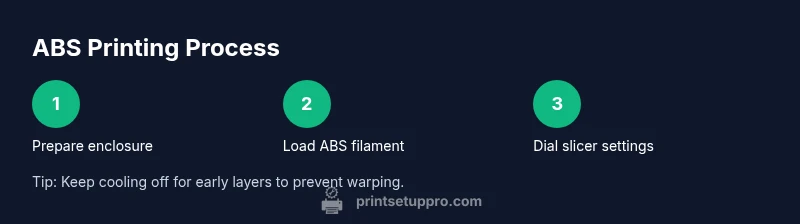
Set up your ABS-ready workspace
Create a controlled environment by closing the enclosure and ensuring adequate ventilation. Verify that the printer is level and the print bed is clean before starting. This setup reduces temperature fluctuations that cause warping and improves first-layer adhesion.
Tip: Keep a consistent ambient temperature; even small drafts can disrupt ABS stability. - 2
Load ABS filament and prime nozzle
Feed the filament until the extruder presents a smooth, consistent flow. Purge the nozzle to clear any old material and check for under-extrusion before printing a calibration object.
Tip: Do a short purge print to confirm stability before proceeding to the actual part. - 3
Calibrate bed height and adhesion method
Level the bed and set a suitable first-layer height. Apply a brim or raft if needed and ensure the first layer adheres well without warping.
Tip: Use a dedicated ABS surface if possible and verify that the bed remains evenly warm across its area. - 4
Configure slicer profile for ABS
Set a higher nozzle temperature and maintain a warmer bed. Minimize cooling and avoid abrupt fan changes on the early layers. Save the profile for future ABS prints.
Tip: Document the exact values you settle on for repeatability. - 5
Print a calibration cube
Start with a small, simple part to validate extrusion, adhesion, and dimensional accuracy. Observe layer bonding and surface finish; adjust as needed.
Tip: If corners lift, tweak bed temperature or adhesion method slightly. - 6
Scale up to a real ABS part
With the calibration passed, print the actual component. Monitor for warping in corners and ensure envelope fits with expected tolerances.
Tip: Increase print duration gradually to avoid large failures. - 7
Finish and post-process ABS parts
Allow gradual cooling to avoid thermal shock. Remove supports carefully and sand as needed; apply solvent smoothing with caution and proper ventilation.
Tip: Work in a well-ventilated area and follow safety guidelines when using acetone.
People Also Ask
When is ABS the best material to use in 3D printing?
ABS is ideal for parts that require heat resistance and mechanical durability. It performs better in warm environments and under stress than PLA, but is more challenging to print due to warping and fumes.
ABS is best when you need heat resistance and toughness, though it requires careful setup.
Can ABS be printed without an enclosure?
Printing ABS without an enclosure is possible but increases the risk of warping and layer separation. An enclosure helps stabilize temperature and improves first-layer adhesion.
Enclosures help a lot with ABS; without one, you’ll fight warping.
What bed temperature is typical for ABS?
ABS generally benefits from a heated bed to reduce warping and improve adhesion. Start with a warm bed and adjust based on the print’s performance and bed surface.
A heated bed helps ABS sticks to the surface.
What safety considerations come with ABS printing?
ABS printing emits fumes; ensure good ventilation or filtration, and avoid inhaling fumes for extended periods. Use a well-ventilated space and consider a fume extractor.
Ventilate the area and consider a filter for ABS prints.
How do I reduce warping on ABS prints?
Warps can be reduced by using an enclosure, brim/raft, stable bed temperature, and slow cooling. Examine first-layer adhesion closely and adjust as needed.
Enclosure and proper adhesion help prevent warping.
Are there good substitutes to ABS?
PLA and PETG are common substitutes. PLA is easier to print; PETG offers a balance of strength and printability. Choose based on the part’s heat tolerance and functional needs.
PLA or PETG can be better for easier printing depending on requirements.
Watch Video
Quick Summary
- Assess whether ABS meets your heat-resistance needs.
- Prepare an enclosure and ventilation before printing.
- Dial in slicer settings with careful calibration.
- Use brim/raft and adhesion techniques to prevent warping.
- Post-process safely with ventilation and caution around solvents.