DTF Printer for Beginners: A Complete How-To Guide
Learn how to choose, set up, and start printing with a DTF printer. A beginner-friendly guide with practical steps, troubleshooting tips, and budgeting advice from Print Setup Pro.

By the end of this guide, you will know how to pick a beginner-friendly DTF printer, set it up safely, and start producing transfers. This step-by-step approach covers essential tools, budget considerations, and common pitfalls to avoid for new users. Keep your learning focused on setup, calibration, transfer prep, and troubleshooting. The guide uses practical examples and checks your understanding with simple actions you can perform this weekend.
What is DTF printing and how it works
DTF (direct-to-film) printing is a transfer method that starts with printing a design onto a clear PET film using specialized water-based inks. It is followed by applying a powder adhesive and heat pressing onto textiles. According to Print Setup Pro, this approach helps beginners focus on a simple, repeatable workflow rather than juggling many variables at once. The key is to separate the printing, powdering, curing, and transfer steps; each stage has its own variables—ink density, powder amount, curing time, and heat press temperature. With the right preparation, even a modest setup can produce professional-looking transfers. Another advantage of DTF is the ability to print on a wide range of fabrics, from cotton to polyester blends, without requiring a separate pretreatment. However, beginners should start with standard fabrics and low-heat settings to minimize scuffing and color bleed. In practice, successful DTF printing balances color accuracy, powder adhesion, and careful handling of hot surfaces during transfer.
Why beginners are drawn to DTF printing
DTF printing offers versatility, lower startup costs, and faster iteration compared to some other transfer methods. For home office hobbyists and small businesses, it enables full-color designs on diverse fabrics without pretreating every item. Print Setup Pro notes that the material cost per transfer can be predictable when you buy in bulk and standardize your workflow. Beginners benefit from the ability to experiment with small batches before scaling up, reducing frustration and waste. The learning curve is manageable when you break the job into discrete steps: design, print, apply powder, cure, and transfer. Color management is simpler than you might fear, as most beginner kits ship with recommended profiles. As you gain experience, you’ll refine ink density, curing times, and pressure settings for consistent results. The key is to practice on scrap fabrics, document your settings, and build a repeatable routine around your available equipment.
Essential components in a DTF workflow
A successful DTF workflow combines a printer, a suitable transfer film, adhesive powder, and a reliable heat press. You’ll also need RIP software or printer driver settings that produce crisp lines and accurate colors. For beginners, keep the substrate simple at first—cottons and poly-cotton blends are forgiving and align well with standard heat-press temperatures. Clean working surfaces, lint-free wipes, and isopropyl alcohol for nozzle/printhead maintenance should be nearby. A dedicated workstation with good ventilation helps manage odor from inks and curing. Finally, spare rollers, tacking sheets, and clip magnets streamline alignment and reduce shifting during transfer. Print Setup Pro recommends starting with a basic supply kit and gradually adding specialty films or powders as you gain confidence.
How to choose a beginner-friendly DTF printer
When selecting a DTF printer for beginners, look for reliability, clear maintenance routines, and reasonable running costs. Favor printers with straightforward cleaning processes and widely available support. Check ink compatibility, as some systems use two-color or multi-color setups; for beginners, a two-head or single-head design with good documentation is often enough. A wider print width adds flexibility but increases upfront cost, so balance your target sizes with your budget. Consider the total cost of consumables: film, powder, and ink can represent most ongoing expenses. Read user reviews from hobbyists and small studios to understand real-world reliability, and verify that the vendor supplies driver updates and online tutorials. Print Setup Pro suggests starting with a modest entry-level unit that includes a starter kit and accessible customer support.
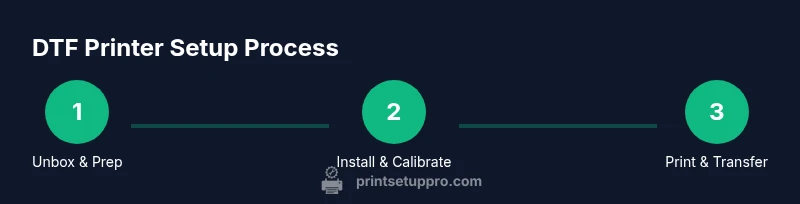
Setting up a DTF printer for the first time
Set up begins with unboxing and placing the printer on a stable, level surface away from direct sunlight. Connect power and data cables, then install the manufacturer’s drivers and any required RIP software. Run a nozzle check and a calibration print to confirm that ink is flowing correctly and alignment is accurate. Install any firmware updates and make sure the printer communicates with your computer or network. Create a dedicated workspace for film handling, powder, and heat pressing to avoid cross-contamination. Keep a log of initial settings, including print speed, temperature, and pressure, so you can reproduce results. If you encounter errors, consult the user manual first and then reach out to support with your device’s serial number and current driver version.
Printing and curing: preparing transfers
After your printer is calibrated, print your designs onto PET film using the recommended color profiles. Allow the print to dry and inspect for smudges or misregistration. Evenly spray a thin layer of adhesive powder over the film and shake off excess; uniform application is critical for clean transfers. Cure the powder in a heat tunnel or oven recommended by the manufacturer, following safe handling practices. Once cured, lay the film face-down on the fabric and position accurately. Press with a heat press at the recommended temperature and time, applying steady pressure. Peel the film when cool to reveal the transfer, and inspect for missing details. Store completed transfers flat and dry until ready to press.
Troubleshooting common issues
Color bleed or fuzzy edges often indicate ink density miscalibration or powder over-application. If powder clumps or shifts, reduce application thickness and recirculate the transfer film to improve evenness. If the transfer sticks to the film or releases poorly, re-check curing temperature and time, and ensure the fabric is pre-treated if required. Paper jams or feed inconsistencies can be addressed by cleaning wheels and ensuring the film path is clear. For heat presses, incorrect temperature or pressure can distort designs; use a test swatch to dial in settings before running a larger batch. Always work in a clean, dust-free area to prevent specks appearing on transfers. Print Setup Pro emphasizes documenting issue symptoms and consolidation of fixes for future reference.
Maintenance, safety, and cost considerations
Regular cleaning of printheads, nozzles, and feed rollers helps maintain color accuracy and prolongs equipment life. Use alcohol-free cleaners as recommended by the manufacturer and wear gloves when handling hot surfaces. Store powders and films in sealed containers away from moisture to prevent adhesion issues. Ventilation is important when curing powders; consider a small exhaust fan or dedicated workspace. Keep an eye on consumables costs by tracking usage, and rotate stock to minimize waste. When it’s time to upgrade, plan a phased approach that prioritizes reliability and safety features. Print Setup Pro reminds readers that a responsible workflow reduces downtime and extends the life of both printer and heat press.
Authority sources and further reading
- OSHA: Heat‑related safety guidelines and general workplace safety (https://www.osha.gov). These guidelines help you manage heat exposure when operating heat presses and curing stations.
- NIST: Measurement standards and color accuracy considerations for printing (https://www.nist.gov). These resources help you understand calibration practices for repeatable results.
- IEEE: Industry standards and practical papers on printing technology and process control (https://www.ieee.org).
Tools & Materials
- DTF printer for beginners(Ensure it supports standard adhesive powders and PET film.)
- Heat press (minimum 12x12 inches)(Choose a model with accurate digital temperature readout.)
- PET transfer film(Lightweight, transparent film for clean prints.)
- Adhesive powder(White or clear powder suitable for DTF transfers.)
- Powder shaker(Helps apply powder evenly across the film.)
- Isopropyl alcohol (91%+)(For nozzle and printhead maintenance.)
- Lint-free wipes(Keep prints clean during handling.)
- Gloves (heat-resistant for transfer)(Protect hands during curing and pressing.)
- Silicone rollers or squeegee(Helpful for aligning film during transfer.)
- Heat-resistant mat or surface(Protect worktable during pressing.)
Steps
Estimated time: about one to two hours
- 1
Unbox and prepare workspace
Remove packaging and verify all parts are present. Clear a clean, flat workspace with good ventilation. Set up a stable station for printing, powder handling, and pressing, keeping liquids away from electronics.
Tip: Take photos of contents for warranty records and future reference. - 2
Install drivers and connect
Plug in the printer and connect it to your computer. Install official drivers and any required RIP software, following the installer prompts. Reboot and test the connection with a basic print.
Tip: Use the manufacturer’s recommended USB/port settings to avoid communication issues. - 3
Run nozzle check and alignment
Print a nozzle check pattern to verify ink flow. If lines are broken, perform a head cleaning cycle and re-check alignment. Calibrate color profiles using the provided software.
Tip: Do this before any test print to avoid wasted film. - 4
Prepare film and substrate
Cut PET film to the intended transfer size and prepare the fabric (pre-wash if needed). Ensure the surface is dust-free. Peel back a corner of the film to reduce static adhesion during handling.
Tip: Pre-cut film reduces waste and speeds up workflow. - 5
Print a test design onto PET film
Load your test design and select a standard color profile. Print at a conservative speed to reduce banding. Inspect the print for sharp edges and color balance.
Tip: Print on scrap fabric to confirm color fidelity before larger runs. - 6
Apply powder and cure
Evenly apply a thin layer of adhesive powder and gently shake off excess. Cure the powder using the recommended heat method until it’s evenly set. Let the film cool briefly before handling.
Tip: Work in a dust-free zone to prevent powder specks on transfers. - 7
Transfer to fabric
Position the film on the fabric, align carefully, and press with a heat press at the specified temperature and time. Apply steady, even pressure and avoid moving the film during pressing.
Tip: Use a test swatch to dial in time and temperature for your fabric. - 8
Cool, peel, and finish
Allow the transfer to cool, then peel the film away to reveal the design. Inspect for missing details and touch up if needed. Store finished items flat to prevent creasing.
Tip: Wait for a full cool-down before peeling to reduce edge lifting.
People Also Ask
What is DTF printing and how is it different from DTG?
DTF prints designs onto a transfer film and uses powder and heat to transfer the image to fabric, whereas DTG prints directly on the garment. DTF can handle a wider range of fabrics and often has lower setup costs for small runs. Beginners should start with basic materials and a simple color palette to learn the workflow.
DTF prints on film and uses transfer powder, while DTG prints directly on fabric. Beginners benefit from starting with simple designs and a small color set to master the process.
Is a beginner-friendly DTF printer worth the investment?
For hobbyists and small businesses, a basic DTF printer can be a solid starting point. Costs are driven by consumables and maintenance, so plan a budget that covers film, powder, ink, and a heat press. A modest setup with good support reduces risk and accelerates learning.
A basic DTF setup is typically worth it for hobbyists and small outfits, provided you budget for consumables and maintenance.
What fabrics work best with DTF transfers?
Cotton, cotton blends, and poly-cotton blends are the most forgiving for beginners. Delicate synthetics may require adjusted heat and duration. Always test on scraps before committing to a full run.
Cotton blends are the easiest starting point; test on scraps before full production.
What are typical consumables costs for DTF printing?
Costs come from film, adhesive powder, ink, and the heat press energy. Prices vary by supplier and batch, so track usage and buy in bulk where possible to reduce per-transfer cost.
Consumables like film, powder, and ink drive ongoing cost; buying in bulk helps reduce per-transfer price.
How long do DTF transfers last after washing?
Durability depends on fabric, curing, and washing conditions. Follow vendor guidelines for washing and drying to maximize longevity. Start with test items to understand real-world performance.
Durability varies; follow care guidelines and test to gauge longevity.
Watch Video
Quick Summary
- Choose a beginner-friendly DTF printer with solid support.
- Follow a repeatable, step-by-step workflow.
- Calibrate and test on scrap material before production.
- Document settings for future projects.
- Prioritize safety and maintenance to extend equipment life.