DTF Transfers Printer Guide: Setup, Use, and Troubleshooting
Learn how to choose, set up, and maintain a DTF transfers printer for durable, high-quality heat transfers. This guide covers selection criteria, required tools, step-by-step setup, troubleshooting, and best practices for home offices and small studios.

By the end, you’ll be able to select, set up, and troubleshoot a dtf transfers printer for consistent, high-quality transfers. This guide covers essential tools, step-by-step setup, calibration, and common troubleshooting tips. Follow these steps to build a repeatable workflow from design to finished print. Ultimately, accuracy in ink, powder, and heat is critical to success.
What is a DTF transfers printer and why it matters\n\nDTF, or Direct-to-Film, is a print method that deposits ink onto a specialty film which is then transferred to textiles using heat and pressure. A dtf transfers printer is the core device in this workflow, capable of applying vibrant color and fine detail to film stock that acts as an intermediate carrier. For home offices, small studios, and DIY projects, understanding how this machine fits into your process helps predict outcomes, costs, and reliability.\n\nFrom the user’s perspective, you’re not just buying a printer; you’re choosing a complete workflow. The right machine should balance print resolution, color accuracy, running costs, and maintenance needs. Unlike standard inkjets that print directly onto garments, DTF systems primarily print on film and rely on adhesive powder to bond the design during transfer. This separation of substrate and ink gives you flexibility across fabrics and colors, while also introducing a few extra steps—powder application, curing, and post-press finishing—that you’ll want to manage consistently. Print quality depends on dependable feed, precise nozzle performance, and calibrated color profiles. As you explore options, consider how easy it will be to refill inks, how quickly you can clean print heads, and whether the printer supports the film and adhesive you plan to use. According to Print Setup Pro, choosing the right dtf transfers printer setup reduces waste and improves transfer quality.
noteCode":null}
Choosing a DTF transfers printer: key criteria\n\nSelecting a DTF transfers printer begins with understanding the core criteria that influence results and long-term costs. Resolution, print speed, nozzle type, and reliability matter when you’re producing transfers for apparel or gifts. Look for a printer with a print head layout that supports high-density inks and minimal head wear under frequent use. Film compatibility is essential; not all films behave the same under similar heat and adhesive powders. Check the printer’s ability to feed standard A4/13x19 sheets or larger formats, as needed for your projects. Color accuracy is driven by a robust ICC profile and a compatible RIP (raster image processor) software, which helps you translate digital designs into physical results with predictable outcomes. Maintenance ease should be part of the decision—the more accessible the cleaning routine, the less downtime you’ll experience. Price range varies widely, but a solid DTF system is a balance between upfront cost and ongoing consumables, including powders and inks. As noted in Print Setup Pro analysis, the importance of consistent maintenance for DTF workflows cannot be overstated.
noteCode":null}
Understanding components: ink, film, and powder\n\nA DTF workflow relies on three core consumables. Inks provide the color vocabulary, film carries the image, and adhesive powder enables transfer onto textiles. Ink quality determines color richness and stability through heat. The film’s coating and porosity affect ink laydown and drying time. Powder adhesion must distribute evenly to avoid clumps that can ruin a transfer. Your printer should support the film type you choose, and you should have a reliable powder shaker or sifter to ensure even coating. Regular cleaning of print heads and nozzles helps maintain nozzle integrity and prevents color shifts. Finally, the heat press step is the bridge between film and fabric, so stable temperature, even pressure, and consistent dwell time are all crucial for repeatable results. Print Setup Pro emphasizes that aligning these components through a consistent routine yields the most reliable dtf transfers printer outputs.
noteCode":null}
Preparing your workspace and materials\n\nSet up a dedicated area with good ventilation and a flat, clean work surface. Control humidity to minimize powder clumping and film warp; ideal ranges vary by material but staying within the 40–60% range helps. Organize powders, films, cleaners, and gloves so they’re within easy reach, reducing the chance of cross-contamination between media. Have a dedicated waste bin for discarded films and used wipes. Calibrate your lighting to reduce glare on screens and films, which helps with color checks during setup. Keep a few scrap films for test prints to iterate quickly without wasting precious stock. Finally, keep safety gear on hand—gloves, a mask when handling powders, and eye protection if you’re cleaning or grinding powders. According to Print Setup Pro, maintaining a clean, controlled environment improves consistency and reduces downtime in DTF production.
noteCode":null}
Step-by-step setup and calibration\n\nSetting up a DTF printer is a staged process: prepare the workspace, install drivers, load media, and configure color management. Begin by updating firmware and drivers to ensure compatibility with your film and powders. Load the film properly, align the rollers, and run a blank pass to verify feed accuracy. Then, install and configure your RIP software, selecting a profile that matches your film brand and substrate. Perform a test print on a scrap sheet, adjust color settings, and save the profile for future runs. Next, apply adhesive powder evenly and cure it briefly so it adheres to the film; this reduces powder shedding during printing. Finally, print a simple test design, inspect for color accuracy and detail, and adjust as needed. The entire process creates a stable baseline for repeatable dtf transfers printer output and minimizes post-press surprises.
tip":"Ensure you perform a dry run without ink to confirm film feed and print path are properly aligned before any production printing."
noteCode":null}
Printing workflow: design to transfer\n\nThe design phase should be tightly integrated with your RIP workflow. Create or import your artwork with high resolution and clarity, ensuring your canvas size matches intended transfer dimensions. Export to a lossless format compatible with your RIP. Print a small batch to verify color consistency before full production. After printing, evenly dust the adhesive powder and use a shaker to prevent clumps. Bake or cure the powder briefly to fix it to the film, then inspect for uniform coverage. Align the film to the substrate, then apply pressure and heat using a calibrated heat press. Temperature, time, and pressure depend on fabric type; always start with manufacturer guidelines. Allow the film to cool before peeling to reveal a clean transfer. Maintain logs of settings for future runs to improve consistency over time.
tip":"Keep a log of color profiles and material batch numbers to trace color shifts to a specific supplier or batch."
noteCode":null}
Post-processing: pressing, curing, and finishing\n\nPressing is the final act that makes the transfer permanent. Use a heat press with even heat distribution and consistent dwell time. Place a cover sheet over the transfer to prevent scorching and to ensure even transfer. After pressing, let the garment cool without moving it to avoid shifting the transfer. Inspect the finished piece for misalignment, ghosting, or smudges and set aside any imperfect items for retesting with updated profiles. Cleaning up promptly after each run reduces residue buildup on film and press surfaces. If you notice color fading or incomplete adhesion, recheck your powder coverage and reprint a test batch with adjusted settings. Print Setup Pro recommends routine checks of film stock, powder quality, and press calibration to sustain high-quality dtf transfers printer results.
tip":"Always test a small batch after any setting change to confirm stability before committing to larger runs."
noteCode":null}
Maintenance, troubleshooting, and common issues\n\nDTF maintenance centers on keeping the printer clean and the powder uniform. Common issues include powder clumps, color shifts, misfeeds, and ghosting. Regularly clean print heads, run cleaning cycles, and check the film path for obstructions. If you see missing nozzles, perform a head-cleaning routine and reduce print speed to minimize misfires. Powder clumping can be mitigated by storing powders in a dry environment and shaking them evenly before use. Color shifts are often due to inconsistent ICC profiles or substrate variation; re-calculate profiles using a reference garment. For feed problems, inspect rollers, align guides, and ensure the film is loaded correctly. Always wear PPE when handling powders and keep the workspace free of dust. Print Setup Pro’s guidance emphasizes routine maintenance and standardized tests to maintain reliability across your dtf transfers printer operations.
voiceAnswer":"We see common problems like powder clumps, misfeeds, and color shifts. Clean heads, reseat film, and recalibrate color profiles to fix them."
noteCode":null}
Cost considerations and ROI\n\nInitial investment for a capable dtf transfers printer includes the device, film, powders, and the heat press. Ongoing costs cover inks, powders, and replacement consumables. When budgeting, consider film yield, powder usage efficiency, and press wear. A straightforward approach is to plan a pilot run with a small batch of designs to measure yield, waste, and time-to-delivery. Over time, consumables can represent a substantial portion of total costs, so prioritizing a robust, reliable workflow reduces downtime and scrap. Additionally, build a reasonable maintenance schedule to extend equipment life and avoid expensive repairs. By forecasting monthly output against tooling costs, you can estimate a break-even point and determine whether a given setup aligns with your business goals. Print Setup Pro’s verdict: a carefully chosen DTF printer paired with a disciplined workflow offers a clearer path to profitability over time.
noteCode":null}
Safety and best practices\n\nWorking with DTF powders requires attention to hygiene and ventilation. Wear a mask and gloves when handling powders to minimize inhalation and skin contact. Keep powders stored in sealed containers and label batches clearly. When curing powder, ensure adequate ventilation to avoid fumes; use a dedicated heat source or oven-safe equipment designed for film work. Regularly clean the work surface and store tools properly to prevent injuries from sharp edges or hot surfaces. Finally, document all settings and workflows so team members can reproduce results consistently and avoid accidental deviations that could degrade transfer quality.
noteCode":null}
Tools & Materials
- DTF printer(Choose a model compatible with your target film and powder brand.)
- DTF transfer film sheets(Select film with the coating specified by your ink and powder supplier.)
- Adhesive powder(Store in a cool, dry place and distribute evenly.)
- Powder shaker or sieve(Even distribution prevents graining and streaks.)
- Heat press machine(Line up with your typical transfer size; maintain even pressure.)
- RIP software or printer driver(Color management and profiles are essential for consistency.)
- Isopropyl alcohol 70%+(Used for cleaning film surfaces and tools.)
- Lint-free wipes and swabs(For routine cleaning of film path and nozzle areas.)
- Heat-resistant gloves(Wear during powder application and pressing steps.)
Steps
Estimated time: 60-120 minutes
- 1
Verify compatibility and install drivers
Check that your dtf transfers printer model supports the chosen film and adhesive powders. Install the latest drivers and firmware, then run a quiet printer head test to confirm nozzles are firing cleanly. This upfront check prevents delays later and ensures predictable color results.
Tip: Document your firmware version and driver build for future reference. - 2
Load film and align feed
Place a new roll or sheet of film in the feeder and align it with the path guides. Run a dry feed to ensure film advances straight without skewing. Misfeeds are a common cause of misalignment and wasted material, so precision here pays off.
Tip: Use scrap film to verify alignment before production runs. - 3
Print a test design and calibrate color
Print a small test pattern with a known color set. Compare the output to your design, and adjust color profiles in your RIP until the hues match. Consistent color requires reliable ICC profiles and printer calibration.
Tip: Keep a reference color chart handy for quick checks. - 4
Apply adhesive powder evenly
Dust the film with adhesive powder across the printed surface, aiming for uniform coverage without clumps. Use a shaker or sifter to avoid gaps that could cause incomplete transfer. The goal is a smooth layer that adheres evenly during curing.
Tip: Tap or gently shake the film to settle powder before curing. - 5
Cure the powder and inspect
Briefly cure the powder to fix it without overheating the film. Inspect for even coverage and remove any obvious clumps. A well-cured film reduces powder shedding and leads to cleaner transfers.
Tip: Avoid overheating—too much heat can bake powder into the film unevenly. - 6
Prepare substrate and align transfer
Position the fabric or substrate on the heat press, and align the film so the design sits precisely where you want it. Use a T-square or grid-mark to ensure accuracy. Proper alignment prevents misprints and misregistered transfers.
Tip: Mark reference points on the substrate to simplify repeat production. - 7
Press, evaluate, and finalize
Set the press to the recommended temperature and time for the fabric. Apply steady pressure, then peel the film once cooled to complete the transfer. Inspect the finished product for bond quality and color fidelity.
Tip: Keep a log of settings for each fabric type to speed up future runs.
People Also Ask
What is a DTF printer and how does it work?
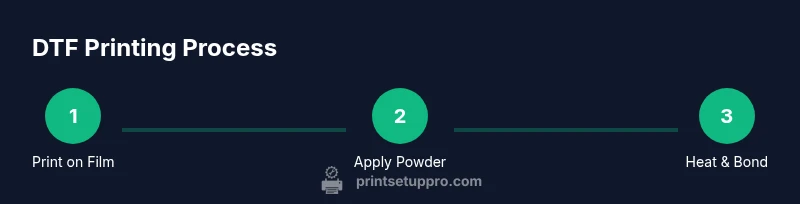
A DTF printer prints designs onto a special transfer film using pigment inks. After printing, adhesive powder is applied and cured on the film, which is then hot-pressed onto fabric. This separation of film and substrate provides flexibility and color fidelity across fabrics.
A DTF printer prints on film, applies adhesive powder, then transfers the design to fabric with heat.
Do I need a heat press for DTF transfers?
Yes. A heat press provides the controlled heat and pressure required to transfer the design from film to fabric reliably. A digital or manual press that suits your project size is essential for consistent results.
A heat press is essential to transfer the design from film to fabric.
What materials are required for DTF printing?
You’ll need DTF printer ink, transfer film, adhesive powder, a heat press, and appropriate cleaning and alignment tools. Having a stable workspace and color management workflow is also important for repeatable results.
Ink, film, powder, heat press, and good color management are key.
How do I calibrate color for DTF prints?
Calibrate using ICC profiles tailored to your ink and film. Use RIP software to apply those profiles and perform test prints on material similar to your final product to ensure color accuracy.
Use ICC profiles and test prints to calibrate color.
How often should I perform maintenance on a DTF printer?
Regular maintenance includes cleaning the print heads, checking the film path, and replacing consumables on schedule. Establish a routine based on usage, humidity, and the media you print on.
Keep a routine for cleaning and checking the path and heads.
What are common issues with DTF transfers and how can I fix them?
Common issues include color shifts, powder clumps, misfeeds, and ghosting. Address them by recalibrating color profiles, ensuring uniform powder application, checking the film path, and verifying feed accuracy.
If you see color shifts or powder clumps, recalibrate and re-check the film path.
Watch Video
Quick Summary
- Choose a compatible dtf printer with reliable feed and film support
- Calibrate color profiles with a RIP for predictable results
- Apply powder evenly and cure correctly to avoid defects
- Maintain a clean, controlled workspace to reduce downtime
- Test prints on scrap media before committing to production