DTF Printer for T-Shirts: A Complete How-To Guide
Discover how to choose, set up, operate, and troubleshoot a DTF printer for t shirts. This practical, step-by-step guide from Print Setup Pro helps home offices and small shops optimize color, durability, and workflow.

This guide helps home offices and small shops pick, install, and fine-tune a DTF printer for t shirts. You’ll learn what to buy, how to calibrate, and how to avoid common issues—delivered in clear, actionable steps from Print Setup Pro. From design alignment to curing, you’ll gain a practical, repeatable workflow for durable transfers.
What is DTF printing and why it matters for t-shirts
DTF (direct-to-film) printing is a modern transfer method that prints pigment onto a clear PET film, then transfers it onto fabric with heat and pressure. For the keyword dtf printer for t shirts, this approach blends the color accuracy of direct printing with the ease of transfers. It supports vibrant full-color designs, white ink on dark fabrics, and relatively fast production compared to screen printing. Print Setup Pro notes that DTF can be a versatile option for home offices and small shops seeking flexibility without the heavy pretreatment requirements. In practice, DTF lets you reproduce gradients, fine lines, and bold text with consistent results when the design is prepared correctly and the workflow is properly calibrated.
The workflow begins with a clean design file, correct color management, and a printer setup that supports white-ink capability. If you’re upgrading from basic inkjet printing, expect a learning curve as you optimize ink consumption, powder adhesion, and curing times. A disciplined approach to calibration will yield predictable results across different fabrics. The Print Setup Pro team emphasizes testing with inexpensive fabrics before committing to a larger run, especially when color fidelity matters for brand-sensitive designs.
The practical benefits of DTF
DTF offers flexibility across fabrics, from cotton to blends, and generally requires less pretreatment than DTG on dark textiles. Color management is critical; expect workable color ranges if you calibrate the RIP software and printer profiles. For beginners, a modest, well-maintained DTF setup can produce high-quality transfers with lower per-unit costs as you scale. Print Setup Pro recommends starting with design files ready to print at your printer’s native resolution and saving test prints on inexpensive fabrics before committing to production runs. Real-world testing helps you establish a reliable baseline for color density, edge sharpness, and fabric compatibility.
Tools & Materials
- DTF printer (direct-to-film printer with white ink capability)(Ensure the printer supports white ink and has a compatible RIP or driver for color management.)
- PET transfer film (DTF film)(Choose film with appropriate porosity and surface finish for your inks.)
- Adhesive powder(Powder assists ink transfer; use the recommended type for your film and adhesive system.)
- Powder shaker/sifter(Even powder distribution prevents print defects.)
- RIP software or printer driver for color management(Calibrates colors, white ink, and black levels for consistent results.)
- Heat press or conveyor dryer(Necessary for curing powder and transferring the design to fabric.)
- Fabrics for testing (cotton, blends, dark/light fabrics)(Test swatches help you verify adhesion and finish.)
- Cleaning supplies (lint-free swabs, isopropyl alcohol)(Keep printhead nozzles and film surfaces clean.)
- Ventilated workspace(Powder and fumes can accumulate; good airflow improves safety.)
- Heat-resistant gloves(Useful when handling hot films and presses.)
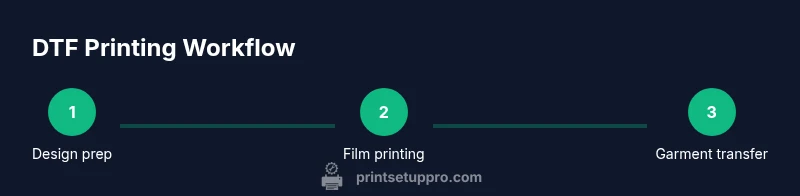
Steps
Estimated time: 2-4 hours
- 1
Prepare workspace and materials
Set up a clean, well-lit area with stable ventilation. Gather all required items from the tools list and verify the printer is on a level surface. Pre-measure and organize films, powders, and fabrics so you can work without interruptions.
Tip: Keep a dedicated dye-sub surface mat to minimize powder spills and makeup on working garments. - 2
Calibrate the printer and RIP profiles
Install the RIP software or driver, then run a color calibration and white-ink test. Create or import color profiles that match your stock films and fabrics. Document baseline readings to compare future test prints.
Tip: Print a small test chart on a neutral fabric before attempting full shirt prints. - 3
Prepare the design and print onto film
Prepare your design in a format compatible with your RIP, ensuring proper white ink layers for dark fabrics. Print a small proof on PET film to verify color density, edge clarity, and white layer coverage before committing to full sheets.
Tip: Avoid images with heavy fine detail in the white layer unless your printer is tuned for high-density white. - 4
Apply adhesive powder to the film
While the film is still warm from printing, apply a fine layer of adhesive powder evenly across the print surface. This powder will trap the ink and prepare it for transfer when heat is applied.
Tip: Light, even distribution is critical; clumps create uneven transfers. - 5
Cure or bake the powder onto the film
Use a dedicated heat source to cure the powder onto the film according to the manufacturer’s recommendations. This step locks the powder in place and improves transfer durability.
Tip: Avoid overheating; excessive heat can distort the film. - 6
Cut and prepare the transfer
Trim excess film and inspect the printed area for gaps or misalignment. Place the transfer face-down on a test fabric to verify alignment before proceeding to full production.
Tip: Mark your garment placement to ensure consistent alignment across shirts. - 7
Pre-press the garment
Pre-press the fabric to remove moisture and flatten the surface, which improves ink adhesion and reduces wrinkling during transfer.
Tip: A 5–10 second quick press on each area helps stabilize the fabric. - 8
Transfer the design onto fabric
Position the transfer and apply heat and pressure as recommended by the film and powder supplier. Maintain steady pressure for the required dwell time to ensure proper bonding.
Tip: Use a heat press with even temperature distribution to avoid hot spots. - 9
Cool, finish, and test wash
Allow the shirt to cool, peel the film carefully, and perform a wash test on a sample garment. Check for edge lift, color consistency, and wash durability before scaling production.
Tip: Document any issues for future adjustments and keep test logs.
People Also Ask
What does DTF stand for and why should I consider it for t shirts?
DTF stands for direct-to-film. It’s a transfer method that prints onto a PET film and uses adhesive powder to transfer the design to fabrics. It’s versatile for colors and fabrics, often offering strong results with less pretreatment than some alternatives.
DTF stands for direct-to-film. It prints on film and transfers to fabric with powder and heat, offering strong colors and flexibility across fabrics.
Do I need pretreatment for DTF on dark fabrics?
DTF typically requires minimal pretreatment compared to DTG methods, especially on dark fabrics. The transfer is designed to sit on the surface of the fabric, with white ink providing opacity.
Usually less pretreatment is needed than DTG, thanks to the white ink layer and the transfer film.
Can I use any heat press for DTF transfers?
A standard heat press or conveyor dryer can work, provided it reaches the recommended temperature and pressure. Check your film and powder supplier guidelines for exact settings.
Yes, a typical heat press will work as long as you can meet the right temperature and pressure per your film’s specs.
What fabrics work best with DTF?
DTF works well on cotton, poly-cotton blends, and many synthetic fabrics. Always run fabric tests to confirm adhesion and color fade resistance for each material.
Most common are cotton and blends, but test every fabric to confirm results.
How durable are DTF transfers in washing?
DTF transfers can be durable when properly cured and finished, with correct powder application and post-press care. Follow manufacturer guidelines for wash temperatures and cycles.
When cured correctly, DTF designs hold up well in wash tests; follow the recommended care instructions.
What space do I need to set up a DTF printer?
A clean, ventilated area with stable power and room for film storage is ideal. Ensure separate work zones for printing, curing, and finishing to avoid cross-contamination.
You’ll want a ventilated workspace with dedicated zones for printing, curing, and finishing.
Watch Video
Quick Summary
- Master DTF basics before scaling
- Calibrate color and white ink for every fabric
- Maintain clean surfaces and controlled humidity
- Test on affordable fabrics before full runs
- Document settings to ensure repeatability