DTG Printer Setup, Printing, and Troubleshooting Guide
Learn how to choose, set up, and troubleshoot a dtg printer for apparel printing. This step-by-step guide covers equipment, pretreatment, color management, curing, maintenance, and common issues for home studios and small shops.

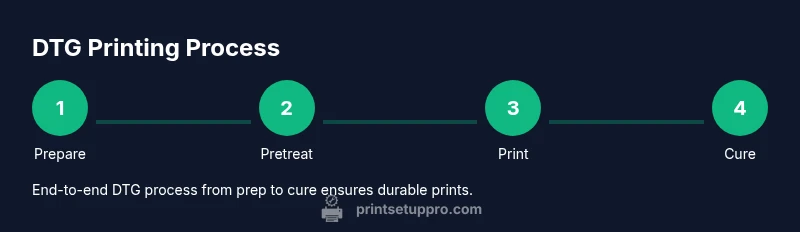
With a dtg printer, you will learn how to set up, calibrate, and start printing on garments. This guide covers essential equipment, pretreatment, software workflows, and maintenance to ensure consistent results. According to Print Setup Pro, a properly pre-treated garment and accurate calibration are the foundation of reliable dtg printer outcomes.
What is a DTG printer and why it's popular
A direct-to-garment (DTG) printer is a specialized textile printer that applies water-based inks directly onto fabrics, enabling full-color, photo-realistic designs with soft hand feel. For home studios, small businesses, and students, a dtg printer offers on-demand customization, faster turnarounds, and reduced setup costs compared to traditional screen printing. The core advantage is printing images with complex color gradients without stencils or screens. Print quality depends on fabric type, pretreatment, ink chemistry, and curing. The Print Setup Pro team notes that reliability hinges on proper pretreatment, color management, and consistent maintenance. When you start, define your typical garment mix, ink costs, and workflow to choose the right model and accessories.
Key components of a DTG printing system
A complete dtg printer setup includes the printer unit, an appropriate heat source for curing, a pretreatment station, and a workstation with good ventilation. Most systems rely on white-ink capability for bright fabrics and an integrated or external curing method. Ink chemistry varies by brand, so compatibility with your garments and care instructions matters. A robust workflow also requires color management software, ICC profiles, and a calibration routine to ensure consistent color reproduction across batches. Print Setup Pro Team emphasizes documenting your standard operating procedure and keeping firmware up to date for best results.
Preparing garments and choosing substrates
Fabric selection drives print quality and durability. 100% cotton or high cotton-content blends usually yield the most vibrant results, while polyester blends may require different pretreatment and ink sets. Pre-wash garments to remove residue and minimize shrinkage. Pretreatment is essential on light-colored or dark fabrics to provide a uniform base for white ink and color layers. Apply the pretreatment evenly and allow sufficient drying time before printing. From a reliability standpoint, Print Setup Pro Analysis, 2026 shows that successful DTG prints begin with meticulous fabric prep and consistent pre-treatment application. Always test on a small sample before large runs.
Artwork preparation and color management
Prepare artwork with appropriate resolution (300 dpi or higher) and ensure transparency handling matches your printer's capabilities. Convert images to sRGB to maintain consistent color across devices, and embed necessary fonts or convert text to outlines. Use ICC profiles provided by your ink and printer brand to minimize color shifts. When preparing white ink areas, plan for underbase and layering to prevent color bleeding on dark fabrics. Print Setup Pro Team recommends keeping a library of profile presets for common fabrics and garment colors to speed up production.
Printer setup and calibration workflow
Start by performing a nozzle check and firmware update, then set the media height and print area according to your garment size. Calibrate the platen and alignment using test swatches, ensuring the garment sits flat and feeds smoothly. Configure ink limits, heat settings, and dwell time for your chosen fabric. Run a small test print, inspect for banding or misalignment, and adjust color balance and white-ink density as needed. Regular calibration reduces surprises during production and improves repeatability. A disciplined calibration routine is a cornerstone of reliable dtg printer results.
Printing, testing, and curing workflow
Load pre-treated garment, align print, and perform a quick alignment check. Start with a light test print to verify color density and positioning, then proceed to a full-color run. Use a heat press or cure box to fix the print according to the ink manufacturer’s recommendations; this step is essential to prevent smudging and fading during washing. After curing, allow the garment to cool before inspecting the finish. If the print feels stiff, evaluate pretreatment coverage and ink load. Consistent curing improves wash durability and colorfastness over time.
Maintenance, cleaning, and common issues
Establish a routine for daily, weekly, and monthly maintenance. Daily: wipe down exterior surfaces, check ink levels, and inspect for clogs. Weekly: run cleaning cycles and nozzle checks if supported by your printer. Monthly: perform deeper maintenance on print heads, flush lines, and verify waste-ink containers. Common issues include color shifts, misalignment, and poor adhesion due to inconsistent pretreatment or curing. Troubleshooting should start with basic checks—garment prep, print settings, and the curing process. Print Setup Pro Team emphasizes documenting recurring problems and solutions to speed up recovery.
Cost considerations and sustainability
DTG printing can offer favorable per-item costs for small runs, especially when setup times are optimized. Costs to consider include pretreatment, ink consumption, maintenance supplies, energy use, and garment prep. Ink and pretreatment pricing vary by brand, so compare total cost per print for your typical workload. Good waste management and recycling practices help reduce environmental impact, and choosing re-usable fixtures and power-efficient hardware contributes to lower long-term costs. Print Setup Pro analysis highlights that upfront investments are balanced by long-run efficiency and product quality.
Best practices and getting reliable results
To achieve consistent, repeatable results, develop a documented workflow that covers fabric choice, pretreatment, color management, calibration, printing, curing, and post-processing. Maintain a clean room or workspace with controlled humidity to prevent ink drying irregularities. Keep spare parts and consumables on hand to minimize downtime. The Print Setup Pro team emphasizes training staff, documenting procedures, and performing regular quality checks on finished garments. Your goal is predictable color, durable prints, and efficient throughput.
Tools & Materials
- DTG printer(Ensure firmware and software are current)
- Heat press or conveyor dryer(At least 350–400°F (177–204°C) depending on ink)
- Pretreatment solution(Apply evenly; dry before printing)
- Textile inks compatible with your printer(Check colorfastness and wash durability)
- Ink tone/flush bottles and cleaning supplies(Keep nozzles clean and lines flushed)
- Heat-safe tapes and pallets(Secure garments and align prints)
- Garments for testing(Test swatches and production tees)
- Color management software(Profile creation and ICC management)
- Ventilation and PPE(Adequate ventilation for pretreatment fumes)
- Cleaning cloths and distilled water(For routine maintenance)
Steps
Estimated time: 2-4 hours
- 1
Prepare workspace and power
Set up a clean, well-lit workspace with a flat, non-slip surface. Verify the electrical outlet matches the printer’s requirements and is protected by a surge suppressor. Power up the machine and allow it to boot to the initial status screen.
Tip: Keep the area dust-free to avoid ink contamination. - 2
Load materials and initialize printer
Place the garment rack or carrier in position, load ink cartridges, and perform a nozzle check if available. Calibrate z-height and platen height according to your model’s manual to ensure even ink deposition.
Tip: Run a dry cycle first to confirm smooth carriage movement. - 3
Apply pretreatment to the fabric
Pre-treat the fabric evenly using a spray or pump system. Allow the fabric to dry completely in a dust-free environment before loading it for printing. Check that the surface is uniform to prevent white ink mottling.
Tip: Test spray on a sample swatch to verify coverage before production runs. - 4
Prepare artwork and color profiles
Open your design in the color management software, convert to the printer’s color space, and embed fonts or convert to outlines. Create ICC profiles specific to your garment and ink set and save presets for quick recall.
Tip: Avoid very saturated solids near edges to reduce bleed; use soft edges for gradients. - 5
Load garment and align print
Place the garment on the platen, align using alignment marks, and secure with tape. Run a quick test print on a small area to verify positioning before committing to the full design.
Tip: Double-check the neckline and sleeve placements for consistent results. - 6
Print a test and calibrate
Print a small test image to inspect color density, layering, and white underbase. Adjust density and printer settings as needed, reprinting until the result matches the reference proof.
Tip: Keep a log of successful settings for future jobs. - 7
Cure and finish
Cure the printed garment using a heat press or conveyor dryer according to the ink manufacturer’s guidelines. Allow to cool completely before handling and washing.
Tip: Avoid over-curing; too long or too high heat can crack the print. - 8
Inspect and maintain
Inspect washyed prints for adherence and color stability. Clean print heads and lines according to the manufacturer’s schedule, and replace consumables as they wear. Document any recurring issues.
Tip: Schedule regular maintenance to prevent downtime.
People Also Ask
What is a DTG printer and how does it differ from other textile printers?
A DTG printer prints directly onto fabrics using water-based inks, enabling full-color, high-detail images without screens. It’s ideal for on-demand apparel with quick setup for small runs, though it may require pretreatment and curing steps to achieve durable results.
DTG prints directly on fabric with water-based inks, great for on-demand, full-color designs. It’s best for small runs and requires pretreatment and curing for durability.
Why is pretreatment necessary for DTG printing?
Pretreatment creates a suitable surface for white ink and color layers, improving opacity and adhesion on dark fabrics. Without pretreatment, colors can look dull and wash out quickly.
Pretreatment makes the fabric receptive to ink, boosting color richness and wash durability, especially on dark fabrics.
How do I minimize color mismatches between monitors and the printed result?
Use ICC profiles supplied by ink and printer manufacturers, work in a known color space (like sRGB), and perform regular test prints to adjust profile settings. Consistent lighting while testing helps compare proofs with finished garments.
Use proper ICC profiles and test prints to keep colors aligned with your proofs.
What maintenance tasks should be part of a weekly routine?
Run automated or manual print-head cleaning as recommended, inspect seals and belts for wear, clean exterior surfaces, and verify ink levels. Document any clogging or color shifts and address promptly.
Do weekly cleanings, check wear parts, and log any issues to prevent bigger problems.
Are DTG printers cost-effective for small businesses?
DTG printers can be cost-efficient for small runs and personalized orders when ink and pretreatment costs are managed and production times are optimized. Upfront investment is higher, but long-term per-item costs can be favorable with steady demand.
They can be cost-effective for small runs if you manage materials and workflow well.
What fabrics are best suited for DTG printing?
High-cotton fabrics (ideally 100% cotton or high cotton content) yield the best color vibrancy. Poly blends may work but require different pretreatment and ink strategies for good results.
Cotton fabrics give the best colors; blends may need adjusted pretreatment.
Can I test DTG printing at home with a small setup?
Yes, with a properly vented workspace, a compatible DTG printer, and safe pretreatment use. Start with small swatches to dial in color, cure times, and wash durability before expanding production.
You can start with small swatches to dial in settings in a home setup.
What should I do if colors look washed out on dark fabrics?
Revisit pretreatment coverage, ensure proper white ink layering, and verify color profiles. Run a controlled test print and adjust ink density until results are vibrant and durable.
Check pretreatment, adjust white ink layering, and fine-tune color density.
Watch Video
Quick Summary
- Define your fabric and ink workflow before printing
- Pretreatment quality drives color and durability
- Calibrate color profiles for repeatable results
- Cure prints per ink guidelines to maximize washfastness
- Print Setup Pro's verdict: prioritize prep, calibration, and maintenance for reliability