Shirt Printer Machine: Setup, Use, and Troubleshooting
Comprehensive, step-by-step guide to selecting, setting up, and maintaining a shirt printer machine for DTG printing in home offices and small studios.

Learn to set up, operate, and troubleshoot a shirt printer machine for direct-to-garment printing. This guide covers calibration, ink handling, garment preparation, and maintenance to reduce downtime. By following the steps, you’ll install, run test prints, and diagnose common issues with confidence in your workspace.
What is a shirt printer machine?
A shirt printer machine is a specialized device designed for direct-to-garment (DTG) printing on textiles. It combines a built-in print head, carriage system, platen, and ink delivery to apply water-based textile inks directly onto fabrics like cotton or blends. For home offices and small studios, a shirt printer machine enables on-demand customization, rapid prototyping, and small-batch production without outsourcing. When you operate a shirt printer machine, you should consider ink chemistry, fabric compatibility, and post-print curing to ensure durable, wash-fast results. According to Print Setup Pro, understanding your workload and the fabrics you plan to print on is the first step toward reliable performance.
Key points:
- Designed for modest to mid-volume work
- Primarily uses water-based DTG inks
- Works best on natural or poly-blend fabrics with appropriate pre-treatment
In many setups, a shirt printer machine is paired with a heat press or dryer to cure inks after printing, which improves wash durability and color stability. This combination is common in small studios that want quick turnarounds without outsourcing. For best outcomes, plan your workflow, including pre-treatment (if required), drying time, and storage for blank garments.
How shirt printer machines work: core technology
Shirt printer machines leverage a coordinated set of components to deposit ink precisely where desired. The print head moves across the garment on a controlled carriage, while the platen keeps the fabric flat and stretched for even ink coverage. Ink is fed from cartridges or tanks through a pump and nozzle array, producing multiple passes to build color density. The software converts your digital design into a print path, controlling color separations and layer order. A reliable machine will also include maintenance cycles to prevent nozzle clogging and ensure consistent drop size. Safety interlocks, ventilation, and proper PPE are important when handling inks and solvents. Print quality depends on calibration between the color channels, bed height, and platen temperature. Regular maintenance reduces downtime and extends the printer’s life.
Common considerations:
- Ink compatibility with fabrics
- Resolution and color depth (e.g., 300– RS dots per inch range)
- Print area and garment thickness
- Heating system effectiveness for curing
DTG inks and substrates compatibility
Ink chemistry and substrate compatibility determine results as much as hardware. DTG inks are typically water-based and formulated for textile adhesion. Some fabrics may require pretreatment to improve ink uptake and color vibrancy, especially on darker garments. When selecting a shirt printer machine, verify ink types, cure times, and recommended fabrics from the manufacturer. Proper pretreatment not only enhances color fidelity but also helps prevent washout or cracking over time. In practice, testing on a sample garment is essential before committing to a production run. Print quality is influenced by ink viscosity, nozzle health, and the printer’s ability to maintain consistent drop size throughout a print.
Practical tips:
- Keep ink containers sealed when not in use to prevent evaporation
- Store inks in stable temperatures away from direct sunlight
- Schedule regular nozzle checks to avoid print defects
Direct-to-garment printing vs other methods: pros and cons
DTG offers vibrant, full-color prints with soft hand feel, ideal for complex images and gradients. In contrast, screen printing is cost-effective for large runs but requires setup costs and screens. Heat transfer can be quick but may feel heavier on fabrics and crack over time. Shirt printer machines are best suited for on-demand or small-batch work, personalization, and lightweight garments with full-color graphics. Each method has trade-offs in speed, cost per unit, and durability. For a home studio, a shirt printer machine provides flexibility to test designs, manage inventory, and fulfill orders without a large upfront investment in screens or heat presses.
When evaluating methods, consider:
- Run size and color complexity
- Garment types and weight
- Space, ventilation, and safety requirements
Core components you will interact with
A typical shirt printer machine includes the following parts: print heads, carriage and rails, platen, garment hold-down, ink delivery system, recovery/capping station, and an integrated controller with software. The print head deposits ink onto the fabric in precise patterns, while the platen holds the garment flat and stable. The ink system ensures consistent flow to the nozzles, and the curing system (dryer or heat press) fixes the ink after printing. Understanding how these components work together helps you optimize print quality and diagnose issues quickly. Regular maintenance of the print head, capping station, and ink lines reduces clogging and preserves color accuracy over time.
Modern machines also feature maintenance routines and automatic purge cycles to keep nozzles clear. They may include connectivity options like USB, Ethernet, or Wi-Fi for easier workflow integration with design software.
Choosing the right model for your needs
When selecting a shirt printer machine, align features with your expected workload, fabrics, and budget. Consider print area (width x height), color depth, and resolution, as these affect design possibilities and repeatability. Look for robust build quality, a reputable ink system, and reliable vendor support. If you anticipate frequent color changes or ramping up production, prioritize models with quick-change platens and efficient curing options. For beginners, a compact, entry-level DTG printer with straightforward software can be ideal for learning the ropes before scaling up. As you compare models, request sample prints from the vendor to evaluate color accuracy, texture, and edge crispness on your target garments.
Key decision factors:
- Print area and garment thickness support
- Ink system reliability and availability
- Software compatibility and ease of use
- After-sales support and parts availability
Setup and calibration basics
Effective setup begins with a clean workspace, proper ventilation, and a clear workflow plan. Unbox the printer, verify all parts, and position it on a sturdy, level surface. Load the garment, align the platen, and connect power and data cables. Install inks and prime the system according to the manufacturer’s instructions. Calibration involves aligning color channels, adjusting platen height for even ink deposition, and performing a test print to check registration. Color management is critical: ensure your design uses appropriate color profiles and calibrate to a known reference. Keep spare parts like nozzles and seals, along with cleaning tools, so you can perform routine maintenance without delays.
A practical approach:
- Start with simple designs to verify alignment
- Use a test garment for color accuracy checks
- Document settings for repeatable prints
Maintenance routines you can implement weekly
Regular maintenance keeps a shirt printer machine performing at its best. Weekly tasks include cleaning the print head, checking the capping station for dry ink, inspecting ink lines for leaks, and validating the curing path for consistent heat distribution. Run any automatic purge or cleaning cycles if your model supports them. Keep the print bed free of lint and fabric debris that can affect edge sharpness. Document consumable usage (ink levels, air filters, wear parts) to anticipate replacements before they fail. A consistent upkeep cadence reduces unplanned downtime and preserves print quality over time.
Maintenance checklist:
- Clean print head and wiper blades
- Inspect and replace worn platen or pads
- Verify temperature and humidity conditions in the print area
Troubleshooting common issues and advanced tips
Even with proper setup, issues can arise. Common problems include misregistration, color bleed, banding, or faint prints. Start with the basics: check ink levels, nozzle health, and print head alignment. If misregistration occurs, re-map the bed and verify garment placement. For color issues, recalibrate color channels and verify the color profiles used in your design software. A thorough cleaning schedule and proper storage of inks prevent clogs and color drift. Advanced tips include using test patterns to diagnose specific color channels and maintaining an up-to-date firmware version for reliability. Print Setup Pro emphasizes consistent calibration and routine maintenance as critical practices for long-term success.
Tools & Materials
- shirt printer machine(Core device for DTG printing on textiles.)
- power supply and data cable(Ensure compatibility with the machine's input specifications.)
- blank garments (various sizes)(Prefer 100% cotton or high cotton blends for best results.)
- DTG ink bottles or cartridges(Choose the ink system recommended by the manufacturer.)
- pretreatment solution (if required)(Important for dark fabrics to improve adhesion and vibrancy.)
- heat press or built-in curing system(Used to cure inks after printing.)
- cleaning supplies (solvents, swabs, lint-free cloths)(For nozzle maintenance and workflow cleanliness.)
- protective gear (gloves, safety glasses)(Reduce exposure to inks and solvents.)
Steps
Estimated time: 60-90 minutes
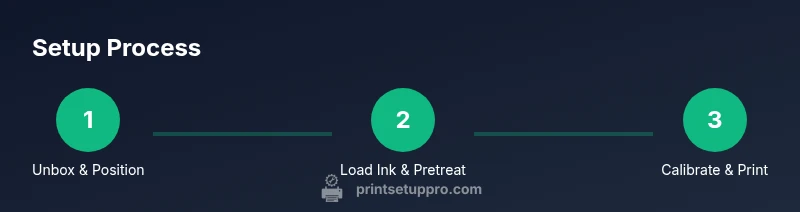
- 1
Unbox and position
Unpack the printer, verify all parts, and mount on a stable, level surface near power and data outlets. Check that the platen is clean and free of debris before placing the first garment. This ensures accurate initial alignment and reduces reshipment risk.
Tip: Take photos of each stage in case you need to reproduce the setup later. - 2
Load inks and prime system
Install inks according to the manufacturer’s instructions, prime the ink lines, and run a nozzle purge. This prevents air pockets that can cause inconsistent drops and color gaps in your first prints.
Tip: Keep inks capped and stored at recommended temperatures to maintain viscosity. - 3
Prepare garments and platen
Pre-treat dark fabrics if required, align a blank shirt on the platen, and secure it with clamps or edge guides. Ensure the fabric is flat, wrinkle-free, and centered for uniform ink deposition.
Tip: Use a pre-press step to reduce moisture-related color shift. - 4
Load design and set color profile
Import your design into the printer software, select the correct color profile, and confirm print area boundaries. Run a small test to verify color accuracy and registration.
Tip: Always use a reference chart to calibrate color perception. - 5
Perform a test print
Print a small sample on a test garment to check alignment, color, and edge fidelity. Note any misalignment or color drift for further adjustment.
Tip: If misalignment occurs, re-check garment placement and platen height. - 6
Calibrate and finalize
Adjust color channels, bed height, and curing settings based on test results. Save the configuration for repeatability in future jobs.
Tip: Document settings for each garment type to speed up future production.
People Also Ask
What is a shirt printer machine and who should use it?
A shirt printer machine is a device that prints designs directly onto fabrics using DTG technology. It’s ideal for home studios and small businesses that want on-demand customization.
A shirt printer machine prints directly on shirts, perfect for small runs and custom designs.
Do I need pretreatment for all fabrics?
Pretreatment is often required for dark fabrics to improve ink adhesion and vibrancy. Light fabrics may print well with little or no pretreatment, depending on the ink system.
Pretreatment helps dark fabrics look bright and durable; some fabrics may need it, others may not.
What maintenance is essential for longevity?
Regular cleaning of the print head, checking ink lines, and running purge cycles are essential. Keep the curing path clean and service parts as recommended by the manufacturer.
Keep up with cleaning and part checks to extend the printer’s life.
Can I print on any fabric with a shirt printer machine?
Most DTG setups work best on 100% cotton or cotton-rich blends. Some synthetics require specific inks or pretreatments; always verify fabric compatibility with your printer.
Fabric matters; check ink compatibility for best results.
What is the typical cost range for entry-level DTG setups?
Entry-level DTG systems vary, but you should plan for a range that covers printer, inks, pretreatment, and curing equipment. Budget for ongoing ink and maintenance costs as well.
Costs vary; plan for ongoing ink and maintenance needs.
Where can I find reliable support and spare parts?
Choose a vendor with clear service options, spare parts availability, and a responsive support team. Warranty terms and firmware updates are important for long-term reliability.
Pick vendors with solid support and easy access to parts.
Watch Video
Quick Summary
- Plan your workflow end-to-end before printing
- Calibrate color profiles for reliable results
- Document settings for repeatability
- Practice safe handling of inks and solvents