Printer on Shirt: A Comprehensive DIY Printing Guide
Learn how to print directly on shirts using DTG or heat-transfer methods. This step-by-step guide covers design prep, materials, printer setup, curing, and care for durable, vibrant results.

Learn how to print directly on shirts using DTG or heat-transfer methods. This guide covers design prep, material selection, printer setup, curing, and care to ensure durable, vibrant results. Whether you’re a hobbyist or small-business owner, follow these steps to achieve professional-looking prints.
What printer on shirt means for modern apparel projects
In apparel printing, printer on shirt refers to applying designs directly to fabric using direct-to-garment (DTG), heat-transfer, or sublimation methods. For DIYers and small businesses, the easiest starting point is a DTG setup or a compatible heat-transfer workflow. According to Print Setup Pro, choosing the right method for your shirt material and design complexity is the single most important decision you’ll make before any ink touches fabric. The team at Print Setup Pro emphasizes that the rest of the process hinges on selecting suitable inks, printing surfaces, and curing methods that preserve color, texture, and wash-fastness.
DTG uses specially formulated water-based inks that bond with yarn fibers when cured with heat. It shines on 100% cotton or cotton-blend fabrics and yields photo-realistic results. Heat-transfer methods, including screen-print transfers and heat-press papers, offer versatility across fabrics, but can feel heavier or stiffer if not chosen correctly. Sublimation works best on polyester or polymer-coated substrates and requires a white base for vibrant colors. Each approach has different prepress steps, equipment needs, and post-print care requirements.
Before selecting a method, assess your project scope: the number of colors in your design, the fabric you’ll use, and whether you intend to print on demand or in bulk. Start with a single-color design on an inexpensive shirt to validate your workflow. Plan for pretreatment (for DTG), temperature targets, and curing times. Your success hinges on clean prints, accurate alignment, and consistent heat application.
Choosing the right method for shirts
Your choice depends on fabric, design complexity, volume, and budget. DTG excels at full-color, photo-like prints on light to medium fabrics, with exceptional soft hand and flexibility for small runs. Heat-transfer papers and vinyl transfers are economical for simple designs or unusual fabrics, and they shine on dark shirts when layered correctly. Sublimation is ideal for high-volume production on polyester, offering vibrant, durable colors but requiring white or light bases.
Consider color count and edge-to-edge printing. DTG and sublimation can handle many colors; HTV shines best with bold single-color or few-color motifs. If you’re unsure, run a small test using a scrap shirt and compare results across methods. Also evaluate the total cost per shirt, including ink, consumables, electricity, and time. Print Setup Pro notes that beginners often underestimate setup time, which is a common bottleneck when learning a new technique. Start with your most forgiving method to build confidence, then expand capabilities as your workflow stabilizes.
Design and file prep for apparel
Design files must be print-ready for fabric. Use vector artwork for crisp edges and raster art with at least 300 dpi for image-based elements. Convert colors to the printer’s color space (usually CMYK or a special fabric ink profile) and soft-proof on a similar fabric swatch. For DTG, convert to a high-resolution PNG with transparent background to preserve color layering. For HTV, design for layering and consider weeding space if using vinyl. Keep back layers simple to avoid crowding the shirt surface.
Label the design with clear bleed margins and use test prints on inexpensive shirts before final production. If your design contains fine details, increase the DPI and avoid ultra-small text that becomes illegible at print size. Block challenging colors into separations or use a dedicated color profile to reduce color drift. Finally, ensure the placement is accurate by using a printed guide or jig on the platen to align your artwork with the shirt seam.
Materials and equipment you need
Essential tools and supplies start with a reliable printer suitable for fabric inks, plus a heat platform for curing. A dedicated printer for textiles, colored inks, and a platen sized to your target shirt dimensions is a solid foundation. Pretreatment for DTG is critical on dark or saturated fabrics, so stock a pretreatment solution and a spray gun or suitable sprayer. For HTV, collect transfer sheets, a vinyl cutter, and a heat press with a silicon pad. You’ll also want lint rollers, clean rags, and isopropyl alcohol or ink-removal wipes for quick cleanups.
Inks and papers should be chosen for fabric compatibility. Keep spare color cartridges, cleaning supplies, and spare platen covers on hand. Temperature controls matter, so calibrate your heat press to ensure consistent pressure and stable dwell times. Lastly, store shirts on a rack or flat surface to prevent wrinkles, and keep your workspace well-ventilated to manage fumes from pretreatment and inks.
Workspace setup and safety
Set up a clean, organized workspace with adequate ventilation for pretreatment and ink drying. Shield nearby electronics from splashes and place a portable fan to move fumes away from your breathing zone. Use PPE: safety glasses, gloves, and a dust mask when handling powders or mist. Organize cords to reduce tripping hazards and label the layout so crew members follow the same workflow. Keep a dedicated lint-free area for print testing and color checks.
Control ambient conditions: stable room temperature reduces ink drying variability and improves dwell times. If you’re printing large runs, consider a small industrial fan or exhausting hood. Finally, establish a standard operating procedure so each session follows the same steps, minimizing variation and mistakes across shirts and runs.
Common mistakes and quick fixes
Many beginners encounter color drift, misregistration, or pale whites when printing on shirts. Color drift happens when inks are not fully cured or a profile isn’t matched to fabric; re-run a color test and adjust the curing time. Misregistration is common on soft fabrics; use alignment marks, a jig, or a test print on scrap to verify placement before final runs. Bleeding can occur when pretreatment is used too heavily or ink saturates the fabric; apply light coats and allow proper drying. If you see a stiff hand on HTV, re-check the heat-press time and pressure. Finally, wash tests are essential before production to ensure durability and color consistency.
Remember to clean the platen and ejection surfaces regularly to prevent ink buildup that causes smudges. If you encounter stubborn prints, consult the ink manufacturer’s guidelines for temperature, dwell time, and post-treatment steps. Print Setup Pro emphasizes testing early and documenting settings to speed up future jobs.
Maintenance and care for printed shirts
Caring for printer-on-shirt prints extends their life. Wash prints in cold water with mild detergent and turn shirts inside out to reduce abrasion on the surface. Avoid high heat in the dryer; let prints air-dry or tumble on low heat to preserve color integrity. For DTG, reapply pretreatment as needed and check the platen temperature for each run to avoid scorching. For sublimation, heat transfer requires protective layers and a non-stick sheet to prevent scorching.
Periodically clean printer heads, replace worn nozzles, and inspect the platen gasket for wear. Keep a log of maintenance tasks and ink lots to trace potential color shifts or batch errors. Finally, store shirts flat rather than folded to minimize creases that can distort seams, especially on edge-to-edge prints.
Cost control and scaling up production
When transitioning from hobby prints to small-batch production, track ink consumption, sheet count, and energy use. Compare per-shirt costs across methods, factoring in pretreatment, transfer sheets, and cleaning supplies. Use scrap shirts for color matching and test prints to minimize waste. Invest in a reliable color management workflow, including calibrations and mockups on fabric swatches before applying to final garments.
Plan for supplies: purchase consumables in batches to reduce unit costs, and schedule curing times to maximize throughput. Build a small library of reusable templates for placement, color profiles, and print sizes to speed up future jobs. Finally, create a simple customer-ready quality checklist to ensure each shirt meets expectations before shipment.
Wrap-up: next steps and learning path
Summarize the key ideas, remind readers to test prints on scrap shirts, and encourage experimentation with different fabrics and inks. Point to resources where readers can deepen skills, such as university extension guides, safety guidelines, and ink manufacturer data sheets. Encourage readers to document settings so they can replicate successful prints and share results with peers. You can start with a small project and gradually expand to a full lineup of shirts.
Tools & Materials
- DTG printer (textile inks compatible)(Ensure white ink capability if printing on dark shirts)
- Heat press (clamshell or swing-away)(Flat, even pressure; consider 15x15 or larger platen)
- Platen and silicone padding(Ensure correct size for your shirts)
- Pretreatment solution(For DTG dark fabrics; use in a well-ventilated area)
- Spray bottle or sprayer(Fine mist for even pretreatment application)
- Textiles inks (DTG compatible)(Keep cartridges organized and labeled)
- Lint roller and cleaning swabs(For fabric prep and platen cleaning)
- Isopropyl alcohol(For quick cleanup of inks and surfaces)
- Teflon sheet or parchment paper(Protects the print and platen during curing)
- Ruler or alignment jig(Accurate placement is critical for repeatability)
- Heat-resistant gloves(Use when handling hot surfaces)
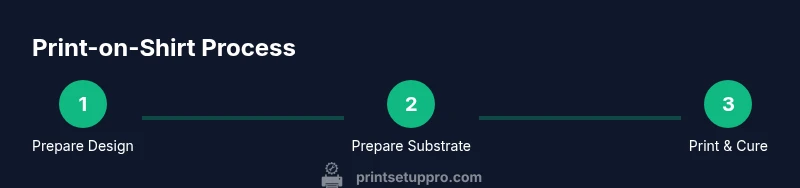
Steps
Estimated time: 90-150 minutes
- 1
Prepare design and files
Finalize the garment placement, ensure your design is in the correct color space and resolution, and save in the appropriate format for your chosen method.
Tip: Keep a master file with layering and bleed margins for future edits. - 2
Prepare shirt and platen
Lay the shirt flat on the platen, smooth wrinkles, and align using reference marks or a jig.
Tip: Use a traditional center seam as a quick alignment anchor. - 3
Apply pretreatment (DTG only)
Evenly mist the fabric where the print will appear and allow it to dry completely before printing.
Tip: Test spray on a scrap to calibrate your mist and avoid oversaturation. - 4
Load and align the design
Position the design in the printing area and confirm alignment with the shirt’s seams and shoulder lines.
Tip: Use a matching test print on scrap to verify placement. - 5
Print the design
Run the print with the appropriate settings for ink density and color profile.
Tip: Print a small test swatch first to validate color values. - 6
Cure and finish
Place a protective sheet over the print and apply heat for the recommended dwell time until the ink is set.
Tip: Avoid excess pressure to prevent smudges or ghosts. - 7
Cool and inspect
Allow the shirt to cool fully, then inspect for color accuracy, alignment, and texture.
Tip: Check whites for opacity and ensure no ink crackling occurs after cooling. - 8
Wash test and document
Run a wash test on a sample, then record settings for consistent future results.
Tip: Keep a simple memo of temperatures, dwell times, and ink profiles.
People Also Ask
What fabrics work best for printer-on-shirt projects?
Cotton and cotton blends are the most forgiving for DTG, while polyester suits sublimation. For HTV, almost any cotton blend works with proper heat settings. Always test on a sample fabric before production.
Cotton and cotton blends are easiest for DTG; polyester works with sublimation, while HTV suits cotton blends. Always test first.
Can you print on dark shirts effectively?
Yes, but dark shirts require pretreatment (DTG) or white base layers (sublimation on suitable substrates) and careful color management to maintain vibrancy.
Dark shirts can print well with pretreatment or a white base, plus proper color management.
Is pre-treatment necessary for DTG?
Pre-treatment improves color contrast and wash durability on dark fabrics. It is recommended for most DTG projects on non-white shirts.
Pre-treatment helps the colors pop and last longer on dark fabrics.
How long does a printer-on-shirt print take to cure?
Curing depends on the ink and method but typically requires a stable heat period until the ink is set. Always follow the ink manufacturer's guidelines.
Cure times vary by ink; follow the ink maker's guidelines.
What is the best workflow for beginners?
Start with a forgiving method like basic HTV or simple DTG on light fabrics, then experiment with multi-color designs and pretreatment for darker fabrics as you gain confidence.
Beginners should start with simple methods on light fabrics and build up.
How can I troubleshoot color drift?
Calibrate the printer, ensure proper ink mixing, verify the color profile, and run test prints on fabric swatches to adjust the profile.
Calibrate and test with fabric swatches to fix color drift.
Watch Video
Quick Summary
- Choose the method that matches fabric and design complexity.
- Prepare design files with correct color profiles and placement guides.
- Calibrate and cure properly to ensure durability.
- Test on scrap shirts and document settings for consistency.