Printer T Shirt Printing: A Comprehensive Step-by-Step Guide
Learn how to print T-shirts with a printer—from choosing methods to finishing touches. Practical, step-by-step guidance for home offices and small shops.

Turn any blank tee into a customized shirt using printer t shirt techniques. This guide covers DTG, heat transfer, and sublimation options, plus setup, materials, and safety. By following the steps, home users and small teams can achieve durable, vibrant prints with common home equipment.
Understanding Printer T Shirt Printing: What You Need to Know
Printer t shirt printing blends art with practical workflow. It refers to using a regular or specialized printer to apply designs onto garments and encompasses several methods: direct-to-garment (DTG), heat transfer, and sublimation. Each path has distinct advantages for color fidelity, feel, durability, and cost. In this guide, you’ll learn how different fabrics interact with inks, what equipment is essential, and how to structure a workflow that yields repeatable results. According to Print Setup Pro, the basics of printer t shirt printing empower hobbyists and small teams to produce durable shirts at home. This foundation helps you pick a path that matches your budget and goals while avoiding common missteps.
Printing Methods: Direct-to-Garment, Heat Transfer, Sublimation
There isn’t a single “best” method for all shirts. DTG offers excellent color detail on cotton-rich fabrics but requires a textile-focused printer and proper pretreatment. Heat transfer is versatile and beginner-friendly, using transfer papers or film; it shines on varied fabrics but may feel plasticky if not applied correctly. Sublimation works exceptionally well on polyester blends, delivering vibrant, durable colors with a soft hand yet limits fabric choices. Understanding these trade-offs lets you design with inks, substrates, and end-use in mind. Print Setup Pro notes that aligning method with your garment type reduces waste and improves consistency.
Design and Color Management for Textile Prints
Color management starts long before you press a button. Create or export your artwork in a color space that matches your printer workflow, usually RGB for design and CMYK for print. Separate color channels where needed, and perform soft-proofing to gauge how colors will translate on fabric. Keep in mind that inks may shift shade when applied to textiles, so plan for a slight, deterministic adjustment. Build a small library of test swatches to rapidly compare proofs and final results. This step is crucial for achieving reliable, repeatable prints across runs.
Fabric and Shirt Selection for Best Results
Shirt fabric quality directly affects print appearance and longevity. 100% cotton or cotton-rich blends are common for DTG and heat transfer, while sublimation emphasizes polyester content. Pay attention to knit type (ringspun vs. standard) and fabric weight, aiming for midweight tees (about 160–180 g/m²) for balance between print vibrancy and wear comfort. Pre-washing and drying fabrics helps remove finishing residues that can interfere with ink adhesion. Print Setup Pro suggests starting with basic, widely available tees to establish a baseline before experimenting with specialty fabrics.
Pre-Press, Calibration, and Safety Considerations
Pre-pressing removes moisture and creates a flat, clean surface for ink adhesion. A warm platen or pre-press step helps reduce cockling and improves color transfer. Calibrate your heat press settings (time, temperature, pressure) for each fabric and method. Safety matters in every step: use heat-resistant gloves, ensure proper ventilation, and follow manufacturer guidelines for inks and papers. Maintaining clean work surfaces reduces contamination that can ruin prints and require rework.
Common Challenges and Troubleshooting
Color drift, banding, or ghosting can derail a print. Start with test swatches to detect color shifts early. Misalignment can occur if the shirt shifts during pressing or printing; use registration marks and stable platens. For DTG, nozzle clogs and white-spot issues are common; run routine maintenance and clean print heads as recommended. If you encounter adhesion problems, verify fabric compatibility, ink temperature, and pre-press duration. Print Setup Pro’s troubleshooting emphasis is on building a repeatable workflow rather than chasing perfection with every test run.
Maintenance and Longevity of Your Printer and Accessories
Regular maintenance preserves print quality and equipment life. Clean print heads, check and replace consumables (cap tops, wipers, and seals) per your printer’s schedule, and keep transfer papers and inks stored properly to avoid moisture damage. Wipe down platens and heat press surfaces to prevent residue transfer. A simple maintenance calendar with weekly and monthly checks helps you catch issues early and plan replacements before they fail mid-run. Consistency in maintenance directly correlates with reproducible results.
Budgeting and Inks: Costs, Quality, and Longevity
Initial setup costs vary widely by method and desired output. Expect to invest in a textile-capable printer or heat transfer system, a reliable heat press, appropriate transfer media or inks, and quality tees. Inks and papers come in ranges tied to performance and durability; higher-quality options generally yield more durable prints with better color accuracy. Keep a running tally of consumables and schedule regular re-orders to avoid production downtime. A smart budget includes both upfront hardware and ongoing materials aligned with your typical job volume.
Building a Simple Home Workflow for Small Runs
A pragmatic workflow keeps your home setup efficient for small runs. Design, proof, and export in a color-managed pipeline; print or press in batches to minimize setup time per item. Maintain a dedicated space with good ventilation, heat protection, and organized storage for inks and transfer media. Track job details (fabric type, ink set, heat settings) for repeatability. By establishing repeatable steps and clear documentation, you can confidently scale to small batches without professional facilities.
Quick Start Checklist for Your First Print
- Define your chosen method (DTG, heat transfer, or sublimation) and fabric compatibility.
- Gather essential tools: printer, heat press, transfer media, and quality tees.
- Prepare artwork with color management and proper dimensions.
- Pre-press the shirt and set appropriate heat/pressure parameters.
- Run a test print on a swatch and adjust as needed.
- Apply finishing heat to set and cure the print; allow to cool before handling.
- Inspect for adhesion and color accuracy; wash test on a sample garment.
- Document settings and results for future jobs.
Tools & Materials
- Textile-capable printer (DTG) or suitable heat-transfer printer(Ensure compatibility with water-based inks for DTG or pigment inks for heat transfer.)
- Heat press or equivalent heat tool(Choose a platen size matching your shirt width; plan for varies sizes.)
- Teflon sheet or silicone cover sheet(Prevents ink transfer to the press surface and helps even heat.)
- Textile inks or transfer media appropriate to method(Select inks/papers compatible with your fabric type (cotton, polyester blends).)
- Shirts (100% cotton or cotton blends recommended)(Start with midweight tees for best balance of print and comfort.)
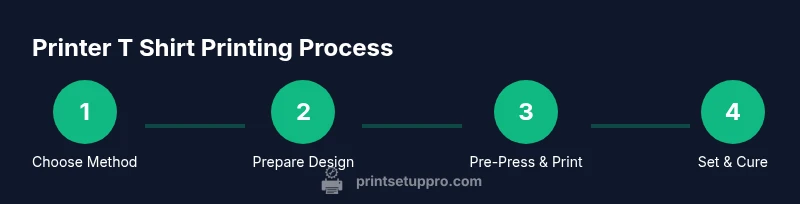
Steps
Estimated time: 45-90 minutes
- 1
Prepare design and color management
Create or import your artwork in a color-managed workflow. Convert colors to the target color space, plan for ink limitations on textiles, and set up registration marks. Proof with a small test print on a swatch before committing to a garment.
Tip: Always build a color-accurate proof; minor shifts are common with fabrics. - 2
Pre-treat and fabric prep
If using DTG, apply pre-treatment to the garment as required, then let it dry completely to avoid ink pooling. For heat transfer, ensure the surface is clean and free of dust.
Tip: Pre-treatment quality strongly affects white/or light colors and overall vibrancy. - 3
Pre-press to flatten and remove moisture
Place the shirt on the platen and pre-press for 5–8 seconds to remove moisture and set the fabric flat. This step reduces cockling during printing.
Tip: A steady, brief press improves registration and ink adhesion. - 4
Print or apply transfer onto the garment
Run the print job on your chosen method, aligning with marks or center seams. For transfers, follow media instructions for ink transfer and wallpaper-like edges.
Tip: Keep the shirt stationary and avoid shifting during the press or print pass. - 5
Set and cure the print
For DTG, allow ink to cure per ink guidelines; for heat transfer, apply a second press if required. Let the garment cool before handling to prevent smudges.
Tip: Cure time is critical for durability; rushing can cause peeling. - 6
Final inspection and wash test
Check color accuracy, adhesion, and texture. Run a cold wash test on a swatch to confirm durability before broader production.
Tip: Document results for future consistency. - 7
Post-care and documentation
Store templates and settings in a project folder; note fabric, media type, and press parameters for repeatability.
Tip: Create a simple playbook for quick repeatability. - 8
Scale up gradually
When moving from one-off to small batches, batch-print to optimize setup time and ensure consistent results.
Tip: Limit changes between runs to minimize variables.
People Also Ask
What is the best method for printing on T-shirts at home?
The best method depends on your fabric and goals. DTG provides high color fidelity on cotton-rich shirts, heat transfer is versatile for many fabrics, and sublimation works best on polyester blends. Start with DTG or heat transfer as they are more beginner-friendly, then explore sublimation if you work with polyester.
For beginners, start with DTG or heat transfer, then explore sublimation for polyester fabrics.
Do I need a DTG printer to print on shirts?
No. You can print shirts using heat transfer methods or sublimation, which utilize transfer papers or films. DTG is ideal for high-detail designs on cotton, but heat transfer and sublimation offer good results with a lower upfront cost.
DTG is optional; transfers and sublimation can cover many basic needs.
Is heat transfer safe for cotton fabrics?
Heat transfer processes are generally safe when done with proper equipment and temperature control. Use the recommended heat settings for the media you choose and avoid overheating to prevent scorching the fabric or compromising fit.
Yes, when you follow the right temperature and time guidelines.
How durable are printed shirts after washing?
Durability depends on the method, media, and curing. DTG prints typically survive many washes on cotton blends when properly cured, transfers may wear faster on some fabrics, and sublimation can be very durable on polyester blends. Always follow care instructions.
If cured correctly and washed per care labels, prints last longer.
Can I wash printed shirts in a regular washing machine?
Yes, most printed shirts can be machine washed, but use cold water and a gentle cycle to extend print life. Turn shirts inside out and avoid harsh detergents or fabric softeners that can degrade inks.
Yes, with proper care: cold wash, gentle cycle, and inside-out drying.
What maintenance does a textile printer require?
Regular nozzle checks, cleaning routines, and periodic replacement of consumables keep prints consistent. Follow your printer’s maintenance schedule, store inks correctly, and avoid running maintenance when the printer is not in a ready state.
Keep up with routine cleaning and head maintenance for best results.
Watch Video
Quick Summary
- Plan method and fabric before printing
- Calibrate colors and manage proofs for consistency
- Pre-press and curing are critical for durability
- Maintain equipment to preserve print quality
- Test and document settings for repeatable results