Decals Printer Guide: Setup, Media, and Troubleshooting
A complete how-to for decals printers, covering selection, media, color management, lamination, and troubleshooting to produce durable vinyl decals at home or in a small shop.

Learn how to select, set up, and troubleshoot a decals printer for durable vinyl decals. This guide covers printer types, media choices, color management, and essential maintenance to keep prints sharp and repeatable. From feed alignment to lamination and curing, you will gain a practical, step-by-step plan to produce high-quality decals at home or in a small shop.
What is a decals printer and why it matters
A decals printer is a specialized inkjet or UV printer optimized for vinyl and film media used to create durable decals. These machines differ from standard photo printers in media handling, ink chemistry, and curing methods. According to Print Setup Pro, choosing the right model depends on volume, media width, and ink compatibility. For hobbyists, a desktop eco-solvent system can be sufficient, while studios may require wide-format or UV-curing devices. The key is to match the printer to your target use-case: wall decals, vehicle graphics, labels, or product branding. By understanding the flow from media to finish, you will reduce waste, improve consistency, and extend print life.
Key features to look for in a decals printer
-
Ink compatibility: solvent, eco-solvent, latex, or UV inks each have different durability and odor profiles. For decals, UV-cured inks offer excellent outdoor resistance but require a curing station. Look for long-life printheads, wide media compatibility (calendered and cast vinyl), and adjustable platen heights to handle thick media.
-
Media handling: front-feeding vs roll-fed; consider media thickness tolerance; ensure the machine has a stable platen and anti-curl features.
-
Color management: integrated spectrophotometer or support for ICC profiles; ability to print with spot colors using an embedded color engine.
-
Maintenance: built-in cleaning cycles, simple head maintenance, and accessible service parts.
-
Connectivity: Ethernet, USB-C, and optional Wi-Fi.
If you want a concise monthly budget, print quality is typically tied to the ink system and media support; ensure the printer can handle your most-used media widths.
Media, inks, and coatings for durable decals
For decals, the most common substrates are calendered vinyl and cast vinyl. Calendered vinyl is budget-friendly with good short-term durability, while cast vinyl is more flexible and long-lasting for curved surfaces. Inks vary by printer type: solvent, eco-solvent, latex, or UV. UV-curing inks cure instantly with a dedicated lamp, enabling outdoor use and faster production. After printing, most decals benefit from a protective laminate—gloss, matte, or satin—followed by a stabilization or curing interval as recommended by the laminate manufacturer. When choosing coatings, consider abrasion resistance, chemical resistance, and UV stability. Finally, testing on a small batch can prevent costly errors in your main run.
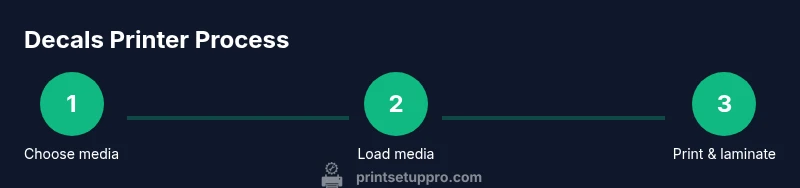
Setup workflow: from unboxing to first test print
Unbox the printer and verify all components are present, including power cables, media rolls, and any finishing laminates. Install drivers or RIP software, and connect the printer to your computer via USB or Ethernet. Load the vinyl media with the correct feed direction and verify that the platen height accommodates the media thickness. Run a nozzle check and printhead cleaning if required by the vendor. Calibrate the color engine by printing a simple grayscale ramp and a color target; adjust the ICC profile if needed. Finally, print a small test sheet and evaluate alignment, color accuracy, and lamination compatibility. If mismatches appear, re-check media tension and feed settings.
Color management and calibration for decals
Color management starts with a calibrated monitor and ICC profiles designed for your printer and media. Use a RIP or driver with built-in color management to translate colors accurately from your design to the print. When printing, choose a standard target like a grayscale ramp and a color chart to verify steps and neutrality. Soft-proof your design to anticipate how the final decal will appear under lighting conditions; adjust brightness and contrast early in the workflow to minimize post-print edits. For outdoor decals, verify that your laminate does not dull colors or shift hue after curing.
Troubleshooting common issues in decal printing
Color drift: ensure ICC profiles match the media and ink set; recalibrate if necessary. Banding: verify media transport, clean printheads, and run a longer purge routine. Misalignment: re-check media guides and encoder; adjust without over-tensioning the roll. Fading: confirm laminate compatibility and UV resistance of inks; consider a higher-quality laminate or protective layer. Printhead clogging: run cleaning cycles and store printer in a clean area with stable temperature. Long cure times: ensure the lamp or UV system is functioning and set processing speeds accordingly.
Maintenance and care to extend decals printer life
Regular maintenance extends the life of a decals printer. Keep the area clean and dust-free; wipe the exterior and feed rollers with lint-free cloths. Schedule routine nozzle checks and cleaning cycles according to the manufacturer's guidelines. Replace wear parts such as wipers, capping stations, and maintenance cartridges on a recommended timeline. Use quality media and inks to minimize residue buildup and residue in the printhead. Store inks and media in proper conditions to avoid drying, sticking, or color shift. Finally, maintain a logbook of print runs, failures, and replacements to anticipate service.
Tools & Materials
- Decals printer (dedicated vinyl printer)(Ensure supports vinyl media widths you plan to use)
- Vinyl media (calendered and/or cast vinyl)(Choose media compatible with your ink system and finish)
- Lamination/overlaminate film(Gloss or matte; protective top coat)
- Lint-free cloths and isopropyl alcohol (99%)(For media cleaning and platen maintenance)
- ICC profiles and color management software / RIP(To ensure accurate color reproduction)
- Transfer tape and squeegee(For applying decals cleanly)
- Scissors/precision knife(For trimming decals)
- RIP software or driver with color management(For print settings)
- Replacement ink cartridges (spares)(Only if printer uses cartridge-based ink)
- Surge protector and a clean, dust-free workspace(Safety and print quality)
Steps
Estimated time: 30-45 minutes
- 1
Unbox and inspect
Carefully open the packaging and confirm all components are present. Inspect the printer for any transit damage and verify that you have the power cable, media, and laminates. This step prevents missing parts that could delay setup.
Tip: Take photos of the contents and any shipping damage for warranty claims. - 2
Install drivers and RIP software
Install the latest drivers from the manufacturer and set up your RIP software or color management tool. Connect the printer to the computer via Ethernet or USB. Update firmware if available to access latest features.
Tip: Use the latest firmware to ensure compatibility with current media and color profiles. - 3
Load vinyl media and set the feed
Place the vinyl on the supply, align guides, and set the platen height to accommodate media thickness. Feed a short test strip to verify smooth transport and edge alignment. Confirm that roll-mounted media winds correctly without slipping.
Tip: Keep media clean and straight; tangles cause misfeeds and skewed prints. - 4
Install inks and run cleaning
Insert ink cartridges and perform a nozzle check. Run a light cleaning cycle if lines appear or colors misalign. Avoid touching printheads and handle cartridges with care.
Tip: Do not overload the cleaning cycle; excessive cleaning wastes ink and can wear heads. - 5
Calibrate color with targets
Print a color target and grayscale ramp to evaluate accuracy. Compare against the target, adjust ICC profiles, and reprint until color matches your design intent. Document profile settings for future projects.
Tip: Maintain a log of profile changes to track what works best for each media type. - 6
Print a test sheet and evaluate
Run a small batch of test decals to check color, sharpness, and edge details. Inspect for banding or misregistration and adjust feed or alignment as needed. Verify lamination compatibility on the test sheet.
Tip: Use a simple vector design with solid colors to catch issues quickly. - 7
Laminate and cure
Apply the protective laminate according to the laminate manufacturer’s instructions. Allow the print and laminate to cure as required before cutting or handling to prevent scuffing.
Tip: Choose a laminate that matches your final use case (gloss, matte, or satin) for desired aesthetics and durability. - 8
Finalize and schedule maintenance
Trim decals, apply transfer tape, and test adhesion on a sample surface. Set a recurring maintenance schedule based on usage and media type, including nozzle checks and part replacements.
Tip: Maintain a log of print runs, failures, and replacements to anticipate service needs.
People Also Ask
What is a decals printer?
A decals printer is a printer optimized for vinyl and film media used to create durable decals. It uses specialized inks and media and often requires lamination to protect the final print.
A decals printer is a vinyl printer designed for durable decals, usually with protective lamination.
What media can I print on decals printer?
You can print on calendered and cast vinyl, clear films, and specialized decal substrates. Media choice depends on durability needs and the printer’s ink system.
You can print on vinyl and film substrates; choose media based on durability and ink compatibility.
Do decals last outdoors?
Outdoor durability varies with ink type and lamination. Use UV-resistant inks and a protective laminate to maximize life under sun and weather.
Outdoor life depends on ink and lamination; UV inks with laminate help.
Is lamination required for decals?
Lamination is highly recommended for protection against UV exposure, scratching, and moisture. Some decals can use overlaminates that provide gloss or matte finishes.
Laminate is usually recommended to protect decals from the elements.
What maintenance does a decals printer need?
Regular nozzle checks, cleaning cycles, and part replacements as specified by the manufacturer help prevent clogs and downtime. Keep the area clean and track wear components.
Regular cleaning and checks keep the printer running smoothly.
Calendered vs cast vinyl: which to choose?
Calendered vinyl is budget-friendly for short-term decals; cast vinyl excels on curved surfaces and long-term use. Match the vinyl type to the intended application and durability needs.
Cast vinyl lasts longer and works on curves; calendered is cheaper for short-term decals.
Watch Video
Quick Summary
- Choose the decals printer that fits your media and volume.
- Calibrate color with ICC profiles for accurate results.
- Laminate decals to maximize outdoor durability.
- Test with small batches before full runs.
- Maintain the printer regularly for longevity.