Printer for Stickers: A Complete Setup Guide
Learn how to pick, set up, and print high-quality stickers with the right printer for stickers. Covers media, ink, color, finishing, and troubleshooting for durable results.

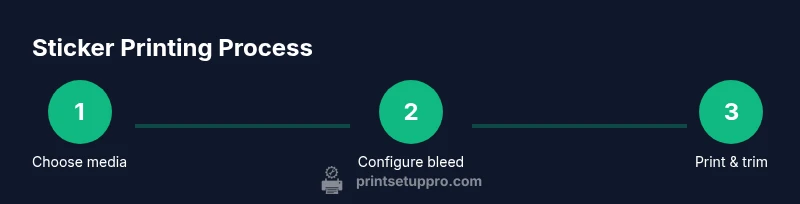
Goal: Produce crisp, durable stickers with the right printer and media. Steps: 1) select a printer designed for label media; 2) load compatible sticker stock; 3) configure bleed, color, and print quality; 4) print a test page and adjust; 5) cut and seal as needed. This quick path helps home offices and small shops get reliable results.
What is a printer for stickers?
A printer for stickers is any printer that can feed and print on adhesive-backed media such as sticker paper, vinyl, or specialty films. Most hobbyists start with a color inkjet, while small businesses might use a color laser or a dye-sublimation setup for specific finishes. According to Print Setup Pro, choosing the right printer for stickers begins with clarifying your end use: short runs of design labels, product tags, or decorative vinyl decals, and then selecting media that matches your printer’s feed path and ink chemistry. The Print Setup Pro team found that knowing your finish—matte, gloss, or clear laminated—helps narrow printer choices, because some devices handle heavier stock or offer better dot gain control on thicker media. In practice, a good sticker printer supports edge-to-edge printing (borderless), feeds a range of media weights (roughly 90–300 gsm), and includes straightforward maintenance to keep nozzles clean and colors vibrant.
note
Tools & Materials
- Printer capable of sticker media (inkjet or color laser)(Supports sticker stock up to 200 gsm; borderless printing is a plus)
- Sticker stock or vinyl sheets(Choose adhesive-backed options compatible with your printer type)
- Cutting tools (scissors or craft knife)(For clean edges and precise shapes)
- Ruler and cutting mat(Helps with straight cuts and bleed alignment)
- Laminating film or sealant (optional)(Adds durability and water resistance)
- Design software or templates(Inkscape, Illustrator, or Canva templates work well)
- Color management tool (calibrated monitor)(Improves color accuracy across devices)
Steps
Estimated time: 90-120 minutes
- 1
Define media and printer pairing
Choose sticker stock that matches your printer’s capabilities (weight, finish, and surface). If you plan outdoor use, select vinyl and consider pigment inks for durability. This ensures fewer feed jams and consistent results across batches.
Tip: Check stock weight on the printer’s spec sheet and price-per-sheets for future runs. - 2
Load media correctly
Open the media tray, align the guides to the stock width, and avoid overfilling. Use plain sheets for alignment tests before loading sticker stock.
Tip: Always perform a nozzle check or feed test before a full print to prevent waste. - 3
Adjust print settings for sticker stock
Set the print quality to high, choose the correct media type in printer driver, and enable bleed if your design requires edge-to-edge color. Turn off any borderless option only if your stock has a white border.
Tip: Enable bleed of 1/8 inch (3 mm) per side to ensure edge coverage. - 4
Prepare your design with bleed and margins
Create your artwork with a bleed area around the edges so color runs beyond the cut line. Define safe margins for text and critical elements to avoid trimming important bits.
Tip: Use vector-based files for sharp edges and convert text to outlines if needed. - 5
Print a test page
Print a small test sheet to verify color, alignment, and bleed. Check for misfeeds, color shifts, or ghosting before committing to full sheets.
Tip: Place a white backer sheet under the stock to detect feed issues quickly. - 6
Calibrate color and density
If colors don’t match your monitor, adjust curves or use a color profile for the stock. Avoid oversaturation that causes ink bleed on glossy stock.
Tip: Take notes on settings so you can reproduce them for future batches. - 7
Print final batch
Print the final run with the verified settings. Keep the printer in a dust-free, stable environment to prevent feeds from sticking.
Tip: Print in small batches to spot changes in color or stock behavior. - 8
Drying and handling
Allow sufficient drying time before handling to prevent smudging, especially on glossy finishes. Lift the edges gently to check cure.
Tip: Use a clean, flat surface for drying to avoid warping. - 9
Trim to shape
Cut along the crop marks or use a cutting tool to maintain uniform edges. For complex shapes, a hobby knife and metal ruler give clean results.
Tip: Always cut away from your body and keep hands steady for accuracy. - 10
Apply finish if needed
Laminate or seal stickers exposed to moisture or sun. Lamination bands edges and adds abrasion resistance, though it increases thickness.
Tip: Choose a laminate with good UV resistance for outdoor use. - 11
Quality check and storage
Inspect each finished sticker for air bubbles, missing color, or mis-cuts. Store in a climate-controlled area away from direct sunlight.
Tip: Label batches with print date and stock lot for traceability. - 12
Maintain your printer
Run routine nozzle checks, clean the printhead as recommended by the manufacturer, and keep the feed path free of dust to prevent future jams.
Tip: Schedule monthly maintenance during heavy print cycles.
People Also Ask
Can I use an inkjet printer for stickers?
Yes, many hobbyists print stickers on inkjet printers using pigment-based inks and sticker stock. For outdoor durability, choose vinyl stock and sealants. Always run a test page to verify adhesion and color on your chosen stock.
Yes, you can use an inkjet printer for stickers—just pick the right sticker stock and pigment inks, then test to ensure durability and color accuracy.
Do sticker papers require lamination?
Lamination is optional but recommended for moisture-prone or outdoor applications. It adds durability and UV resistance, though it can increase thickness and affect flexibility.
Lamination is optional but helps protect stickers from moisture and sunlight; consider it for outdoor use.
What is bleed in sticker printing?
Bleed is extra design area beyond the final trim line that ensures color goes to the edge after cutting. It prevents white gaps if trimming is slightly off.
Bleed is extra edge area beyond the trim line to prevent white edges after cutting.
Which media lasts outdoors best?
Vinyl stock with UV-resistant inks and proper lamination generally lasts longer outdoors. The longevity also depends on exposure, cleaning, and installation quality.
Outdoor longevity comes from vinyl stock, UV-resistant inks, and lamination.
How long does ink take to dry on stickers?
Drying times vary by stock and ink, but penny-dry times typically range from a few minutes to several hours. Avoid stacking until fully dry.
Dry times vary; usually a few minutes to a few hours—check the stock guidelines.
Is there a difference between label paper and sticker vinyl?
Yes. Label paper is cheaper and good for indoor use; vinyl is more durable and weather-resistant, ideal for outdoor or high-traffic environments.
Label paper is great indoors, while vinyl offers durability outdoors.
Watch Video
Quick Summary
- Choose media compatible with your printer to prevent jams
- Bleed and proper margins ensure edge-to-edge results
- Test prints reduce waste and save time
- Laminate for durability when needed
- Regular maintenance prevents future print defects