How to Print Custom Stickers with a Sticker Printer
Practical guide to printing custom stickers with a dedicated sticker printer. Learn hardware choices, media options, design prep, and a reliable workflow for crisp, durable results.

By the end of this guide you'll be able to set up a dedicated sticker printer for custom designs, choose compatible media, and run a reliable print workflow. You'll learn how to select hardware, prepare artwork with bleed, configure printer settings, and perform quick quality checks to produce crisp, durable stickers.
What sticker printer custom means for your projects
Sticker printer custom workflows empower home office users, small business owners, students, and DIY enthusiasts to create branded labels, product stickers, and event decals. In a practical sense, it means selecting a printer and media that can handle adhesive-backed materials while preserving color fidelity and durability. According to Print Setup Pro, success starts with clear goals and a compatible combination of printer, media, and design software. You should define the minimum size, desired finish (gloss, matte, or satin), how long the stickers should last outdoors, and whether you need sheets or roll formats. With these basics established, you can evaluate hardware options, choose media, and build a repeatable workflow that minimizes waste and maximizes consistency.
In this guide, we focus on accessible approaches that work for a home office or small shop. You’ll see how to align your design with the printer’s capabilities, why bleed and margin considerations matter, and how to set up a safe, repeatable process. The goal is not to chase every possible feature, but to deliver reliable results with sensible investments, fast setup, and predictable outcomes. By following the steps, you’ll be able to produce crisp, durable stickers that reflect your brand or personal style.
How to choose the right hardware for sticker printing
When you embark on a sticker printer custom project, the hardware choice is foundational. Most hobbyists start with an inkjet that uses pigment-based inks for longer color retention and water resistance. For higher-volume needs or materials with challenging inks, a dedicated color printer or dye-sublimation option might be better suited, especially for roll-fed media. The key is to match output needs with media compatibility, print speed, and maintenance requirements. Look for printers that explicitly advertise sticker-capable media or have a wide media path to handle sheet sizes and thicker vinyl stocks. Temperature control, dry-out protection, and quiet operation can matter in a home office or shared space.
Beyond the printer itself, consider the finishing options you’ll need. If you plan to seal or laminate your stickers, you’ll want a device that tolerates glossy finishes or supports a top-coated lamination. If you expect to cut your stickers, factor in a compatible cutting method either via a built-in cutter or a separate plotter. Finally, compatibility with design software and color profiles reduces surprises during print. In many cases, a modest investment in a dedicated sticker printer and the right media yields better results and fewer headaches than DIY substitutions.
Selecting materials and finishes for durability
Durability starts with media selection. Vinyl stocks with permanent adhesives tend to perform best for outdoor or long-lasting applications, while paper-backed sheets offer lower cost for indoor projects. If you expect exposure to moisture, consider laminated or overcoated finishes that resist fading and water ingress. Matte, gloss, and satin finishes each create a different visual effect; gloss tends to make colors pop while matte minimizes glare. For professional-looking results, choose a laminate layer that can be fused during the finishing stage or applied as a separate film after printing. Transfer tape can simplify application on curved surfaces, especially if you’re making curved or irregular shapes.
Be mindful of the adhesive and liner. A strong adhesive is essential for outdoor use or high-traffic surfaces, but if your stickers must be removed later, you’ll want a formulation that balances adhesion with clean removal. For kiss-cut sheets, ensure the backing is compatible with your cutter and does not tear easily during the cutting process. Finally, store materials in a cool, dry place away from direct sunlight to prevent warping and color shift over time.
Design best practices: resolution, bleed, and color management
Design for print begins with the right file format and resolution. Use vector artwork where possible for crisp edges on scalable shapes, and export complex images at a high raster resolution when needed. Include bleed beyond the final trim edge to avoid white gaps if the cut isn’t perfectly aligned. A typical bleed zone helps ensure the final sticker looks professional even if there is slight misalignment.
Color management is essential for sticker printing. Work in the printer’s color space (often CMYK) or convert colors carefully to preserve hues after printing. If your software supports soft-proofing, simulate how the final sheet will look before you print. Test prints are invaluable; print a small batch with different color settings to determine which profile yields the most accurate color, then lock in those settings for future runs. Finally, ensure your design includes clear text that remains legible at small sizes and uses fonts that print clearly.
Printer setup: drivers, media type, and alignment
Before printing, install the latest driver for your chosen printer and select the correct media type preset that matches your sticker stock. Setting the media type affects ink flow, drying time, and color density, so choose a setting that minimizes bleeding and feathering. Align your printer with a simple calibration page to ensure consistent margins and avoid skew. If your printer supports multiple pass options, you may experiment with speed versus quality to find a balance that matches your budget and timeline.
Maintain a clean print path by removing dust and debris from the feed rollers before starting a job. Check that the media is correctly loaded and that any guides are snug against the edges of the stock. When using laminated or coated media, ensure the lamination does not jam the feed. If your printer has an integrated cutter, test its accuracy on a scrap sheet before committing to a full run.
Printing workflow: from design to cut (kiss-cut) and quality checks
Create a streamlined workflow by organizing files for batch printing, saving time on repeated jobs. Prepare the final artwork with the correct trim and bleed, then send to the printer using the appropriate profile. Run test prints on a small area to verify color and alignment, then check the sheet for even ink coverage and any misfeeds. If you plan to cut, ensure your cutter’s blade depth is correct to avoid tearing the vinyl.
As you scale up, group stickers by size and finish to reduce re-spins. Print a spare sheet for quality checks, and keep a log of settings for future jobs. A well-documented workflow minimizes errors and helps you reproduce results consistently across sessions.
Troubleshooting common issues and how to fix them
Even with careful preparation, issues can arise. If ink appears to smudge, check your media compatibility, drying time, and whether you used lamination that reacts with the ink. Color shifts may indicate the profile is off; re-run a test print with a different color profile and verify the output on a similar stock. Jams and misfeeds are usually caused by improper loading or a protective backing interfering with the feed; straighten the stock and adjust guides.
Bandaids for runtime issues include cleaning the printhead, keeping the printer in a dust-free environment, and using proper gloves when handling finished sheets to avoid fingerprint marks. If you use a cutting plotter, ensure blades are sharp and the cutting depth is appropriate for the chosen media. Finally, maintain the job log to track which media and settings produced the best stickers for future clarity.
Real-world use cases and project ideas
Stickers can support branding for products, packaging, events, and personal projects. A small business might create product labels with a durable vinyl stock for shipping, or design sticker sheets for promotional mailers. At home, you can craft custom decals for laptops, water bottles, notebooks, and wall art. Students can produce educational stickers, classroom rewards, or club insignias, while hobbyists explore scrapbooking layouts or die-cut art.
Experiment with finishes like matte lamination for a soft look or gloss for vivid colors. For bulk orders, consider using a roll-fed media path or a professional service to ensure color accuracy and consistent application across larger runs. Finally, measure the impact of your designs by keeping track of sales or engagement metrics tied to specific sticker initiatives.
Tools & Materials
- Sticker printer(Inkjet or color printer with pigment inks; ensure it supports sticker media)
- Vinyl sticker stock or printable sticker sheets(Compatibility with your printer type (inkjet/Laser))
- Cutting tool or cutting plotter(For kiss-cut or die-cut styles; optional if hand-cut)
- Laminating sheets or clear laminate tape(Adds durability and moisture resistance)
- Transfer tape(Helpful for easier application on curved surfaces)
- Design software (Illustrator, Inkscape, etc.)(Create vector shapes and export print-ready files)
- Bleed templates or print-ready templates(Predefined bleed margins simplify setup)
- Ruler, hobby knife, cutting mat(For precise trimming and clean edges)
- Color management tools or soft-proofing software(Preview color before printing when possible)
Steps
Estimated time: 60-180 minutes
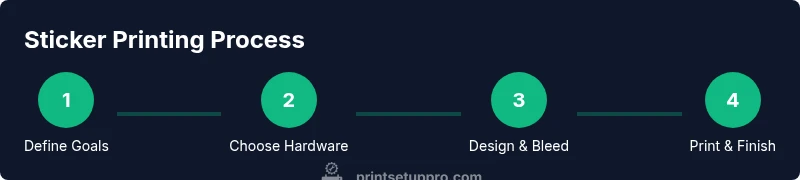
- 1
Define goals and specs
Identify sticker size, shape, finish, and quantity. Clarify whether you need sheets or rolls, and what level of durability is required for your environment.
Tip: Document these specs before selecting hardware to avoid overbuying. - 2
Choose hardware and media
Select a printer that supports your chosen stock and a media type preset that matches the sticker material.
Tip: Prefer printers with pigment inks for longevity on vinyl. - 3
Prepare artwork with bleed
Design at high resolution and include bleed at least 2–3 mm beyond trim lines to prevent white edges.
Tip: Convert text to outlines to avoid font substitutions on other systems. - 4
Configure printer settings
Set the correct media type, color profile, and print quality. Save the profile for future jobs.
Tip: Do a small test print on a sample sheet first. - 5
Print a test sheet
Print a single sheet to confirm alignment, color accuracy, and drying time before a full run.
Tip: Allow adequate drying time to prevent smudging on glossy stock. - 6
Cut and finish
Use a cutting tool or plotter to trim or kiss-cut the shapes. Apply laminate if durability is required.
Tip: Test cut on a scrap piece to calibrate blade depth. - 7
Review, store, and iterate
Check final sheets for consistency, record settings, and plan improvements for next batches.
Tip: Keep a job log to reproduce results reliably.
People Also Ask
What is sticker printer custom and who benefits?
Sticker printer custom refers to printing personalized stickers using a dedicated printer and media. It benefits home office users, students, crafters, and small businesses needing branded labels or decals with consistent color and durability.
Sticker printer custom means printing personalized stickers with a dedicated printer. It helps home offices, students, and small businesses achieve consistent, durable labels.
Can I use a regular home printer for stickers?
You can print simple stickers on some home printers, but for long-lasting, high-quality results you should use a printer designed for sticker media with appropriate inks and media compatibility.
Regular home printers can print basic stickers, but for durability and color accuracy, a sticker-specific printer is recommended.
Do I need a cutting machine for kiss-cut stickers?
A cutting machine is not mandatory for simple shapes, but it makes precise cuts easier and scalable for sheets. If you hand-cut, allow for slower production and potential inconsistencies.
A cutting machine helps with precision and scale, but you can hand-cut if you’re printing in small batches.
What finishes improve outdoor durability?
Laminates or protective coatings can significantly improve outdoor durability and resistance to moisture. The best choice depends on your climate and the sticker stock.
Laminates boost outdoor durability; choose a coating based on climate and stock.
How do I ensure color accuracy?
Use a proper color profile, soft-proof when possible, and run test prints on the same stock before committing to a full run.
Use the right color profile and test prints to lock in colors before a large print run.
What is a common cause of smudging?
Smudging is usually due to insufficient drying time, incompatible laminates, or printing on non-recommended media. Allow drying between coats and test with similar stock.
Smudges often come from drying issues or wrong media; give it time to dry and test with compatible stock.
Watch Video
Quick Summary
- Define exact sticker specs before buying hardware
- Choose media compatible with your printer type
- Bleed and resolution are critical for print quality
- Test prints save time and money
- The Print Setup Pro team recommends a repeatable workflow for consistent results