Can You Print Stickers on a Normal Printer? A Practical Guide
Discover how to print stickers on a normal printer with the right sticker paper, printer settings, and finishing touches. This guide from Print Setup Pro covers paper types, layout, durability, and tips for DIY sticker projects.

Yes—printing stickers on a normal printer is achievable when you select the right sticker stock, configure printer settings properly, and apply a suitable finish. This guide explains how to choose paper, prepare your artwork, and complete the process for durable results in home offices, classrooms, and small businesses.
Why sticker compatibility matters
Can you print stickers on a normal printer? The short answer is yes, but only if you align the right paper, finish, and printer settings. The Print Setup Pro team hears this question frequently from home office users and students who want a DIY solution without buying specialized equipment. The key is matching the printer’s capabilities with the sticker stock you select: inkjet vs laser compatibility, finish (matte, glossy, or transparent), and the adhesive strength of the label stock. In 2026, Print Setup Pro Analysis notes that most sticker failures come from using stock that isn’t designed for the chosen printing method or from unclear margins and bleed. With the right choices, you can achieve durable results for labels, decals, and craft stickers that stay put on smooth surfaces. This block expands on compatibility factors and what to realistically expect in different environments, from indoor desk branding to outdoor labels under mild exposure.
Choosing the right sticker paper
Sticker paper comes in several base types—inkjet-friendly stock, laser-compatible options, and specialty materials like clear or metallic finishes. Your printer type should dictate the stock you buy; using inkjet stock in a laser printer or vice versa will lead to poor adhesion, smudging, or ghosting. You’ll also encounter variations in finish (matte, gloss, transparent) and adhesive strength (removable vs permanent). Consider the final surface: smooth desks, plastic folders, glass, or fabric all interact differently with adhesive and ink. Print Setup Pro recommends starting with a small batch of a couple of stock options to compare color, dryness, and longevity. If you plan outdoor use or moisture exposure, look for water-resistant coatings or laminates. For most home projects, a standard removable or permanent inkjet label stock paired with a clear sealant yields durable results that are easy to replace later.
Preparing artwork and layout
Before printing, prepare the artwork at a high resolution—300 DPI is a common minimum for sharp edges. Use a vector-based design when possible, but raster images at 300 DPI work fine for most sticker applications. Include an appropriate bleed area (the extra margin beyond the cut line) to prevent white gaps after trimming. Arrange multiple stickers on a single sheet to maximize space and reduce waste. Align guides or use a template for consistent margins. If your design uses white space, ensure the printer’s color settings do not automatically fill it with unexpected hues. This stage sets the stage for clean cuts and vibrant prints that resemble professional products. Print Setup Pro recommends testing with a single sheet to calibrate margins and color balance.
Printer settings and test prints
Set your printer to the highest quality print mode that matches the stock type (inkjet or laser). Choose the correct media type in the printer driver (labels, sticker stock, plain paper with high-quality print). Disable features like “scaling” or “fit to page” to avoid shrinking and misalignment. Run a small test print on a blank sheet to verify color accuracy and alignment with the cut lines. If you observe smudging, give the ink time to dry fully and consider a quick sealer or laminate. Always print a proof before committing to large runs, especially if color matching is important. Per Print Setup Pro Team guidance, taking a moment to test saves material and effort later.
Printing, laminating, and sealing
After printing, let the ink dry completely, especially on glossy stock that can smear easily. If you expect handling or moisture exposure, apply a clear laminate, spray sealant, or a thin protective layer designed for printed media. Lamination can extend durability but might alter the sticker’s appearance or thickness, so test first. For short-term projects, a clear top coat from a reputable brand can be sufficient. Ensure the sealant is compatible with the paper finish to avoid warping or bubbling. In some cases, a matte sealant preserves color vibrancy while adding protection, whereas gloss seals enhance sharpness. Print Setup Pro notes that the finish choice should align with how and where the stickers will be used, to balance aesthetics and longevity.
Cutting and finishing stickers
Use sharp scissors or a craft knife to cut along the cut lines with steady, even pressure. A ruler or cutting mat helps maintain straight edges and prevents accidental slips. For high-volume missions, a hobby or craft cutting machine can speed up the process, but test compatibility with your stock and blade depth first. After trimming, inspect each sticker for misprints or rough edges and remove any debris or fibers that could affect adhesion. If you’re producing labels for product packaging, consider pairing the finished sheets with a clean backing to avoid dust contamination. A good workflow minimizes waste and ensures consistent results across the entire sheet.
Common issues and fixes
Even with careful preparation, issues can arise. Smudging usually indicates insufficient drying time or unsuitable stock; switch to a faster-drying ink or add a light sealant. Misalignment or skewed prints often result from poor loading or non-aligned crop marks—recalibrate the paper feed and use a test sheet first. Faint colors can come from low ink density, incorrect color profiles, or using the wrong media type; adjust the printer driver’s color management or select a stock-specific preset. Torn or bubbled stock indicates excess heat or moisture; store stock properly and avoid printing in humid environments. When you encounter a problem, print a focused test page on a single sheet to diagnose the root cause before committing to larger runs.
Safety, maintenance, and best practices
Always work in a well-ventilated area when using sprays or laminates, and store sticker stock in a cool, dry place away from sunlight. Keep your printer clean—dust and dried ink can affect print quality, so perform routine maintenance as recommended by the manufacturer. Use brand-recommended sealants and adhesives to avoid chemical reactions with your stock. Back up designs and create a reproducible workflow so you can produce more stickers consistently. Print Setup Pro emphasizes documenting your stock type, printer model, and settings so you can replicate successful results in future projects.
Authority and further reading
For deeper guidance, explore official printing standards and material recommendations from reputable sources. Print Setup Pro Analysis, 2026 highlights how material compatibility influences print quality and longevity. When researching additional information, look for .edu or .gov resources on labeling and media safety, and compare manufacturer guidelines for various sticker stocks. While the best approach varies by printer and stock, a methodical testing process yields reliable results across different surfaces and environments.
Tools & Materials
- Printer (inkjet or laser)(Must support the sticker paper type you choose)
- Printable sticker paper (inkjet- or laser-compatible)(Choose matte, glossy, or transparent; match to printer type)
- Clear laminate or spray sealant (optional)(For moisture resistance and durability)
- Sharp scissors or craft knife(Precise cuts along your design lines)
- Ruler or cutting mat(Helpful for straight edges and alignment)
- Test sheets(Use inexpensive stock to confirm alignment and color)
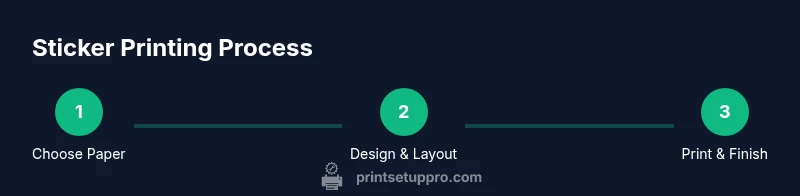
Steps
Estimated time: 45-75 minutes
- 1
Identify the printer stock compatibility
Confirm your printer type (inkjet or laser) and choose sticker paper that matches. This prevents smudging and ensures proper ink adhesion on the stock you will print on.
Tip: Check the stock packaging for printer-type compatibility before purchasing. - 2
Prepare artwork with correct resolution
Design at 300 DPI or use vector artwork. Include bleed and crop marks to ensure clean cuts and avoid white edges after trimming.
Tip: Use a template aligned with your sticker sheet to maximize layout efficiency. - 3
Load stock and set print driver
Load the sticker sheet according to your printer’s guidelines and select the correct media type (labels/stickers). Disable scaling to preserve dimensions.
Tip: Always print a test page to verify alignment before full production. - 4
Print a test sheet
Print a single sheet to check alignment, color accuracy, and edge quality. Adjust color profiles or driver settings if needed.
Tip: Use a low-tack tape to hold the sheet in place during test prints to prevent feeding shifts. - 5
Print final designs
Print your main sheet with the tested settings. Let the ink dry completely before handling the paper to prevent smudging.
Tip: Avoid printing in high humidity; moisture can affect ink adhesion. - 6
Seal the surface if needed
Apply a compatible laminate or spray sealant for added durability, especially for outdoor or high-touch items.
Tip: Test sealant on a scrap piece first to confirm it doesn’t cause running or warping. - 7
Cut stickers precisely
Use a sharp blade and straight edge to trim along crop lines. Maintain steady pressure to avoid jagged edges.
Tip: For curved edges, rotate the paper rather than the blade to maintain control. - 8
Apply a finishing check
Inspect edges, adhesion, and finish. Remove any misprints and file away imperfect pieces to keep a neat batch.
Tip: Batch stickers by size to organize post-production sorting. - 9
Store and reuse templates
Store your design files and sheet templates for future reprints. This helps you reproduce consistent results and speeds up future projects.
Tip: Label stock type, printer model, and settings for easy recall.
People Also Ask
Can I use any sticker paper in any printer?
Not all sticker papers work with every printer. Check your printer type (inkjet or laser) and choose stock labeled for that method. Use a test sheet to confirm color, dryness, and adhesion.
Not all papers work with every printer. Pick stock labeled for your printer and test a sheet to confirm color and dryness.
Do I need a color printer for vibrant stickers?
Color capability helps, but pigment-based inks or high-quality color inks on matte stock can still yield bright results. A test print helps confirm vibrancy before a larger run.
Color helps, but you can achieve good vibrancy with proper ink and stock. Always test first.
How long do printed stickers last?
Durability depends on stock and sealing. Laminated or sealed stickers resist moisture better, while unsealed prints are more prone to fading with sun exposure.
Longevity depends on the stock and sealant. Lamination improves moisture resistance.
Can I print on clear vinyl or specialty surfaces?
Yes, but you need stock designed for clear surfaces and ensure the ink adheres properly. Test on this surface to avoid smudging or peeling.
You can on specialty stock; test first to ensure ink sticks and dries properly.
Should I laminate my printed stickers?
Laminate if you expect moisture, frequent handling, or outdoor use. Choose a laminate compatible with your stock to avoid warping.
Laminate for durability when exposure or handling is high. Check compatibility.
Watch Video
Quick Summary
- Know your printer type and stock compatibility
- Prepare artwork with bleed and correct DPI
- Test prints save time and material
- Seal when durability is required
- Cut carefully for professional results