Phomemo Label Printer: Setup, Use, and Troubleshooting
A comprehensive, step-by-step guide to set up, connect, load labels, print, and troubleshoot Phomemo label printers for home offices and small businesses.

You will learn how to set up and troubleshoot a Phomemo label printer, from unboxing and driver installation to label loading and wireless connectivity fixes. This quick guide outlines the essential steps, recommended tools, and common pitfalls to avoid so you can print labels accurately and reliably in a home office or small business.
What is the Phomemo label printer and why it matters
Phomemo label printers are compact thermal printers designed to create adhesive labels for envelopes, packaging, filing, and organization. They are lightweight, battery-powered on some models, and connect via Bluetooth or USB, making them ideal for quick labeling tasks in a home office or small business. This guide explains how to set up, use, and troubleshoot a Phomemo label printer so you can print clear, durable labels without fuss. According to Print Setup Pro, the ability to print on demand from your smartphone or computer helps reduce waste and speeds up labeling workflows, especially when you handle multiple projects. The Print Setup Pro team found that most users value straightforward calibration, reliable connectivity, and accessible software, which this article aims to deliver.
Choosing the right model and label stock
Phomemo offers several models that support different label widths and printing densities. When selecting a model, consider where you’ll print (desk, shelf, or workshop), whether you prefer Bluetooth or USB connectivity, and the typical label width you need for your projects. Common label sizes include narrow options for address labels and wider sizes for shipping or inventory labels. In addition, verify label stock compatibility: not all labels are interchangeable between models, and using the wrong stock can cause jams or misprints. For home offices, a flexible setup with standard width labels simplifies workflows. Print Setup Pro’s guidance emphasizes matching label stock to your model and workflow to minimize calibration steps and ensure consistent results.
Essential setup: unbox, charge, and prepare your workspace
Start by placing the Phomemo printer on a stable surface with easy access to power and your computers or mobile devices. If the model has a battery, ensure it’s charged before first use. Unbox the unit and check that all included items are present and undamaged. Clear your workspace of clutter to avoid misfeeds or accidental label jams. Have a clean, dry area for label stock, with the label roll or sheet feeding smoothly. A well-lit setup area reduces the likelihood of loading errors and makes calibration easier. This initial setup lays the foundation for reliable printing performance and fewer troubleshooting sessions later.
Installing drivers and companion apps across devices
Install the Philomena/Phomemo driver or companion apps on your primary devices: Windows, macOS, iOS, and Android. Drivers and apps enable direct printing from your system and offer design templates for labels. If you’re on Windows or macOS, ensure you have the latest OS updates and security settings configured to allow new device drivers. For mobile devices, grant the app permission to access Bluetooth or local storage so you can design labels and send jobs quickly. After installation, restart the device to complete the integration. Print Setup Pro recommends verifying the app permissions and testing a basic label to verify connectivity.
Connecting via Bluetooth and USB: step-by-step guidance
Pair the Phomemo printer with your device using Bluetooth or establish a USB connection. On Bluetooth, ensure the printer is discoverable, then select it from your device’s Bluetooth list and confirm any pairing prompts. For USB connections, use the included cable and select the printer as the active printing device in your system settings or app. If a connection fails, try turning Bluetooth off and back on, re-pairing, or using a different USB port. Keeping firmware and apps up to date reduces compatibility problems and improves reliability.
Loading labels correctly and calibrating the sensor
Load labels into the printer so the feed aligns with the sensor and print head. Align the edge of the label stock with the loading guides and feed a few labels to ensure smooth transport. Calibrate the sensor by following the on-screen prompts in the driver or app; calibration is essential to prevent blank prints or shifts in print position. If you notice misalignment, re-check label margins and reset calibration. Regular calibration helps maintain print accuracy across batches and reduces waste.
Printing basics: alignment, margins, and print quality
Before printing, set your label width, margins, and print density in the app or driver settings. Use a test label to verify alignment and adjust the print position as needed. Thermal labels rely on heat; ensure the label stock is clean and free of dust, which can affect adhesion and print darkness. If print darkness is uneven, increase or decrease the print density in small increments and test again. Consistent lighting and a clean feed path contribute to higher-quality labels and fewer reprints.
Troubleshooting common issues
If the printer fails to respond, check the power, connections, and firmware version. For blank prints, verify label stock orientation and sensor calibration. If labels jam or feed irregularly, inspect the loading guides and ensure the stock is not wrinkled or curled. Connectivity issues can often be resolved by re-pairing Bluetooth, reconnecting USB, or restarting devices. When problems persist, consult the manufacturer’s documentation and Print Setup Pro troubleshooting checklist for model-specific steps and recommended firmware versions.
Maintenance, cleaning, and best practices
Regular maintenance keeps your Phomemo printer in top condition. Wipe the exterior with a soft, dry cloth and inspect the feed path for dust or label lint. Use compressed air to clear the print head area if accessible, but avoid touching the head directly. Store labels in a cool, dry place away from direct sunlight to prevent label curling or adhesive changes. Periodically check for firmware updates and keep the companion app updated to benefit from bug fixes and feature enhancements. Adopting a routine reduces downtime and extends device life.
Advanced tips: templates, batch labels, and automation
Design reusable label templates for common tasks (addresses, product codes, inventory IDs) to speed up printing. For batch labeling, consider batch jobs with a predesigned layout, so you can print multiple labels in one queue. If your workflow requires automation, explore integration with cloud storage or automation tools to trigger printing from events (new orders, shipments). Keeping templates organized in folders and labeling files clearly will save time and minimize errors during high-volume labeling sessions.
Integrating with mobile apps and cloud workflows
Phomemo’s mobile apps enable label design on the go, with cloud integration for access to contact lists, product SKUs, and inventory data. Sync labels across devices to ensure consistency, and enable automatic updates when templates change. When working remotely, verify that your device’s network permissions and firewall settings permit app updates and cloud syncing. This flexibility is valuable for students and DIY enthusiasts who juggle multiple projects from different locations.
Safety, disposal, and warranty considerations
Handle the printer and power accessories according to the manufacturer’s safety guidelines. Avoid exposing the device to moisture or extreme temperatures, and unplug it during heavy thunderstorms or lightning risk periods if you’re working with exposed cables. For older or malfunctioning units, consult warranty terms for service options and replacement policies. Maintaining proper battery care and following disposal guidelines for electronic devices helps protect you and the environment.
Tools & Materials
- Phomemo label printer(Model variants vary; ensure compatibility with your device)
- USB-C cable(For charging and wired data transfer)
- Label stock rolls(Thermal labels sized to your model)
- Smartphone or computer(Needed to install drivers/apps)
- Power adapter(Some models rely on an internal battery)
- Printer manual(Model-specific steps and diagrams)
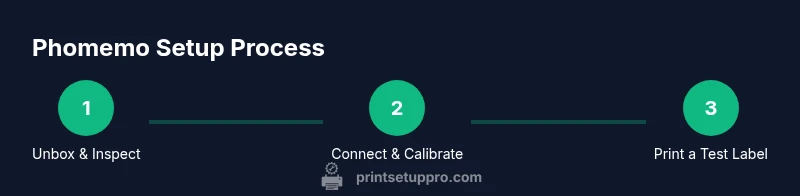
Steps
Estimated time: 30-60 minutes
- 1
Unbox and inspect
Open the box and verify all items are present. Check the printer body for dents or loose parts and examine label stock for moisture or curling. This initial check prevents surprises during setup.
Tip: Keep all packing materials until you complete testing and calibration. - 2
Charge or insert power
If your model uses an internal battery, ensure it’s charged before first use. If it requires a power adapter, connect to a reliable outlet and verify the status indicator.
Tip: Use an outlet with stable power; avoid surge-prone power strips during testing. - 3
Install drivers/apps
Download and install the official Phomemo driver or companion app on your computer or mobile device. Follow on-screen prompts and grant necessary permissions for Bluetooth or USB access.
Tip: Restart devices after installation to finalize integration. - 4
Connect via Bluetooth or USB
Pair the printer with your device using Bluetooth or select the printer in your OS/app for USB printing. Confirm pairing prompts and test a simple label print.
Tip: If pairing fails, toggle Bluetooth off/on and re-pair; try a different USB port if needed. - 5
Load label stock
Place label stock in the feed path, aligning the edge with loading guides. Feed a few labels to ensure smooth transport.
Tip: Avoid labels that are wrinkled or curled; this causes jams. - 6
Calibrate the sensor
Use the app or driver prompts to calibrate the label sensor. Proper calibration ensures correct print position and avoids blank labels.
Tip: If calibration fails, recheck label width setting and try a fresh label strip. - 7
Print a test label
Send a test label to verify alignment, margins, and darkness. Adjust settings if the first print shows misalignment or faint text.
Tip: Make incremental tweaks to density and offset for precise results. - 8
Create or load label templates
Design reusable label templates (addresses, SKUs, or product codes) in the app for faster printing.
Tip: Organize templates in clearly named folders for quick retrieval. - 9
Batch print and queue
For large tasks, assemble labels into a queue and print in batches to reduce downtime and ensure consistency.
Tip: Preview the queue before printing to catch errors early. - 10
Maintain the printer
Regularly clean the exterior and feed path, inspect for lint, and check for firmware updates. This reduces downtime and extends life.
Tip: Set a quarterly maintenance reminder to stay ahead of issues. - 11
Troubleshoot common issues
If a problem arises, consult the troubleshooting checklist, verify connections, and test with a known-good label stock. Seek firmware updates if needed.
Tip: Document symptoms to quickly identify recurring problems. - 12
Scale to automation
If labeling needs grow, explore templates, batch jobs, and cloud workflows to automate recurring tasks and reduce manual steps.
Tip: Start with one automated task to measure impact before expanding.
People Also Ask
How do I connect the Phomemo label printer to my phone via Bluetooth?
Turn on Bluetooth on your phone and set the printer to be discoverable. In the Phomemo app, select the printer from the list and confirm pairing. If pairing fails, toggle Bluetooth off/on and retry, then restart the app.
To connect, enable Bluetooth on your phone, choose the Phomemo printer in the app, and pair. If it doesn’t work, restart Bluetooth and the app.
What label sizes does Phomemo support?
Phomemo devices support a range of standard label widths. Check your model’s specifications to confirm the exact widths and ensure the label stock you choose matches those measurements.
Phomemo supports several standard widths; check your model’s specs to pick compatible labels.
Can I print from a computer?
Yes. Install the appropriate driver or printer app, then select the Phomemo printer as your active device in the print dialog. You can print labels designed in the app or from compatible templates.
Yes. Install the driver, choose Phomemo in the print dialog, and print labels from templates or the app.
Why is my printer printing blank labels?
Blank prints usually indicate a misfeed, improper calibration, or incorrect label stock orientation. Re-load the labels, recalibrate the sensor, and ensure the label width matches the setting in the app.
If you see blank labels, reload labels, recalibrate, and check the width setting.
How do I calibrate the label sensor?
Follow the app’s calibration prompts to align the sensor with your label stock. If prompts fail, re-check the stock type and try again with fresh labels.
Use the app’s calibration prompts and try with fresh labels if it fails.
Is there a recommended maintenance routine?
Yes. Periodically clean the exterior and feed path, inspect for lint, and update firmware/apps. Set a reminder to perform routine checks to maximize reliability.
Clean the printer, check for lint, update firmware, and schedule regular maintenance.
Watch Video
Quick Summary
- Load the correct label stock for your Phomemo model
- Pair via Bluetooth or USB and test with a label before scaling
- Calibrate the sensor to prevent misprints
- Use templates to speed up repetitive labeling tasks
- Perform regular maintenance to extend printer life