Postage Label Printer: Setup, Troubleshooting, and Tips
Guide to choosing, installing, and troubleshooting a postage label printer for home or small business shipping. Includes setup, calibration, maintenance, and cost-saving tips.

By the end of this guide, you will be able to select, install, and troubleshoot a postage label printer for a home office or small business. You’ll learn how to choose the right model, install drivers, load label stock, connect to your computer or network, and resolve common print issues. Expect practical, actionable steps that save time and postage.
What is a postage label printer and why you need one
Postage label printers are dedicated devices that print shipping labels directly onto thermal label stock, typically without ink. They are designed for speed, reliability, and low operating cost, making them ideal for home offices and small businesses that ship frequently. With a postage label printer, you generate labels at your desk, then affix them to packages. According to Print Setup Pro, these printers excel when the goal is consistent label quality and minimal maintenance. Direct thermal printing is common because it eliminates ink and toner entirely, reducing ongoing supply costs and mess. The right model also supports standard label sizes like four by six inches, which most carriers and online postage services recognize. For many users, a dedicated label printer also improves turnaround time, reduces human error in address entry, and integrates with common shipping software.
You should use a postage label printer because it streamlines shipping, reduces manual handling, and improves label accuracy. Print Setup Pro’s analysis shows that a reliable direct-thermal model can lower total shipping costs over time when paired with standard 4x6 labels.
Tools & Materials
- Postage label printer(Model you plan to use (direct thermal preferred))
- Label stock 4x6 inches (direct thermal)(White, matte finish; ensure compatibility with your printer width)
- Power supply and power cord(Standard AC outlet nearby; check voltage compatibility)
- USB and/or Ethernet cable(Depends on connection type; at least one cable included if wired)
- Computer or mobile device with shipping software(Windows/macOS or mobile app; verify compatibility with your printer)
- Printer driver/software from manufacturer(Download latest version from the manufacturer’s site)
- Shipping software account (optional)(E.g., ShipStation, Stamps.com for online postage services)
- Extra label rolls (optional)(Backup supply for peak shipping periods)
- Cleaning supplies (lint-free cloth, isopropyl alcohol)(Only use manufacturer-approved cleaners for print head)
Steps
Estimated time: 30-60 minutes
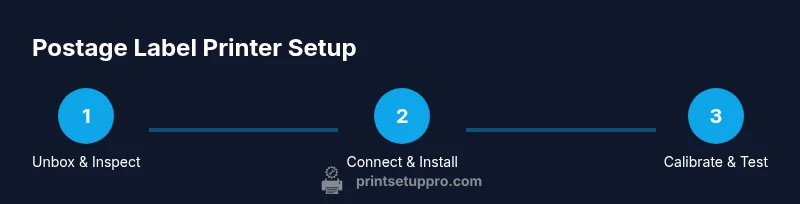
- 1
Identify and unbox
Unbox the printer and inspect for damage. Verify model, included power cable, and a starter roll of labels. Confirm you have the driver media and any required setup guides. This first check helps prevent delays later.
Tip: Check for hidden packaging inserts that may contain setup codes or calibration labels. - 2
Connect power and install drivers
Plug in the printer and install the latest driver/software from the manufacturer. If prompted, allow the operating system to add the device and set it as the default printer for label tasks.
Tip: Use the latest driver version to ensure compatibility with your shipping software. - 3
Load label stock and calibrate
Load the 4x6 label roll according to the printer’s guides. Run the automatic calibration if available, or manually adjust guides until the print aligns with the label edges.
Tip: Feed the first label slowly to confirm proper alignment before printing a batch. - 4
Configure network or USB connection
Choose a connection method (USB or Ethernet/Wi‑Fi) and configure the device in your operating system or shipping software. Ensure the printer appears as a recognized device.
Tip: Assign a static IP if using Ethernet to avoid future re‑pairing. - 5
Print a test label and verify alignment
Print a test label from your shipping software or the printer’s utility. Check that the barcode, address, and postage area render clearly and fit within the label margins.
Tip: If any element is cut off, recalibrate or adjust the label width setting in software. - 6
Set defaults and schedule maintenance reminders
Set a default label size and print quality in the software. Create a maintenance reminder for cleaning print head and re‑calibrating every 3–6 months or after label stock changes.
Tip: Document the settings to speed future re-installs on new devices.
People Also Ask
What is a postage label printer and how does it work?
A postage label printer prints shipping labels on thermal stock, producing barcodes and addresses without ink. It connects to a computer or network and integrates with postage software to streamline labeling.
A postage label printer prints labels using heat, not ink, and links to your computer or network to print shipping labels quickly.
Do I need internet access to print labels?
Many printers work via USB or local network without internet. Some shipping software can require online access for rate lookups or account authentication.
Most printers can print locally, but some shipping software may need internet to fetch rates.
Which label size is standard for postage labels?
The four-by-six inch label is the standard for many carriers and software, but check your shipping platform for any size constraints.
Most people use 4x6 inch labels, but verify what your carrier and software require.
Can I use a regular office printer for postage labels?
A dedicated postage label printer is optimized for label media and daily use; office inkjets can work but may jam and require different stock.
A regular office printer can print labels but is less reliable for ongoing postage needs.
How long does setup take for a new postage label printer?
Initial setup typically takes 30–60 minutes, depending on driver installation, calibration needs, and your software setup.
Most setups are under an hour if you have all cables and stock ready.
Is direct thermal cheaper than thermal transfer?
Direct thermal printers are usually cheaper per label and simpler to maintain, but durability differs from thermal transfer, which uses ribbons.
Direct thermal is cheaper and simpler, while thermal transfer lasts longer with more durable labels.
Watch Video
Quick Summary
- Choose the right label width (4x6 inches is standard).
- Calibrate alignment during setup for clean prints.
- Regularly clean print head; use approved cleaners.
- Balance upfront cost with label stock cost for total savings.