FedEx Label Printer Setup: Step-by-Step Guide 2026
A practical, step-by-step guide to choosing, installing, loading, and maintaining a fedex label printer for efficient home office and small business shipping.

This guide helps you select, install, and troubleshoot a fedex label printer for reliable shipment labeling. You will learn how to choose a model, connect via USB or network, install drivers, load labels, print test labels, and diagnose common issues. The instructions cover home office and small business setups, including label stock requirements and routine maintenance to prevent jams.
What is a FedEx label printer and why you might need one
In today’s shipping environment, a fedex label printer is a dedicated device that prints shipping labels onto adhesive stock used by FedEx. For home offices and small businesses that ship daily, having a reliable label printer reduces manual handwriting, speeds up checkouts, and minimizes label errors that could lead to misrouted packages. The core advantage is speed and accuracy: a printer designed for narrow, continuous label stock can feed through quickly and produce legible barcodes that FedEx scanners read reliably. Print Setup Pro notes that investing in a dedicated label printer is a long-term time saver, especially when your shipping volume grows or you want to automate label generation from your shipping software. In this guide we focus on setup, compatibility, and practical workflows that work with common FedEx tools and carrier-supplied label formats. You will learn how to choose, install, and confidently use a FedEx label printer in a typical home office or small business environment.
Understanding thermal labeling: direct thermal vs thermal transfer
Direct thermal labeling uses heat sensitive paper that darkens when heated, with no ink or ribbon to replace. Thermal transfer printing uses a ribbon to transfer pigment to the label surface, offering greater durability but at higher ongoing costs. For most FedEx label printing needs in a home office or small business, direct thermal printers are the easiest and most economical option, provided you use compatible, high contrast stock. The choice affects print longevity, cost per label, and printer calibration. Print Setup Pro recommends selecting a model that supports standard FedEx shipping labels and aligns with your expected daily volume to avoid frequent roll changes.
Compatible models and connectivity options
Most FedEx label printing setups rely on direct thermal label printers that support USB and network connections. USB is straightforward for a single computer, while Ethernet or WiFi enables shared access across multiple devices and remote workstations. When evaluating compatibility, verify that the printer accepts the typical 4x6 or 4x2 inch FedEx label stock and that it can be driven by the operating system you use (Windows, macOS, or Linux). Many models offer plug and play drivers, automatic print calibration, and status monitoring that helps you catch problems early. Print Setup Pro emphasizes choosing a device with reliable driver support and good vendor firmware updates to prevent compatibility gaps.
Preparing your workspace and gathering tools
Create a clean, level workspace with stable power and a nearby computer or networked hub. Have the printer, its power supply, a suitable USB or Ethernet cable, and a supply of FedEx label stock on hand. A stable label supply and a clean path for feeding labels reduce jams. Keep a lint free cloth and isopropyl alcohol handy for routine cleaning, plus a pair of scissors or a label cutter for trimming stock. If you will share the printer among multiple users, consider a central location with plain language labeling and a basic setup guide. Print Setup Pro recommends a minimal, organized setup that reduces misfeeds and downtime.
Step-by-step setup path: USB connection and driver install
To begin, connect the printer to your computer via USB or ensure it is reachable on your network. Install the printer driver and any companion software from the manufacturer or your enterprise shipping tool. When prompted, select the correct port (USB or network address) and allow the driver to complete calibration. Restart your computer if requested by the installer. After installation, print a test label from your shipping software to confirm the driver and stock are communicating correctly.
Configuring label stock, margins, and print settings
Open your shipping software’s label settings and select the printer you installed. Choose the typical FedEx label stock size and adjust margins and scaling to fit the label. Disable any “fit to page” options that would stretch the label, and enable any features that improve barcode readability, such as high contrast black on white printing. If your printer supports it, enable calibration to ensure the feed aligns with the stock. Save these settings as a profile for future shipments, so you do not have to repeat the process each time.
Printing a test label and calibrating the printer
With the printer loaded and settings saved, print a handful of test labels from your shipping software. Check alignment by inspecting the barcode, address block, and margins. If the printout is skewed or off center, run the printer’s calibration or feed test labels until alignment is precise. Adjust label stock thickness or guide settings if jams persist, and always verify the print on actual label stock before running large batches.
Common issues and troubleshooting tips
Common issues include misfeeds, blurry barcodes, and faded text. Misfeeds are usually caused by misaligned guides or worn rollers, which are fixed by reloading stock and recalibrating. Blurry barcodes often stem from incorrect print density or low-contrast stock; try a different stock or adjust density in the driver. Faded text may indicate worn ribbons in thermal transfer printers or expired stock in direct thermal units. Regular cleaning and prompt driver updates reduce these problems, and keeping spare labels on hand helps minimize downtime.
Best practices for maintenance, security, and compliance
Create a routine maintenance schedule that includes monthly cleaning of the feed path and periodic checks of the label stock. Store label stock in a cool, dry place away from direct sunlight to preserve readability. Maintain firmware and driver updates to protect compatibility with FedEx labeling formats and carrier requirements. For security, ensure that access to the printer and computer is controlled if you handle sensitive shipment data, and consider archiving printed labels in a secure, compliant manner.
Tools & Materials
- FedEx label printer (direct thermal capable)(Choose a model that supports standard FedEx 4x6 label stock and USB or network connectivity)
- USB cable or Ethernet cable(Use the appropriate cable for your chosen connectivity)
- Power supply and outlet(Surge-protected power strip recommended)
- Label stock (FedEx-compatible, 4x6 or 4x2 inch)(Have enough stock for initial tests and calibrations)
- Computer or workstation with shipping software(Prepare your FedEx Ship Manager or other shipping tool)
- Shipping software or FedEx tools(Ensure OS compatibility (Windows/macOS) and drivers)
- Lint-free cloth and isopropyl alcohol(For cleaning the printer rollers and contacts)
- Scissors or label cutter(For trimming labels after printing)
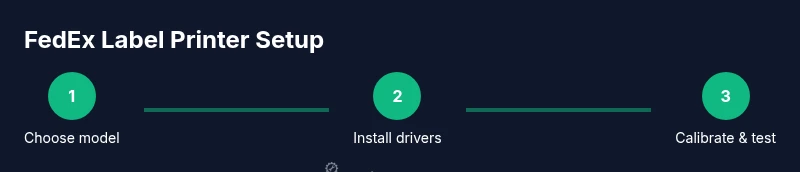
Steps
Estimated time: 25-45 minutes
- 1
Identify the right model and connectivity
Choose a direct thermal label printer that supports standard FedEx label stock and decide between USB or network connectivity based on how many devices will print labels. This choice affects setup complexity, sharing capability, and future maintenance.
Tip: Plan for a shared setup if more than one user will print labels. - 2
Unbox and position the printer
Place the printer on a stable surface near power and your computer or router. Remove packaging, install any included feeder, and prepare a clean feeding path for labels to minimize jams.
Tip: Leave space behind the printer for cable management and airflow. - 3
Install drivers and software
Connect the printer and install the driver from the manufacturer site or the shipping software package. Follow prompts to select the correct port and allow any firmware updates to run.
Tip: Restart the computer if the installer requests it. - 4
Load label stock and align guides
Open the media cover, insert a roll of label stock, thread it through the feed path, and align the side guides to match the stock width.
Tip: Feed a test label to ensure the alignment is precise before printing real labels. - 5
Configure print settings in software
In your shipping tool, select the printer and the exact label size (e.g., 4x6), then adjust margins and print density for clarity and barcode readability.
Tip: Disable any auto-scaling options that could distort label content. - 6
Print a test label and calibrate
Print a few test labels and check alignment and barcode scanability. If needed, run the printer calibration and refeed until the print matches your stock.
Tip: Keep a small batch of test labels handy for quick checks. - 7
Establish a maintenance routine
Regularly clean the feed path, check rollers, and keep label stock dry and clean. Update firmware and drivers as needed to preserve compatibility.
Tip: Schedule monthly checks to prevent jams during peak shipping times.
People Also Ask
Do I need a specific FedEx model to print labels?
No. Any direct thermal label printer that supports standard FedEx label stock can print labels, provided you have compatible drivers and software.
You don't need a special FedEx branded printer; a compatible direct thermal model will work when set up with the right drivers.
Which operating systems are supported by most FedEx label printers?
Most printers offer drivers for Windows and macOS, with some models also supporting Linux. Check the manufacturer's site for exact versions and required software.
Most printers support Windows and macOS, with some offering Linux drivers. Check the maker's site for specifics.
What label stock should I use for FedEx labels?
Use adhesive shipping labels compatible with your printer and sized to FedEx guidelines, commonly 4x6 inches or 4x2 inches. Ensure high-contrast, smudge-free stock.
Choose a label stock that fits your printer and FedEx size, usually 4x6. High contrast helps scanning.
Why are my labels blurry or faint?
Blurriness often stems from incorrect print density, wrong stock, or dirty print path. Try adjusting density settings, switching stock, and cleaning the rollers.
Blurry labels usually mean density or stock mismatch; clean the path and recalibrate.
How do I calibrate the printer after changing label stock?
Run the printer’s calibration function, print a label, and adjust guides as needed until the barcode prints cleanly and scans easily.
Run calibration after stock changes and verify with test labels.
How often should I perform maintenance?
Set a monthly or weekly routine depending on shipping volume. Clean the feed path, replace worn rollers, and update firmware when available.
Maintain a monthly or weekly check depending on usage, cleaning and updating as needed.
Watch Video
Quick Summary
- Choose the right model for your label size and network needs.
- Install drivers and test print before full use.
- Keep labels clean, aligned, and stock fresh to prevent jams.
- Regular maintenance reduces downtime and errors.