Rollo Label Printer Setup & Troubleshooting Guide
Learn how to set up, troubleshoot, and optimize a rollo label printer for shipping and product labeling. Step-by-step guidance, tips, and common fixes for home offices.

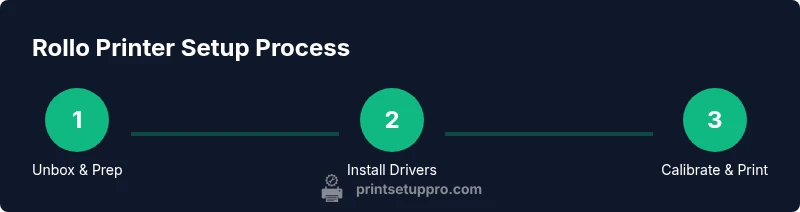
With a rollo label printer, you’ll be able to print shipping and product labels quickly from your computer or mobile device. This quick guide covers setup, driver installation, label loading, and basic troubleshooting to get reliable results. By following these steps, home offices and small businesses can reduce label waste and boost efficiency.
Why a Rollo Label Printer fits modern home offices
A rollo label printer is a compact, direct-thermal device designed for fast, clean shipping and product labeling. It eliminates the need for costly ink or toner and delivers consistent results on compatible label stock. For home offices and small businesses, a Rollo printer can streamline packaging workflows, reduce manual labeling time, and improve accuracy on every order. According to Print Setup Pro, the key benefits come from reliable print quality, easy label loading, and minimal maintenance demands. When used with appropriate label stock and software, this printer becomes a dependable part of your daily operations, helping you scale as your orders grow.
If you’re just starting out, expect a straightforward setup process and a solid first print after a quick calibration. The printer’s design prioritizes ease of use, allowing you to focus on fulfillment rather than device tinkering. By choosing a Rollo model that matches your label sizes and connectivity needs, you’ll create a smoother workflow from day one.
Choosing the Right Model and Label Stock
Selecting the right Rollo model depends on your typical label size, connectivity needs, and print volume. Most users benefit from a compact unit that supports common desktop printing workflows and a broad range of direct-thermal label rolls. When choosing labels, stick to direct-thermal stock designed for shipping and product labeling. These labels are coated to react to heat, producing clear text and barcodes without ink. GS1 and ISO guidelines emphasize using compatible label formats to ensure scannability and traceability across supply chains. Print Setup Pro analysis shows that mismatches between printer capability and label stock are a leading cause of jams and misprints. To minimize issues, confirm label width, Roll core size, and printer compatibility before purchasing stock.
Driver Installation and Initial Connection
Your Rollo printer relies on simple driver software to translate your computer’s commands into printable labels. Start by downloading the latest driver from the official site and installing it on your computer or mobile device. After installation, connect the printer via USB or the available interface, then power it on. Most setups will prompt you to select your printer in the system preferences or settings panel. If you’re using a Mac or Windows PC, ensure you grant any requested permissions for the driver to communicate with your device. Print Setup Pro recommends performing a quick test print to verify that the driver is correctly linked to the printer and that the label stock is detected.
Loading Labels and Calibrating Alignment
Open the printer cover and place the label roll on the supply spindle. Thread the label stock through the feed path so the printing surface is facing up, then close the cover. Use the feed button to advance a blank label and verify that it feeds straight and without resistance. Calibrate alignment by printing a test page or using the built-in calibration feature in the driver software. Proper calibration reduces misprints, wasted labels, and alignment drift over long print runs. Print Setup Pro notes that regular calibration after changing stock improves consistency and reduces troubleshooting time.
Configuring Print Settings for Speed and Quality
In your software, set the label width, print speed, and darkness to match the stock you’re using. The default settings are often fine for basic tasks, but optimizing speed and contrast can dramatically improve readability of tiny barcodes and text. If you frequently print addresses or shipping labels, consider standard templates for each label type and save them as presets. Double-check margins and gutter spacing so the entire label content stays within the printable area. Remember: higher print darkness can speed up scan reliability but may shorten label life if the stock is sensitive to heat. Print Setup Pro suggests starting with mid-range speed and density, then adjusting after a few print runs.
Running Test Prints and Verifying Quality
Print a few test labels on different stock to confirm legibility across fonts, barcodes, and logos. Check for smearing, ghosting, or uneven darkness. If you notice issues, recalibrate the feed, re-verify label alignment, and review driver settings. For best results, maintain a clean print head and avoid touching the stock surface with bare hands. Print Setup Pro emphasizes documenting test results so you can repeat successful configurations later.
Routine Maintenance and Cleaning
Keep the print head and roller clean using a lint-free cloth lightly dampened with isopropyl alcohol. Do not apply solvent directly to the printer components. Regularly inspect the feed path for dust and label fragments, which can cause jams. Schedule periodic firmware checks to ensure you benefit from the latest improvements. Proper maintenance minimizes downtime and extends the printer’s usable life, keeping your workflow smooth.
Advanced Tips: Integrations and Templates
Many e-commerce platforms and shipping apps support direct printing to a Rollo label printer. Set up templates for common label types (shipping, product, returns) and save them for quick access. If you work across multiple devices, consider cloud-enabled printing options or app-based drivers to keep configurations synchronized. By leveraging templates and presets, you can speed up fulfillment without sacrificing accuracy.
Real-world Scenarios and Best Practices
For a busy home office, creating a consistent labeling workflow is essential. Establish a dedicated labeling station, load a fresh stock at the start of the day, and perform a quick calibration check after any stock change. When shipping multiple carriers, maintain separate templates to ensure correct label content, barcodes, and sender information. Keeping your software and driver up to date minimizes compatibility issues and improves security.
Final Thoughts on Getting the Most from Your Rollo Printer
A well-set-up Rollo label printer can dramatically improve efficiency, accuracy, and consistency in your labeling process. Regular calibration, proper stock selection, and keeping firmware current are the simplest ways to unlock reliable performance. As Print Setup Pro would attest, investing time in setup now pays dividends in faster fulfillment and reduced waste over time.
Tools & Materials
- Rollo label printer(Main device for direct-thermal label printing)
- USB cable (or required interface cable)(Connects printer to computer or power source)
- Computer or mobile device(Runs drivers/software and label templates)
- Direct-thermal label rolls(Stock compatible with your printer width and core size)
- Driver/software(Download from official Rollo site; install on your device)
- Cleaning supplies(Lint-free cloth and isopropyl alcohol for head/roller maintenance)
- Extra label stock(Keep a spare roll on hand to avoid workflow interruptions)
Steps
Estimated time: 30-60 minutes
- 1
Unbox and place the printer
Remove the unit from the packaging and place it on a stable, clean workspace near your computer. Ensure it's powered off before moving parts. Take a moment to verify all included accessories are present.
Tip: Keep packaging aside for possible return; ensure the printer is on a flat surface with adequate airflow. - 2
Install drivers and software
Download the latest drivers from the official site and run the installer on your computer or mobile device. Follow on-screen prompts to complete the setup and grant necessary permissions.
Tip: Choose the correct operating system version and enable automatic updates if available. - 3
Connect the printer
Plug in the USB cable or required interface cable and power on the printer. Wait for a ready signal and confirm the device shows up in your system’s printers list.
Tip: If the device isn’t detected, try another USB port and reboot the computer. - 4
Load label roll
Open the cover, place the label roll on the supply spindle, and thread the label stock through the feed path. Close the cover and advance a blank label to ensure it feeds smoothly.
Tip: Make sure the printing surface faces upward and alignment guides are engaged. - 5
Calibrate label size and alignment
Run the printer’s calibration feature or print a blank test page to verify alignment. Adjust guides if the printed content drifts.
Tip: Calibrate after every new stock change to prevent misprints. - 6
Configure software settings
In your label-app or driver, set the correct label width and print parameters. Create templates for common labels and save presets for quick usage.
Tip: Start with mid-range speed/density and tune based on test prints. - 7
Run a test print
Print a few test labels to confirm quality across text and barcodes. Check legibility and alignment, adjusting as needed.
Tip: Document successful settings for future rolls. - 8
Maintain and store
Clean the print head and feed path periodically. Store the printer in a dry, cool place away from direct sunlight.
Tip: Schedule quarterly maintenance checks to minimize downtime.
People Also Ask
What is a Rollo label printer best used for?
A Rollo label printer is ideal for fast, reliable direct-thermal labeling of shipping and product labels. It works best with compatible labels and software templates to streamline fulfillment.
It's ideal for fast, reliable shipping and product labels with compatible templates.
Can I use third-party label rolls?
Yes, you can use third-party direct-thermal label rolls that match the printer’s width and core size. Always verify compatibility and print quality with a few test labels first.
Yes, but test a few labels first to ensure compatibility and quality.
What should I do if labels print blurry or misaligned?
Recalibrate the label size, check the feed path for debris, and verify driver settings. Running a test print after each adjustment helps lock in the correct alignment.
Recalibrate and test after each adjustment to fix alignment.
Do I need a computer to print, or can I print from a phone?
You can print from both computers and compatible mobile devices using driver software or apps. Ensure the device supports the printer’s connection type and apps for templates.
Yes, you can print from computer or compatible mobile apps.
Can the Rollo connect to Mac and Windows systems?
Yes. Install the correct driver for your OS, then select the printer in the system settings. Both platforms typically support direct printing from common label apps.
Yes, with the right driver, you can print on both Mac and Windows.
How should I clean the print head safely?
Power off the printer, remove the label roll, and wipe the head with a lint-free cloth dampened with isopropyl alcohol. Do not rub harshly or pour liquid onto internal parts.
Power off, clean with a damp cloth and alcohol, then dry before use.
Watch Video
Quick Summary
- Load correct label stock matching your model.
- Calibrate after stock changes to avoid misprints.
- Use templates to speed up recurring labels.
- Regular maintenance protects print quality and device longevity.