Rollo Printer Setup and Troubleshooting
Learn how to set up and troubleshoot a rollo printer for reliable label printing. This step-by-step guide covers drivers, media loading, alignment, test prints, and maintenance for home offices.

You will learn how to set up and troubleshoot a rollo printer for reliable label printing, including driver installation, media loading, alignment, and test prints. Essential items: USB or network connection, a compatible driver, and the correct label media. This guide covers common issues, calibration steps, and safe operating tips to keep your rolls running smoothly.
What is a rollo printer and why it matters
A rollo printer is a compact, often thermal, label printer designed for high-volume label printing. For home offices and small businesses, it streamlines everything from shipping labels to product barcodes. According to Print Setup Pro, the practical advantage of a rollo printer lies in its ability to produce crisp, durable labels quickly with minimal maintenance. Most models support direct thermal media, which means you don’t need ink or toner for everyday labels. This makes the rollo printer a cost-effective solution for inventory management, order fulfillment, and packaging workflows. When evaluating a unit, consider print speed, paper width compatibility, and connectivity options (USB, Ethernet, or Bluetooth). The right setup reduces waste and speeds up daily operations, especially if you print dozens to hundreds of labels each day.
Core components and compatibility
A rollo printer comprises several core components: the print head, feed roller, media sensor, and the control board. Compatibility hinges on media width (label size), media type (direct thermal vs. thermal transfer), and driver support for your operating system. In practice, most users rely on standard direct-thermal labels (50 mm to 102 mm wide) and a USB or network connection. The Print Setup Pro team notes that confirming media width and driver compatibility before purchase saves time and prevents misprints. Also verify firmware compatibility with your printer model and the software you plan to use for label design and printing, such as shipping platforms or ERP systems.
Setup prerequisites and planning
Before you power anything, map out your workflow. Determine where the printer will live, how cables will run, and which computer or router will handle label jobs. Gather the essential items: a label roll, power outlet, USB or network cable, and access to a computer with driver download capability. Print Setup Pro recommends keeping spare rolls and cleaning supplies on hand to minimize downtime. If you work with multiple label sizes, plan how often you’ll swap media and configure your system to switch label presets quickly.
How printing works and media loading basics
Most rollo printers use direct thermal printing, which relies on heat to create dark marks on specially coated labels. This means you don’t need ink cartridges for standard labels, reducing ongoing costs. Correct media loading is critical: feed the label from the rear, align the guides to the width, and ensure the roll spins freely without rubbing on the sensor. Cleanliness is essential; dust on the print head or rollers can cause streaks or ghosting. Keep the print head clean with a soft, lint-free cloth and use isopropyl alcohol only when necessary. A well-loaded media path lessens jams and misfeeds, which are among the most common nuisances for beginners.
Common issues and how to fix them
Misalignment, blurry prints, or skipped labels are typical early problems. Start with a calibration: feed a few test labels and adjust the printhead alignment, then verify the software’s label dimensions match the physical media. If prints are blurry, check media type and print speed—slower speeds often yield sharper results with direct thermal labels. Ensure the label stock is genuine and not counterfeit. Dirty print heads or rollers can cause streaks; clean them gently and re-calibrate. For connectivity problems, confirm the correct driver is installed and that the printer is visible on your network or USB path.
Maintenance and best practices
Routine maintenance extends the life of a rollo printer. Establish a simple cleaning schedule: wipe the print head and sensor area weekly and inspect the feed path for debris. Store media in a cool, dry place to prevent coating degradation. Periodically update firmware and driver software to maintain compatibility with your labeling software. If you handle different label suppliers, consider creating presets in your label design software to switch layouts quickly. Finally, keep a documented log of calibration results and jams, so you can track performance over time.
Authority sources and further reading
For best practices and safety guidelines, you may consult reputable sources on electronics maintenance and consumer printing equipment. See industry standard advisories from government and educational sources for general electronics handling and safe setup practices. Always refer to your printer's official manual for model-specific instructions and cautions.
Tools & Materials
- rollo printer unit(Ensure power LED indicators, cables, and user manual are present)
- label media rolls (direct thermal)(Have multiple widths on hand (e.g., 25–102 mm))
- computer or laptop(With administrative rights to install drivers)
- USB cable or ethernet cable(Use the correct connector for your setup)
- power outlet(Surge-protected power strip recommended)
- clean, lint-free cloth(For print head and sensor cleaning)
- isopropyl alcohol (70%-90%)(Only for print head/roller cleaning when needed)
- driver software/firmware installer(Download from official site; ensure OS compatibility)
- label design software or template(Optional but helpful for layout and barcodes)
- calibration test labels(Pre-printed or standard test labels for quick checks)
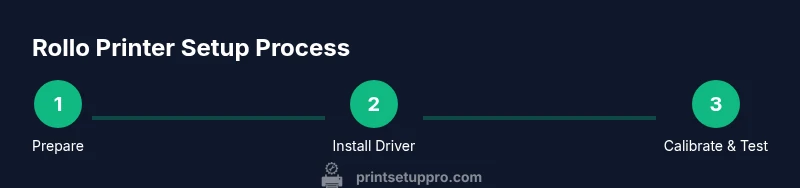
Steps
Estimated time: 25-40 minutes
- 1
Prepare workspace and verify power
Power off the printer and unplug from the outlet. Clear a clean area, then check that you have a stable surface for loading media. This reduces the risk of misfeeds during setup.
Tip: Have the printer unplugged when inspecting the media path to avoid damage. - 2
Install or update drivers
Connect the printer to the computer and install the latest driver from the manufacturer’s site. If a firmware update is available, apply it after driver installation for optimal compatibility.
Tip: Restart the computer after driver installation to ensure the OS recognizes the printer. - 3
Load label media correctly
Open the media cover, position the label roll on the spindle, and thread the leading edge through the feed path. Align the guides to the width of the label stock so the media feeds straight.
Tip: Use a small pinch bias to ensure the label edge remains aligned as it feeds. - 4
Calibrate print alignment
In the printer utility, run a calibration to align the printhead with the media. Adjust margins and print density as needed to avoid cropping or ghosting.
Tip: Print a test label and visually inspect alignment; repeat calibration if necessary. - 5
Run a test print and adjust
Print a simple test label with basic text and a barcode if used. Verify clarity, spacing, and alignment; refine print speed or darkness to optimize readability.
Tip: Use a standard, known-good label stock for the first test to isolate issues. - 6
Document routine maintenance
Create a simple maintenance schedule: wipe the print head monthly, check rollers quarterly, and update drivers annually. Keeps performance stable and avoids jams.
Tip: Mark the calendar for firmware updates to avoid compatibility gaps.
People Also Ask
What is a rollo printer and what is it best used for?
A rollo printer is a compact, often direct-thermal label printer designed for high-volume labeling. It is ideal for shipping labels, product/barcode labels, and inventory tagging in home offices and small businesses.
A compact direct-thermal label printer for shipping and product labels; great for small workflows.
Do I need a driver to use a rollo printer?
Yes. Install the appropriate driver for your operating system and keep firmware up to date to ensure compatibility with printing software and label presets.
Yes, install the correct driver and keep firmware updated.
Can rollo printers print in color?
Most rollo printers use monochrome direct thermal printing, which does not support color printing. They are best for black-and-white standard labels.
Typically they print in black and white; color printing isn’t supported.
How can I fix blurry prints?
Check media type, calibration, and print speed. Ensure the print head and rollers are clean, and verify that the label stock matches the configured width.
Clean the print head, calibrate, and ensure correct media width.
What maintenance does a rollo printer require?
Regular cleaning of the print head and sensor, plus periodic firmware updates and media checks, will keep performance steady and reduce jams.
Keep it clean, update firmware, and check labels regularly.
Why is my print misaligned after loading new media?
This usually means improper media loading or a miscalibrated feed. Re-load the media, re-align guides, and run a quick calibration.
Reload media, adjust guides, and recalibrate to fix misalignment.
Watch Video
Quick Summary
- Prepare, connect, and install drivers before loading media
- Calibrate alignment to ensure clean, legible labels
- Regular maintenance reduces jams and extends printer life
- Always test print before large runs
- Document calibration and maintenance for future reference