Rollo Shipping Label Printer: A Complete Setup Guide
A comprehensive guide to installing, calibrating, and troubleshooting a rollo shipping label printer for reliable, high-contrast label printing in home offices and small businesses.

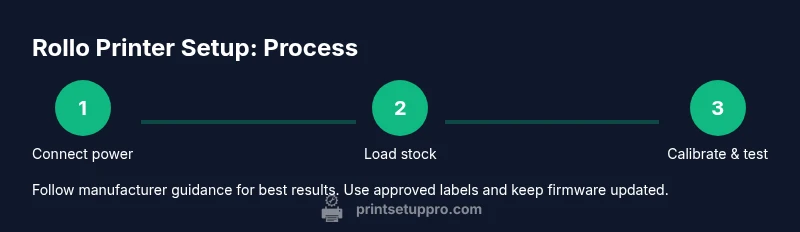
By the end of this guide you’ll be able to install, connect, and calibrate a rollo shipping label printer so you can print consistent, scannable labels with confidence. You’ll need a compatible label stock, a USB or network connection, and admin rights to install drivers and software. The process covers setup, testing, and common troubleshooting for home offices and small businesses.
What is a Roll‑o Shipping Label Printer and Why It Matters
A rollo shipping label printer is a compact, thermal device designed to print shipping labels quickly and without ink. It typically uses heat to transfer image onto adhesive label stock, producing clean, scannable labels for packages, returns, and fulfillment workflows. The benefit is speed, quiet operation, and the ability to handle high daily volumes without ongoing ink costs. For home offices and small businesses, a rollo printer can simplify order processing and shipping accuracy. As you prepare to set one up, remember that success comes from aligning hardware, software, and label stock. According to Print Setup Pro, starting with compatible stock and proper drivers sets the foundation for reliable printing.
wordCount":160
Tools & Materials
- Rollo shipping label printer(Your main device, ensure it is the model you intend to use.)
- Power adapter(Use the included adapter or an approved replacement.)
- USB cable or network access(Choose the connection type your computer or network supports.)
- Compatible label stock(Use stock recommended for thermal printing; avoid generic labels that jam or smear.)
- Computer or device for software installation(Admin rights may be needed to install drivers.)
- Calibration label sheet or test labels(Optional for precise alignment checks.)
- Printer software or driver package(Download from the manufacturer or use OS print driver if supported.)
Steps
Estimated time: 40-60 minutes
- 1
Prepare your workspace
Clear a clean, stable surface near power and your computer. Place the printer so you can access the rear ports and label input easily. This minimizes reaching and reduces the risk of label jams during loading.
Tip: Have a few spare labels handy to test after each major setup step. - 2
Connect power and data cables
Plug the printer into a power source and connect the data cable to your computer or network. If you’re using a USB connection, ensure the cable is fully seated and not under tension. For network setups, confirm the printer appears on the same network as your workstation.
Tip: If the printer doesn’t power up, try a different outlet or check the power brick for damage. - 3
Install drivers or software
Install the driver package or software recommended for your model. Follow on‑screen prompts to complete the setup. Reboot if prompted to ensure the driver loads correctly and the printer becomes visible to your system.
Tip: Disable any conflicting print drivers before installing the new package to avoid conflicts. - 4
Load the label stock
Open the feed path and load a roll of labels with the adhesive facing down (or as required by your model). Align the roll so it feeds smoothly and the leading edge sits under the print head. Close the feed guides securely.
Tip: Use the label stock recommended by the manufacturer to minimize jams and misfeeds. - 5
Calibrate the printer
Use the printer’s calibration procedure to align the print head with the label stock. This often involves printing a calibration page and adjusting margins until the test print aligns with the label edges.
Tip: If you cannot find calibration options, check the driver’s advanced settings panel for “calibration” or “alignment.” - 6
Configure print settings in your software
Open the app you ship from (e.g., ecommerce platform, ERP, or labeling software) and set the printer as the default output. Choose the label size that matches your stock and set margins to zero or a small preset. Save the profile for future use.
Tip: If available, enable “fit to page” or “no margins” to maximize label usage. - 7
Print a test label
Generate a simple test label with common shipping data to verify alignment, density, and readability. Inspect for any cropping, ghosting, or misalignment and adjust settings as needed.
Tip: Always verify both the barcode and human-readable text are clear. - 8
Troubleshooting basics
If text is blurry, reseat the label stock and recalibrate. If the printer isn’t detected, recheck connections and drivers. For persistent issues, consult the manufacturer support or the printing software’s help center.
Tip: Document error messages with screenshots to speed up support.
People Also Ask
What is a Roll o shipping label printer and what is it used for?
A Rollo shipping label printer is a thermal printer designed to produce shipping labels quickly without ink. It is commonly used in home offices and small businesses for order fulfillment and shipping.
A Rollo is a label printer used for shipping labels, popular with small businesses.
Do I need special labels for a Rollo printer?
Yes, use label stock designed for thermal printing and compatible with the Rollo model. Avoid non‑thermal stock that can smear or jam.
You should use thermal label stock that works with your printer.
Why isn’t my label printing correctly?
Common causes include misloaded labels, incorrect margin settings, or outdated drivers. Re‑check the stock orientation, recalibrate, and update the driver if needed.
Check the label load, run calibration, and update drivers if prints look off.
Can I connect the Rollo printer to a network?
Yes, most models support USB or network connections. If you need network access, configure the printer’s IP settings and ensure the computer can reach it.
You can connect it via USB or network and set it up in your network tools.
How do I calibrate the printer?
Run the calibration routine from the printer’s control panel or driver. Print a calibration page and adjust alignment until the printed image sits on the label correctly.
Use the calibration option and fine-tune until alignment is perfect.
What maintenance does a Rollo printer require?
Keep the printer clean, avoid dust on the feed path, and replace label stock when jams persist. Periodic soft cleaning of the print head is recommended.
Keep it clean and use good stock to prevent jams.
Watch Video
Quick Summary
- Install drivers and calibrate for reliable prints
- Load compatible label stock and run tests
- Troubleshoot using common issues and logs
- Create a repeatable print profile for efficiency