Thermal Printer for Shipping Labels: A Complete How-To Guide
Learn how to choose, install, and use a thermal printer for shipping labels. This educational guide covers connection options, label stock, drivers, troubleshooting, and maintenance for home offices and small businesses.

You will learn how to choose, install, and maintain a thermal printer for shipping labels. This quick answer outlines connection options (USB, Ethernet, Wi‑Fi), selecting compatible label stock, installing drivers, and diagnosing common issues like misfeeds or print darkness, so you can ship efficiently. We also point to best practices for labeling, roll management, and maintenance routines to extend printer life and avoid downtime.
Why a thermal printer for shipping labels is a smart choice
For home offices and small businesses, a thermal printer for shipping labels offers a practical, cost-effective solution. It prints durable labels without ink, reduces maintenance, and speeds fulfillment by eliminating cartridge changes. According to Print Setup Pro, choosing the right thermal printer for shipping labels can significantly speed up fulfillment and minimize label waste. Direct thermal printers are simple and quiet, while thermal transfer models offer greater durability for rough handling. When you set up a shipping workflow, this investment often pays for itself in less downtime and smoother dispatch cycles. In this guide, we explore why this technology fits modern shipping needs and how to pick the right model for your environment.
Essential features to evaluate before buying
Before you commit, map out the features that matter most for shipping tasks:
- Print method: direct thermal is cheaper to operate but may fade over time; thermal transfer offers longer label life with ribbon.
- Label stock compatibility: ensure the printer supports your label formats (4x6 inches is common for carriers; smaller labels for returns).
- Connectivity: USB is standard; Ethernet or Wi-Fi adds network printing capabilities for multiple devices.
- Print speed and resolution: higher speeds save time on large batches; 300 dpi is typically sufficient for barcodes.
- Reliability and media handling: look for auto-cutter, peeler options, and a robust feed mechanism.
- Software and drivers: verify OS compatibility (Windows, macOS, or Linux) and whether there are built-in label design tools.
- Warranty and support: a longer warranty and responsive support reduce downtime.
With these in mind, you can compare models side-by-side and select a printer that fits your daily fulfillment needs.
Label stock, sizes, and durability considerations
Shipping labels come in a few standard sizes; the most common is 4x6 inches, but many carriers also accept 2x1.5 inch formats for returns or internal routing. When selecting stock, decide whether you need direct thermal (no ribbon) or thermal transfer (ribbon-required) for durability. Label stock should be designed for your printer's media type, adhesive strength, and environmental conditions. For the best results, store stock in a cool, dry place away from direct sunlight to prevent curling or discoloration. If you frequently handle labels in cold or humid environments, consider weather-resistant stock or a printer with a sealed path. Also check the label roll core size and the internal diameter your printer supports to avoid feed jams. Choosing the right size and material reduces waste and improves scan reliability during carrier pickups.
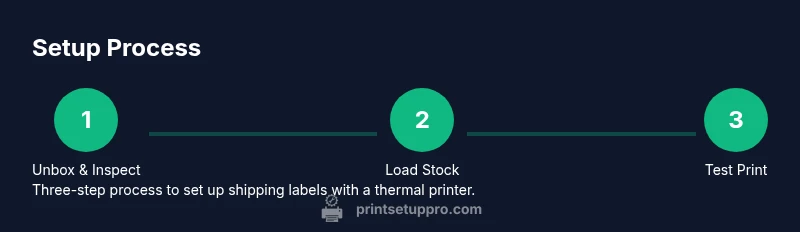
Unboxing, setup, and first print (narrative overview)
When you unbox your thermal printer, verify that all components are present according to the packing list, including power supply, USB/Ethernet cable, and spare labels. Place the printer on a clean, stable surface with adequate ventilation. Connect power and power on the device; let it go through its initialization. Download the latest drivers from the manufacturer’s site and run the installation wizard, selecting the appropriate operating system. Load the label stock, aligning the roll with the feed path, and secure any alignment guides. This is a good moment to confirm the label orientation (face-up vs face-down) and the label gap or black mark alignment. After loading, print a test label from the printer utility to verify feed accuracy and darkness settings.
Connectivity options and driver setup
Most thermal printers offer USB, Ethernet, or Wi‑Fi connectivity. USB is straightforward for a single PC; Ethernet or Wi‑Fi enables shared access across devices. Once physically connected, add the printer in your computer’s settings and select the correct driver. If you use label design software, set the printer as default and configure the label size (e.g., 4x6 inches). Ensure your firmware and drivers are up to date to support barcode printing and edge-to-edge alignment. If you encounter network printing issues, check IP addresses, firewall rules, and the printer’s status page.
Calibration, print quality, and testing
Print darkness, speed, and label alignment are the keys to crisp barcodes and scannable labels. Start with a conservative darkness setting and increase in small steps until barcodes are dark and clean. Use a uniform roll path, remove dust from the print head with a lint-free cloth, and avoid touching the heating element. Run a few test prints across different label batches to confirm consistency; if you notice fading or ghosting, inspect ribbon alignment (for thermal transfer) or consider environmental factors like humidity. For barcode readability, verify the quiet zones and margins, as carriers often require specific spacing around a barcode.
Maintenance, care, and longevity tips
Regular maintenance extends the life of your thermal printer. Clean the print head and feed rollers monthly or more often in high-volume use, using manufacturer-approved cleaning swabs. Keep the interior free of dust; use compressed air if necessary. Replace worn parts like feed rollers promptly. Use only recommended label stock and avoid exposing labels to moisture. Create a simple maintenance log to track cleaning and part replacements. Store the printer in a stable location away from direct sunlight and heat sources to prevent print head degradation.
Quick-start checklist for immediate use
- Verify you have a compatible thermal printer and the correct label stock (4x6 inches is typical for shipping).
- Connect power, USB/Ethernet/Wi‑Fi, and install the latest drivers.
- Load the first reel of labels and confirm correct orientation.
- Print a test label from the printer utility and adjust darkness as needed.
- Set up your shipping software to use the printer as the default label printer.
- Implement a basic maintenance routine (clean print head monthly, store labels properly).
- Keep a spare label roll and the printer’s manual handy for quick reference.
Tools & Materials
- Thermal printer (direct thermal or thermal transfer)(Choose a model that supports standard shipping-label stock (e.g., 4x6 inches).)
- Label stock (shipping labels, 4x6 inches)(Direct thermal stock is cheaper but may fade; thermal transfer stock is durable with ribbon.)
- Power supply and power cable(Use the included or manufacturer-approved adapter.)
- Connecting cables (USB or Ethernet)(Select based on your chosen connectivity; Ethernet enables network printing.)
- Network equipment (router or Wi-Fi access point)(Optional if you plan to print from multiple devices over a network.)
- Computer or mobile device for setup(Used to install drivers and configure printing preferences.)
- Printer drivers/software(Download from the vendor site; ensure OS compatibility.)
- Label alignment tools(Guides or spacers help with precise feeding.)
- Cleaning supplies (lint-free cloth, isopropyl alcohol)(For periodic print head cleaning and maintenance.)
- Test labels and user manual(Keep on hand during setup and calibration.)
Steps
Estimated time: 45-60 minutes
- 1
Unbox and identify model
Inspect packaging, confirm model, power supply, cables, and spare labels are included. Note any physical damage before powering on. This ensures you start with a complete setup and reduces post-purchase confusion.
Tip: Take photos of ports and included items for reference. - 2
Connect power and boot
Plug in the power supply and switch on the printer. Allow the boot sequence to complete before attempting driver installation. A proper boot confirms the device is working at a basic level.
Tip: Use a surge protector to protect the device. - 3
Install drivers
Download the latest drivers from the manufacturer’s site and install on your computer. Choose the correct OS and follow prompts to complete the installation. This enables accurate label rendering and barcode scanning compatibility.
Tip: Run as administrator if prompted by the installer. - 4
Load label stock
Open the feed mechanism and load the label roll with the correct orientation. Thread labels through the sensors and align to the edge. Close the feed and ensure smooth feeding without jams.
Tip: Trim the label edge slightly to ease feeding. - 5
Configure label size
In your OS printer settings or label design software, set the label size (for example, 4x6 inches) and orientation. This ensures printed content matches physical labels and avoids cropping.
Tip: Double-check margins and barcode quiet zones. - 6
Print a test label
Use the printer utility to print a test label. Check for alignment, darkness, and edge-to-edge printing. If issues are visible, adjust the darkness or speed in the driver settings.
Tip: Test with multiple stock batches to confirm consistency. - 7
Run a small batch
Send a small batch from your shipping software to validate routine performance. Watch for jams, skew, or misfeeds and fix as needed before large shipments.
Tip: Keep spare labels handy during the first batches. - 8
Establish maintenance plan
Create a routine for cleaning the print head and rollers and document the settings used for common label jobs. Regular upkeep reduces downtime and extends printer life.
Tip: Schedule monthly maintenance as a baseline.
People Also Ask
What is a thermal printer and how does it work?
A thermal printer uses heat to print on specially coated label stock. Direct thermal printers don't require ribbon, while thermal transfer models use ribbon for longer-lasting labels. It's fast, quiet, and ideal for shipping workflows.
A thermal printer uses heat to create images on special label stock, with no ink. Direct thermal prints don’t require ribbon, while thermal transfer needs ribbon for durability.
Should I choose direct thermal or thermal transfer for shipping labels?
Direct thermal is cheaper and simpler but can fade with time or heat exposure. Thermal transfer provides more durable labels, especially in rough handling or high-temperature environments, at the cost of ribbon.
Direct thermal is cheaper but fades; thermal transfer lasts longer with ribbon.
Can I print shipping labels from a laptop or smartphone?
Yes. If the printer supports USB or a network connection, you can print from a laptop or mobile device using the printer’s drivers or compatible apps.
Yes. Use USB or network printing with the vendor’s apps or driver support.
What label sizes are common for shipping labels?
The 4x6 inch size is the industry standard for many carriers, though smaller sizes exist for returns or internal routing.
4x6 inches is standard for many carriers; smaller sizes exist for returns.
What causes label jams and how can I prevent them?
Jams are usually caused by misfeeds, dirty rollers, or incompatible stock. Regularly clean the feed path, ensure correct stock type, and verify alignment before printing.
Jams come from misfeeds or dirty rollers; clean parts and use the right stock.
How often should I clean and maintain a thermal printer?
Clean the print head and rollers regularly, at least monthly for moderate use. Replace worn parts as needed and keep label stock dry and properly stored.
Clean monthly and replace worn parts as needed.
Watch Video
Quick Summary
- Choose a compatible thermal printer for your label stock.
- Connect via USB or network to support multiple devices.
- Load stock correctly and test before large batches.
- Calibrate darkness and speed for clear barcodes.
- Maintain regularly to extend printer life.