Printer Thermal Printer: Setup, Use and Troubleshooting
Learn how to choose, install, and troubleshoot a printer thermal printer for reliable label and receipt printing. This educational guide covers direct thermal vs thermal transfer, media loading, calibration, maintenance, and common issues with practical steps.

This guide gives you the practical steps to select, install, and optimize a printer thermal printer for reliable label and receipt printing. You’ll understand direct thermal vs thermal transfer, choose compatible media, connect to your computer or network, install essential drivers, calibrate print quality, and perform basic maintenance to minimize downtime.
What is a printer thermal printer
This section provides a concise overview of what a printer thermal printer is and how it differs from other printing technologies. A printer thermal printer uses heat to interact with special media to produce text and images without traditional ink. Direct thermal printers rely on heat-sensitive label stock that darkens where heated, while thermal transfer printers use a ribbon to transfer resin or wax onto the media. According to Print Setup Pro, these devices are particularly well suited for labeling, packaging, and point-of-sale receipts where durability and fast, simple operation matter most. The Print Setup Pro team also notes that the total cost of ownership often favors thermal systems for routine labeling tasks because there are no ink cartridges to replace and fewer moving parts compared with some inkjet or laser solutions. For home offices, micro businesses, and DIY enthusiasts, thermal printers provide a compact, relatively user-friendly option that scales with your load when you choose models designed for your media width and feed type.
How thermal printers work: direct thermal vs thermal transfer
Thermal printers operate by applying heat through a print head to media that reacts to the heat. In direct thermal printing, the substrate itself darkens when heated, so you get a simple, maintenance-light workflow without ribbons. In thermal transfer printing, a ribbon placed between the print head and media transfers pigment to the surface, creating more durable labels that resist abrasion, oil, and humidity. Direct thermal is common for short‑lived receipts and basic labels, while thermal transfer shines for long-lasting barcodes, product labels, and outdoor use. The choice depends on your environment, required durability, and the type of media you intend to print on. When planning a purchase, consider how often you print, the expected wear on labels, and whether you’ll need resistance to chemicals or UV light.
Types of thermal printers and typical applications
Thermal printers come in several form factors to suit different tasks. Receipt printers are common at cash registers and kiosks, using direct thermal media for fast turnaround. Label printers handle shipping labels, product identifiers, and inventory tags, often requiring wider print widths and robust media handling. Some models are compact desktop units great for home offices, while industrial variants provide heavy-duty feeding and higher duty cycles. For DIY projects, you may choose compact direct-thermal models that print on standard label stock. Across these types, the core capabilities—print speed, resolution, media width, and connectivity—will guide your fit. Remember that media compatibility is critical: some media require direct thermal only, while others need thermal transfer ribbons for durability.
Key specs to compare when shopping for a thermal printer
When evaluating options, focus on media width, print resolution, and supported media types. Connectivity options (USB, Ethernet, Wi‑Fi, or Bluetooth) determine how easily you’ll integrate with your existing devices and software. Print speed and duty cycle indicate how quickly you can complete tasks and how often maintenance might be required. Consider the print head longevity, ease of cleaning, and availability of cleaning utilities from the manufacturer. Also verify driver support for your operating system and the ability to run templates or barcodes through your preferred software. Print quality, legibility of barcodes, and alignment accuracy all hinge on the printer’s calibration process and the media you choose. Print Setup Pro Analysis, 2026 notes that thermal printers can offer lower ongoing media costs due to the absence of ink refills, which is a meaningful consideration for small businesses and home offices.
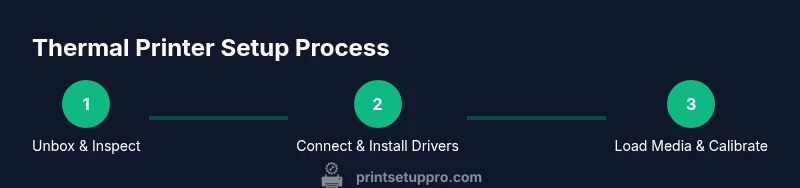
Setup and connection basics: unboxing, drivers, and network config
Getting started requires a clean setup path. Start by unboxing the device, verifying all parts, and connecting power. Install the official drivers from the manufacturer or a trusted source, ensuring compatibility with your operating system. Decide between USB and network (Ethernet/Wi‑Fi) connections, and configure a static IP if the printer will be shared across a network. Keep firmware up to date and test the connection with a simple print job. If you’re integrating with a business system, verify that the printer is visible to your software and that templates or label layouts load correctly.
Loading media and calibration for print accuracy
Correct media loading is essential for clean, aligned prints. Open the media guides and insert the stock with the correct orientation, ensuring the media edge aligns with the feed path. Close the cover and perform a calibration from the printer’s menu or software tool; this aligns the print head to the media width and fixes any minor skew. Most models offer a test page for alignment checks. If you notice misalignment after a calibration, repeat the process with adjusted offset settings. During calibration, avoid forcing media through the feed path to prevent head or platen damage.
Printing best practices and media handling
Choose media that matches your printer’s capabilities: direct thermal media for quick, short-lived labels and thermal transfer media with a ribbon for durable applications. Store stock in a cool, dry place away from direct sunlight to prevent curl and warping. Keep the print head clean—use manufacturer-approved cleaning swabs and avoid abrasive cleaners. Calibrate frequently if you switch media types or brands to maintain optimal print quality. When designing templates, use legible fonts and adequate margins for encoding barcodes or QR codes that scanners can read reliably.
Troubleshooting common issues
If prints appear faint, skewed, or have inconsistent darkness, start with media quality, ribbon alignment (for thermal transfer), and cleanliness of the print head. Check media thickness, calibration, and the ribbon tension if applicable. For jam issues, inspect the feed path for debris or misaligned guides. If the device is not detected by the computer, verify USB or network settings, confirm driver installation, and ensure the correct port or IP address is selected. Keep a log of error codes and consult the manufacturer’s support resources. Regular maintenance reduces the occurrence of these problems and extends device life. The Print Setup Pro team emphasizes consistency in media and routine checks to minimize downtime.
Maintenance and longevity: cleaning, storage, and routine checks
Create a simple maintenance schedule that includes weekly print-head cleaning, monthly media alignment checks, and quarterly firmware updates. Store media in sealed, dry containers away from heat sources. Periodically inspect belts, rollers, and the print head for wear and replace parts as needed per the manufacturer’s guidelines. Use only approved cleaners and swabs; avoid water or harsh solvents that can damage components. A proactive maintenance mindset helps you sustain print quality, reduce unexpected downtime, and extend the life of your thermal printer. The Print Setup Pro team recommends documenting maintenance steps as part of your standard operating procedure.
Environmental considerations and safety notes
Operate the printer in a clean, ventilated space away from direct sunlight, excessive humidity, and dust. Heat and chemical exposure can degrade media and print head performance, so store supplies properly. Use caution when handling ribbons and solvents—avoid inhalation and skin contact, and follow the safety data sheets for any consumables. If you are printing in a small office or classroom, ensure proper cable management to prevent trip hazards and accidental unplugging during operation. Regular checks for power supply stability and proper grounding help prevent electrical issues and data loss.
Tools & Materials
- Thermal printer unit(Direct thermal or thermal transfer model depending on use case)
- Power supply and power cord(Check voltage compatibility and plug type)
- Data connection cable (USB or Ethernet)(For initial setup and ongoing data transfer)
- Media stock (labels or receipts)(Match printer width and media type to avoid jams)
- Ribbon (for thermal transfer models)(Only if using thermal transfer; direct thermal does not require ribbon)
- Printer driver/software(Download from manufacturer site or included media)
- Clean cloth and isopropyl alcohol(For print head and platen cleaning)
- Caliper or ruler(Media width verification and alignment checks)
Steps
Estimated time: 60-75 minutes
- 1
Unbox and inspect
Remove packaging, verify all parts, and check for damage. Confirm that the power supply, cables, and media stock are present. This initial check prevents surprises during setup and helps you plan inventory.
Tip: Take photos of the box contents in case you need to contact support. - 2
Connect power and power on
Plug in the printer, connect to a power outlet, and turn it on. Wait for the startup routine to complete and watch for any error indicators on the control panel.
Tip: Do not force any buttons during the initial boot; allow the system to reach ready state. - 3
Install driver and software
Download the latest driver from the manufacturer or install the supplied CD if available. Follow the on-screen prompts to complete the installation and perform a test print.
Tip: If Windows or macOS blocks the installer, temporarily disable security features and reattempt. - 4
Choose and configure connection
Decide between USB or network connection. For shared environments, set a static IP and verify accessibility from a test computer.
Tip: Label your printer in the network with a descriptive name to avoid confusion among devices. - 5
Load media and align guides
Open the media cover, place the stock, and slide the guides to fit the width. Ensure edges are straight and the stock feeds without friction.
Tip: Use the media guides to prevent skew; test feed with a sample label before printing batches. - 6
Calibrate print head and media
Access the printer’s calibration tool or software utility. Run calibration, observe the test pattern, and adjust offsets if necessary to improve alignment.
Tip: Run multiple short tests when changing media types to lock in the correct offset. - 7
Print a test label/receipt
Send a basic design to the printer to verify darkness, alignment, and readability. Review barcode or text for clarity and make refinements as needed.
Tip: Keep a calibration log for future reference and re-run calibration when media changes are made. - 8
Set templates and integration
Configure your label design or receipt layout in the software that will drive the printer. Ensure compatibility with your POS, ERP, or inventory system and test end-to-end printing.
Tip: Use consistent label sizes and templates to reduce errors in mass printing. - 9
Schedule maintenance
Create a routine that includes cleaning the print head, checking media alignment, and updating firmware. This keeps print quality high and reduces downtime.
Tip: Document maintenance steps to build a reusable process for your team.
People Also Ask
What is a printer thermal printer and how does it differ from other printers?
A printer thermal printer uses heat to transfer images either directly onto heat-sensitive media or via a ribbon. It differs from inkjet or laser printers by not using liquid ink or toner, which reduces consumables and maintenance for many labeling tasks.
A thermal printer uses heat to print on special media, avoiding traditional ink. It’s popular for receipts and labels where durability isn’t dependent on ink cartridges.
Direct thermal vs thermal transfer: which should I choose?
Direct thermal is simpler and cheaper but prints may fade over time, especially under heat or sunlight. Thermal transfer offers durable prints by using a ribbon, ideal for product labeling and outdoor use.
Direct thermal is quick and cheap but fades; thermal transfer lasts longer with a ribbon.
Can I use regular paper with a thermal printer?
Most direct thermal printers require heat-sensitive label stock, not ordinary paper. Using the wrong media can cause poor print quality or head wear. Always check media compatibility before printing.
No, ordinary paper isn’t suitable for most direct thermal printers.
What media sizes are supported by most thermal printers?
Thermal printers support a range of label widths and heights depending on the model. Check the manufacturer’s specifications for the maximum print width and media thickness before buying stock.
Most printers support a range of widths; verify the exact size in your model’s specs.
How do I troubleshoot poor print quality or misalignment?
Start with media and ribbon alignment, then run a calibration. Clean the print head and platen as needed, and verify software settings and print darkness. If issues persist, consult the manufacturer’s support resources.
Check media, calibrate, clean the head, and verify software settings.
Watch Video
Quick Summary
- Identify whether you need direct thermal or thermal transfer based on durability needs.
- Load media correctly and calibrate for accurate alignment.
- Choose drivers and connectivity that fit your workflow and devices.
- Establish a routine maintenance plan to protect print quality.